Adding a User
In most cases, new users are added to Apporto when they login via single sign-on (SSO). If you do not have an SSO integration with Apporto, you may create accounts for new users manually or by importing users from a CSV file.
Add Users
Add User
Using your preferred web browser, navigate to the URL for your Apporto system, for example, “myorg.www.apporto.com”, and log in to the system using your credentials.
Click the Users ![]() icon in the navigation panel.
icon in the navigation panel.
The ‘Users’ screen displays.
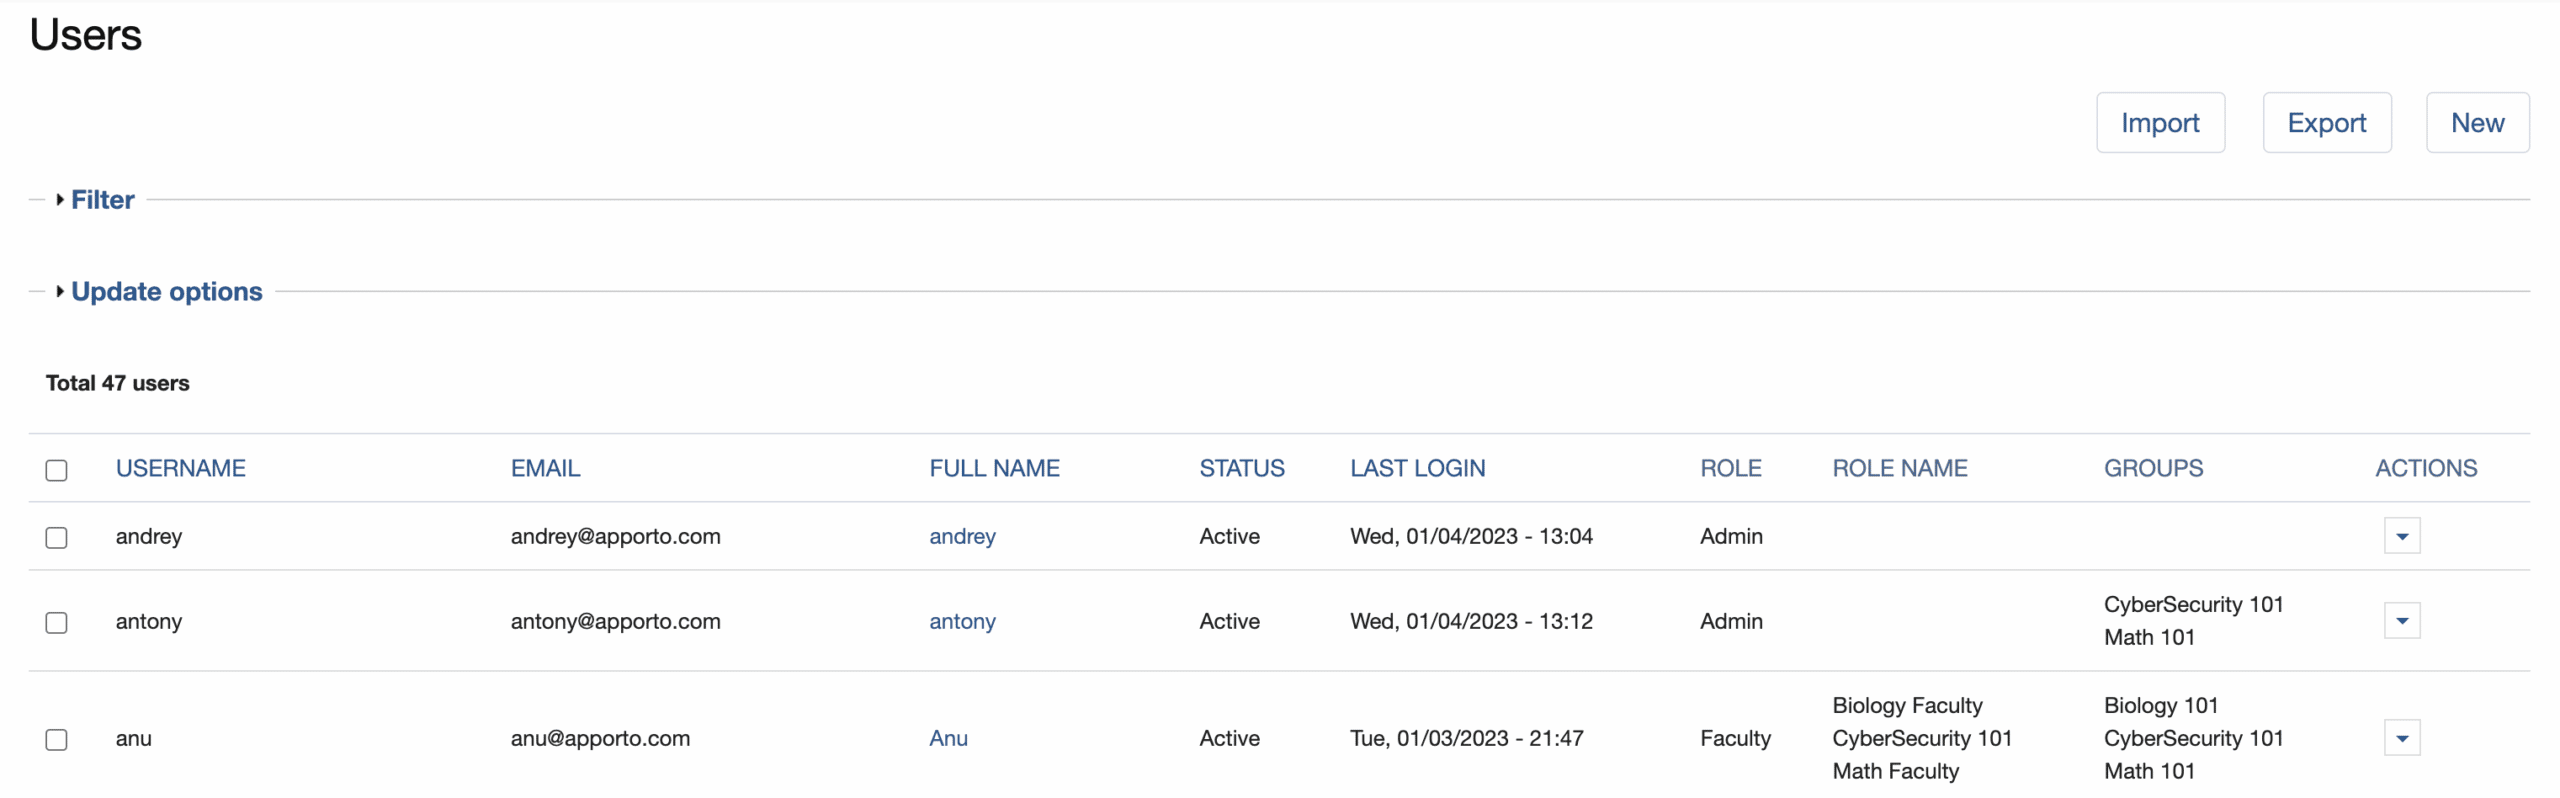
The screen shows a list of all users with accounts in your Apporto instance.
Click New
The ‘Create new account’ screen displays.
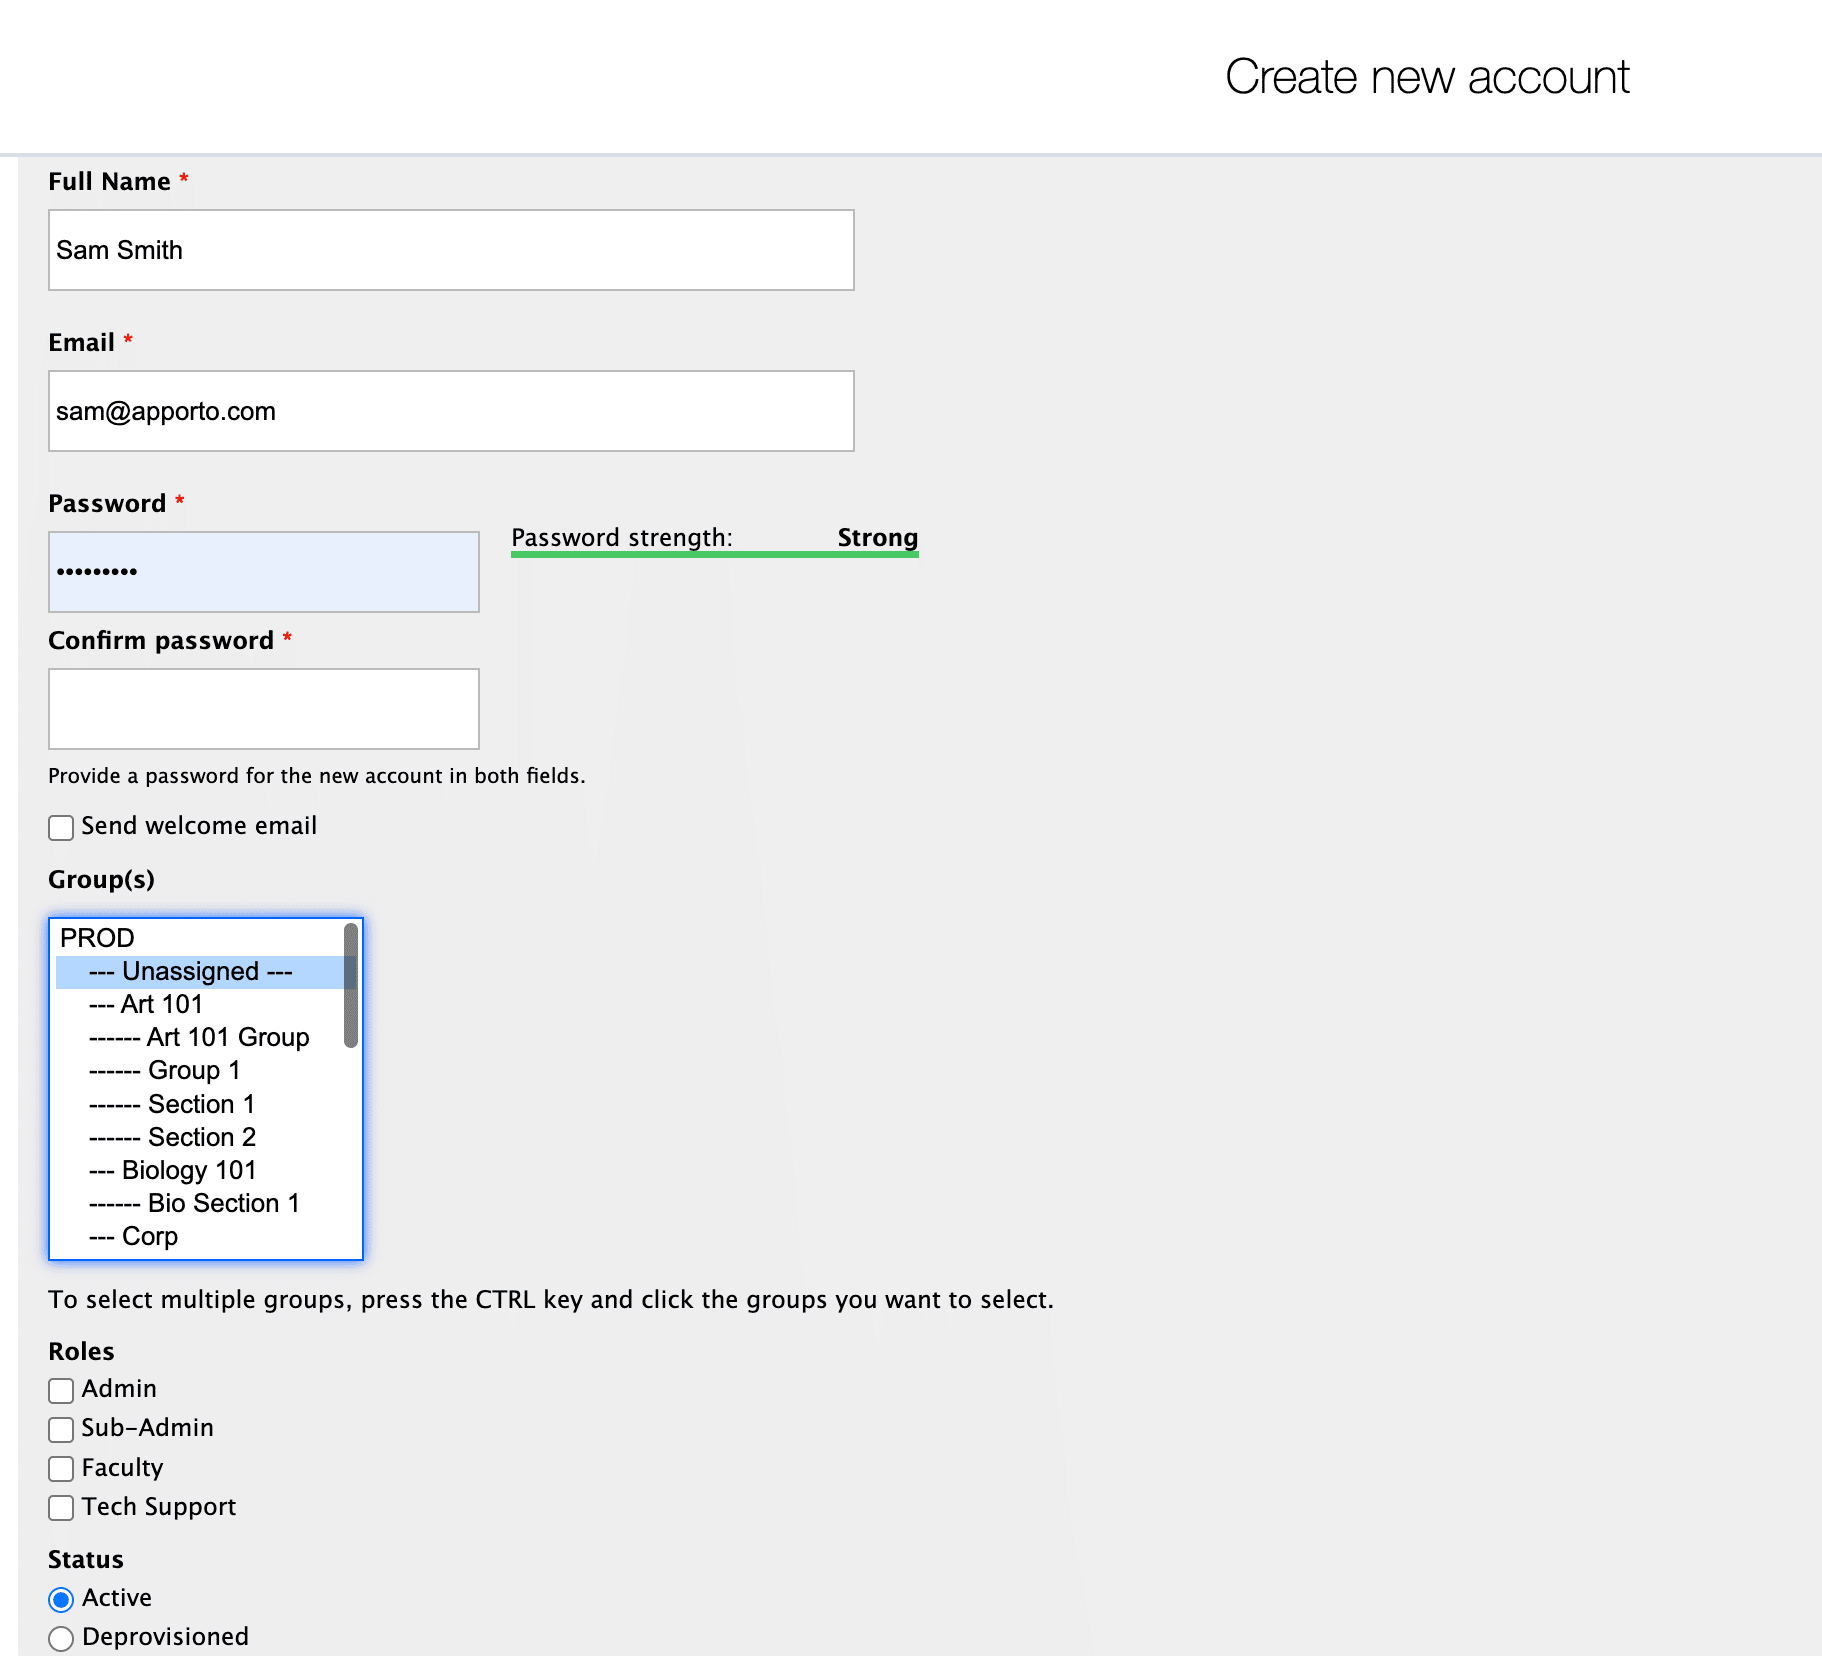
Enter the user’s Full Name.
You can enter the Full Name in any order (eg. “First Name Last Name” or “Last Name, First Name”).
Enter the user’s Email address.
Each user must have a unique Email address.
Enter a Password for the user, then enter it again to Confirm password.
It is recommended that the password conforms to the following requirements:
-
The password should be at least 6 characters long
-
The password should include uppercase and lowercase letters
-
The password should include numbers
-
The password should include punctuation
To send an email notification with a one-time login link to the new user, select the Send welcome email checkbox.
Use the Groups menu to select the group(s) to which the user will be assigned.
-
To assign the user to a single group, click the desired group.
-
To assign the user to multiple groups:
-
Press and hold the Ctrl key (Windows OS) or Cmd key (Mac OS).
-
Click each desired group. The selected groups are highlighted.
-
When all desired groups have been selected, release the Ctrl key (Windows OS) or Cmd key (Mac OS).
-
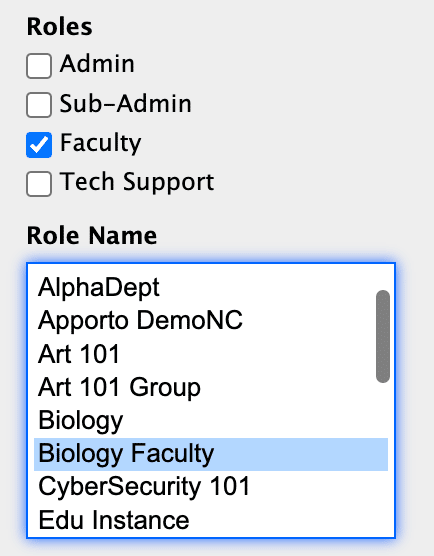
Select the desired Role for the user. If no role is selected, the user will be an End User by default.
If the Sub-Admin, Faculty, or Tech Support box is checked, the ‘Role Name’ box displays and you will be prompted to select from available custom roles. (Role Names are defined in the Roles screen and grant permissions to particular groups, apps/desktops, and features.)
By default, Active will be selected from the Status radio buttons. This ensures the new user will be able to login to Apporto.
Click Create new account to add the new user to your Apporto database.
The screen refreshes to display your changes, and a success message shows at the top of the screen.