Using the Virtual Classroom
The Virtual Classroom enables faculty to monitor and assist students. It provides a real-time view of the desktops of all students in a particular group who are online – all from a single screen. Students can raise their hands to ask questions. Faculty can click to get a closer view of a student’s desktop, chat with or call students, and even request remote control to help a student along.
Using the Virtual Classroom
Login
Using your preferred web browser, navigate to the web address provided by your administrator (e.g., “mycollege.www.apporto.com”) and log in to the system using your Faculty credentials.
Click on  to access the Apporto App Store.
Select your App or Desktop
Locate the desired app or desktop and click Launch.
The selected app or desktop opens in a new browser tab.
Open the Virtual Classroom
Select the ![]() Virtual Classroom option (under More) in the menu bar.
Virtual Classroom option (under More) in the menu bar.
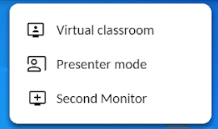
Select the relevant group (e.g., course, section) and click Launch.

Note: Faculty must have permission to both the group and app/desktop in order to launch the Virtual Desktop.
Note: The classroom may only be launched for groups of 200 users or fewer.
The Virtual Classroom will open in a new browser tab. The desktops of all students in the group (who are online) will be visible.
When a new student logs in, their desktop will appear.

When a student logs out, their desktop will disappear. By default, students’ desktops appear in the order they came online. You may change the sort order using the class roster.
Note: Students must launch the same app/desktop as Faculty in order to appear in the classroom.
Note: One faculty user (or a teaching assistant assigned the faculty role in Apporto) may view the class at a time. We plan to support multiple faculty in an upcoming release.
When the Virtual Classroom is launched, students will see a notification that their desktop is being shared.

Note: For privacy, the student’s Messenger and menu bar are not visible in the Virtual Classroom.
Students will also see a new menu option ![]() that enables them to raise their hand. When a hand is raised, you will see the student’s desktop highlighted and the raised hand icon
that enables them to raise their hand. When a hand is raised, you will see the student’s desktop highlighted and the raised hand icon ![]() showing. A notification will also appear at the bottom of the screen.
showing. A notification will also appear at the bottom of the screen.

Clicking on the desktop enlarges the desktop, removes the blue highlight, removes the raised hand, and notifies the student.

Students may also choose to lower their hands by clicking on the Lower hand ![]() button. Doing so will remove the blue highlight and raised hand icon from the student’s desktop.
button. Doing so will remove the blue highlight and raised hand icon from the student’s desktop.
View Class Roster
The class roster button ![]() shows the number of students who are present out of the total number of students in the class. Click on the class roster button to open the roster and view the list of present and absent students.
shows the number of students who are present out of the total number of students in the class. Click on the class roster button to open the roster and view the list of present and absent students.

By default, present students are listed in the sort order selected in the layout menu. Click on the Sort dropdown to change the sort order to order of sign-in.
Adjust the Layout
By default, the layout of student tiles is determined automatically. To change this, click on the layout button ![]() to trigger the Layout menu screen.
to trigger the Layout menu screen.

Click on the fixed grid dropdown to view the grid options. You may select from any option in the list.

Click on the thumbnail sort dropdown to change the display order of the present students’ desktops.

Click Save to commit any changes to the layout.
Enlarge a Desktop
Click on a desktop to enlarge the view and see real time updates of desktop activity. “You are viewing [username]’s screen” will appear at the top of the view.

Click < Back to close the view. The student will be alerted that you are no longer watching their screen.
![]()
Request Remote Control
In order to assist a student, click the Request control button. A confirmation message will display, showing that you have requested control.
![]()
The following request will appear on the student’s desktop.

If the student accepts, your view will refresh. “You can control [username]’s screen” will appear at the top of the view, and you may cursor into the view to control the student’s desktop.

Click Stop control to return screen control back to the student.
Students may also decline requests for faculty remote control by clicking on the Decline button in the popup. If a student declines your request, you will see a message that states “[username] has declined your request for remote control.”
Chat with Students
If Messenger is enabled for your instance, it will be available in the Virtual Classroom to make it easy to chat with students 1-on-1 or call a student to help quickly answer a question. As faculty, you may trigger this function by clicking the ![]() Chat button at the bottom of the screen.
Chat button at the bottom of the screen.
When viewing the entire class, the Messenger contact list shows all students in the group. It also shows other faculty members and labels them with “(Faculty)”.

When viewing an individual student’s desktop (enlarged view or remote control), the contact list is filtered to make it easy to communicate with that specific student.
A student may also initiate the chat session by clicking on the Messenger button at the bottom of their view or the ![]() Chat button at the bottom of the screen.
Chat button at the bottom of the screen.
Ending a Virtual Classroom Session
While you are in your virtual classroom session, you will see an End Session button on the screen. Once you are finished with your session, click the button and the system will prompt you to confirm your decision. Click Close Classroom and then you can close the browser tab to return to the desktop.