Using an App or Desktop
After logging in to Apporto, you will see the App Store. This is where you can access all of the desktops and apps available to you. It is your virtual computer lab. From there, you can launch the relevant desktop or app and begin working with the available software (e.g. Excel, Word, Photoshop, SolidWorks, etc.). The available software will depend on what your administrator has configured.
This short guide will show you step by step how to:
Launch an App or Desktop
Login
Using your preferred web browser, navigate to the web address provided by your administrator (eg. “mycollege.www.apporto.com”).
Then log in to the system to access the Apporto App Store.
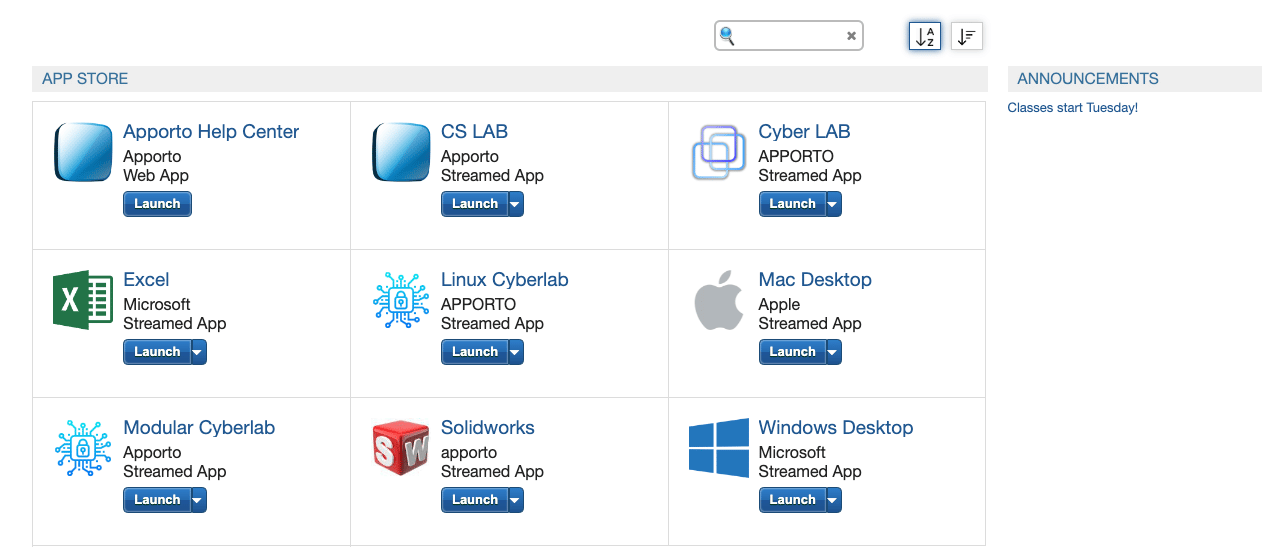
Select your App or Desktop
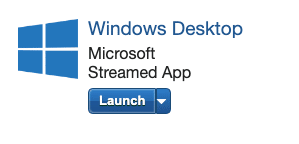
Locate the desired app or desktop and click Launch
If the server is already running, the virtual desktop will launch quickly. If the server needs to be started, it may take a minute or two for the desktop to open. In this case, you will see a “Starting Server” message.

The selected app or desktop opens in a new browser tab.

![]() When you first login to Apporto, it may take up to 30 seconds to launch an app. This is because your profile is being created. After this, applications will launch much faster, typically between 7-15 seconds.
When you first login to Apporto, it may take up to 30 seconds to launch an app. This is because your profile is being created. After this, applications will launch much faster, typically between 7-15 seconds.
![]() Some applications (e.g. Persistent Virtual Machines) may take a few minutes to launch, because the server needs to start before the application can be launched. In these cases, a modal will notify you when the server is starting. Starting a server typically takes 1-2 minutes.
Some applications (e.g. Persistent Virtual Machines) may take a few minutes to launch, because the server needs to start before the application can be launched. In these cases, a modal will notify you when the server is starting. Starting a server typically takes 1-2 minutes.
Use Apps and Desktops
The Menu
Available menu options are displayed as icons (buttons) in the top menu bar. Hover your mouse over an icon to see tooltip text explaining what the menu option is.

Click the up arrow ![]() to hide the menu bar. Click the down arrow to unhide the menu bar.
to hide the menu bar. Click the down arrow to unhide the menu bar.
When you first launch an app or desktop, an Intro wizard will walk you through each menu option. The following guide describes the function of each menu option in more detail.
Change Display Mode
Click the ![]() icon in the top menu bar to toggle the display to full-screen mode.
icon in the top menu bar to toggle the display to full-screen mode.
Press and hold the <Esc> key to return the display to normal mode.
In full screen mode, the menu bar is hidden to maximize screen real estate. Click on the down arrow to access the menu.

Upload / Download Files
Click Upload ![]() to upload a file from your device to the Apporto cloud desktop. Very large files, such as videos, may take several minutes to upload.
to upload a file from your device to the Apporto cloud desktop. Very large files, such as videos, may take several minutes to upload.
Click Download ![]() to download a file from Apporto to your device. Files will be available in your Downloads directory.
to download a file from Apporto to your device. Files will be available in your Downloads directory.
Additional ways to access files include:
- Drag and drop a file from your device to the Apporto cloud desktop. This works well for small files.
- Open a browser (e.g. Chrome)
 in the Apporto cloud desktop, navigate to your cloud storage service (e.g. OneDrive, Google Drive, etc.) and login, find the relevant file(s) and use the download menu to download them. Open Windows File Explorer in Apporto and navigate to the Downloads folder. Drag the file onto your desktop to begin working with it.
 - Use the Apporto Cloud Mounter
 to mount a university network drive or cloud storage service (OneDrive, Google Drive, Box, and Dropbox). Mounted drives are accessible in Apporto via the Windows File Explorer. From there, you can move files from the drive to the Apporto cloud desktop to work with them and copy them back to the relevant drive when finished. This feature is supported for Apporto Windows Desktops and apps (not Mac or Linux).
Share Your Screen
Use the Share Screen ![]() feature to share your screen with another user and collaborate in the current session. For example, you can send a link to your faculty or a teammate so they can access your app or desktop. You can grant permissions that enable viewing, drawing, or full control (clicking in your desktop).
feature to share your screen with another user and collaborate in the current session. For example, you can send a link to your faculty or a teammate so they can access your app or desktop. You can grant permissions that enable viewing, drawing, or full control (clicking in your desktop).
Open Messenger
Click Chat ![]() to open and use Messenger. The Apporto Messenger works the same as other messaging tools but is filtered by group so you can easily communicate with other students in your classes.
to open and use Messenger. The Apporto Messenger works the same as other messaging tools but is filtered by group so you can easily communicate with other students in your classes.
Use Multiple Monitors
To use multiple monitors, click the More menu option and select Second Monitor ![]() to open a second browser tab.
to open a second browser tab.
Drag the tab to another monitor and resize as needed. The desktop view will span both tabs/monitors. Then, you can drag applications to either monitor. You may use up to three monitors.
Turn Sound On/Off
Click the Sound ![]() button to turn sound on. Click again
button to turn sound on. Click again ![]() to turn sound off. By default, sound is turned off.
to turn sound off. By default, sound is turned off.
Assignment Upload
Click the Assignment Submission button to upload a homework file to the Learning Management System (LMS). Follow prompts to select the relevant assignment and file. Hit Submit to transfer the file to the LMS. This feature is available for Canvas and Blackboard.
Network Indicator
A fast and reliable network connection is key for fast performance when working in Apporto. View the Network Indicator ![]() to gauge the strength of your network connection. The number of bars depends on network latency (the amount of time in milliseconds for response from the server).
to gauge the strength of your network connection. The number of bars depends on network latency (the amount of time in milliseconds for response from the server).
- Five bars show when latency is < 40 ms
- Four bars show when latency is 40 < 70 ms
- Three bars show when latency is 70 < 100 ms
- Two bars show when latency is 100 < 130 ms
- One bar shows when latency is > 130 ms
Click on the indicator to see details:

Settings
Click the Settings ![]() menu to access screen scaling, resolution, video compression, microphone and clipboard options.
menu to access screen scaling, resolution, video compression, microphone and clipboard options.

Note: The USB feature must be configured for your instance. Contact your Administrator if you need this feature.
Note: Frame Statistics is only available for debugging. By default this option does not appear in the menu.
By default the Apporto cloud desktop will match the scale of your local device. If you want desktop images and text to appear larger, you may increase the scale up to 250%. Increasing the scale may reduce system responsiveness though, since more data is transferred from the cloud to your browser.

By default, the Apporto desktop displays at a high resolution for optimal image quality. The resolution is dynamically adjusted when you change your browser size (for example by toggling to full screen mode).

If you are using a high-resolution monitor that is impacting app performance, you may opt for the medium resolution (2560 x 1440) setting.
And if you have a poor network connection, you may want to use the low resolution (1024 x 768) setting. This option will ensure a faster system responsiveness, since less data is transferred from the cloud to your browser.
Note: Multi Monitor mode does not work when Low resolution is selected.
If your device supports video compression, Apporto will automatically enable it. You may disable this feature if desired though.
Enabling the microphone ![]() (in your browser and device settings) enables you to use voice features in the Apporto desktop like making calls via Messenger.
(in your browser and device settings) enables you to use voice features in the Apporto desktop like making calls via Messenger.
Enabling the clipboard ![]() in your browser settings enables you to copy and paste text and images to and from your local device to the Apporto cloud desktop.
in your browser settings enables you to copy and paste text and images to and from your local device to the Apporto cloud desktop.
Help
Click the Help ![]() menu to access tutorials, the User Guide, the Support Request form, and version information About Apporto. These are the default values. Your organization may customize this menu to point to their own resources.
menu to access tutorials, the User Guide, the Support Request form, and version information About Apporto. These are the default values. Your organization may customize this menu to point to their own resources.
