Start and Schedule Production Servers
Sometimes a group of users will need to launch an application or desktop all at the same time, for instance, when a synchronous class meets. In this case, you may want to start the servers 5-10 minutes ahead of time or schedule servers to be running. This will enable all users to launch apps quickly — and prevent waiting several minutes for a sufficient number of servers to become available.
Apporto enables this feature for Administrators by default. Sub-admins and faculty can also be granted permissions to start or schedule production servers when you define roles.
This short guide will show you how to:
Start Production Servers
Start Servers
In the App Store, locate the application or desktop you need. Instead of clicking on the Launch button (which would launch the app for a single user), click on the drop-down menu arrow.
The drop-down menu offers two relevant options: Start Servers and Schedule Servers.
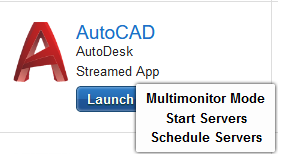
Select Start Servers.
The ‘Start All Servers’ dialog box displays.
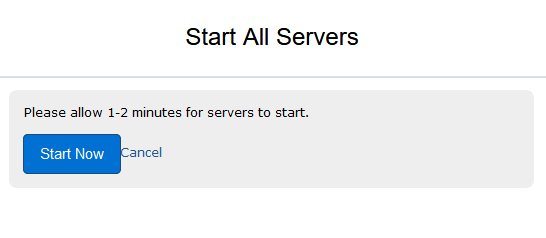
Click Start Now to start all servers for a particular application.
Please allow a few minutes for servers to start before the group of users begin launching the application from the App Store. The amount of time required for a server to start varies depending on the cloud. For AWS, a server is typically up and running within 30 seconds. On Azure, it may take up to 2 minutes.
Open Calendar
There are two ways to navigate to the Calendar.
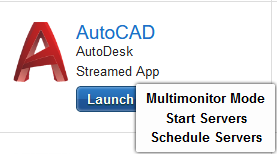
- From the App Store, find the application or desktop you need. Click on the drop-down menu arrow next to the Launch button and select Schedule Servers.
- Select the Calendar
 option from the menu on the left.
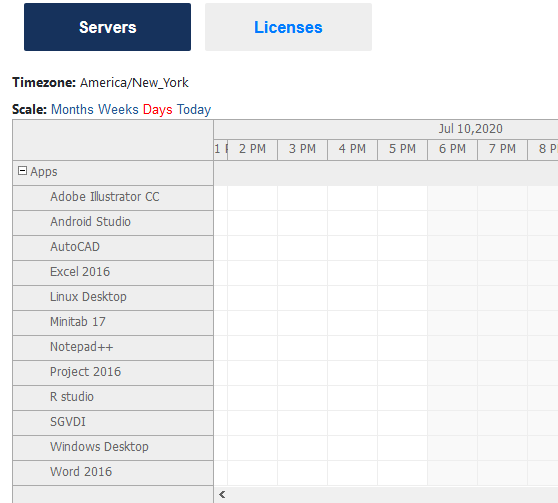
The ‘Calendar’ displays.
Schedule Servers
Click in the cell corresponding to the relevant date/time and application.
The ‘Schedule Servers’ dialog box displays.
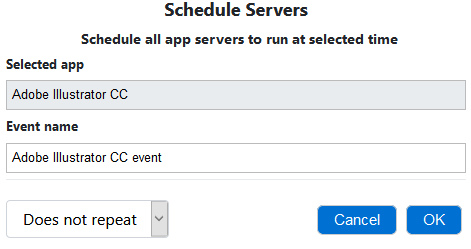
You can edit the Event name by cursoring into the textbox and typing a new name.
To schedule a daily or weekly recurrence, click on the Does not repeat popup menu and follow the instructions. When finished, click OK to schedule servers.
You will see a success message and the Event will appear in the calendar. If you scheduled a recurring event, for instance a weekly class, you can scroll to the relevant dates to confirm the event appears.
Since running a group of servers is costly, this capability is limited to 10 hours per week by default. The limit applies across your entire organization. After the weekly limit is exceeded an error message will display when attempting to start or schedule additional servers. Please contact [email protected] if you need to schedule servers for > 10 hours per week.
Servers are scheduled in 1 hour blocks. If you need servers to be running for multi-hour blocks, you need to schedule multiple 1-hour blocks. For example, if you want servers to be running from 9-11am, you must schedule two blocks (eg. 9-10am and 10-11am).
Change or Delete Event
To change the Event time, drag the Event to a new time slot. For recurring events, it may be easiest to delete the event and create a new one at the desired time.
To edit the Event name, double-click on the Event. When the dialog box opens, cursor into the textbox and type a new name.
To delete an Event, mouse over the event and click on x.