Creating and Managing Groups
Groups are useful for publishing (to limit access to particular apps or desktops), analytics, and collaboration features such as Messenger.
You may create Groups in Apporto via the Groups screen. Then, users can be added to a group in one of two ways:
- Passing a group attribute when users login via single sign-on (SSO). During your SSO integration, attributes are mapped to Apporto groups.
- Importing users via a CSV file and specifying group assignments.
For each group, you may optionally create a Shared Folder, specify the Storage Quota per user, and define Network Access Rules.
This short guide will show you step by step how to:
Manage Groups
Add Group
Using your preferred web browser, navigate to the URL for your Apporto system, for example, “mycollege.www.apporto.com”, and log in to the system using your Admin credentials.
Click the Groups ![]() icon in the Navigation panel.
icon in the Navigation panel.
The ‘Groups’ screen displays.
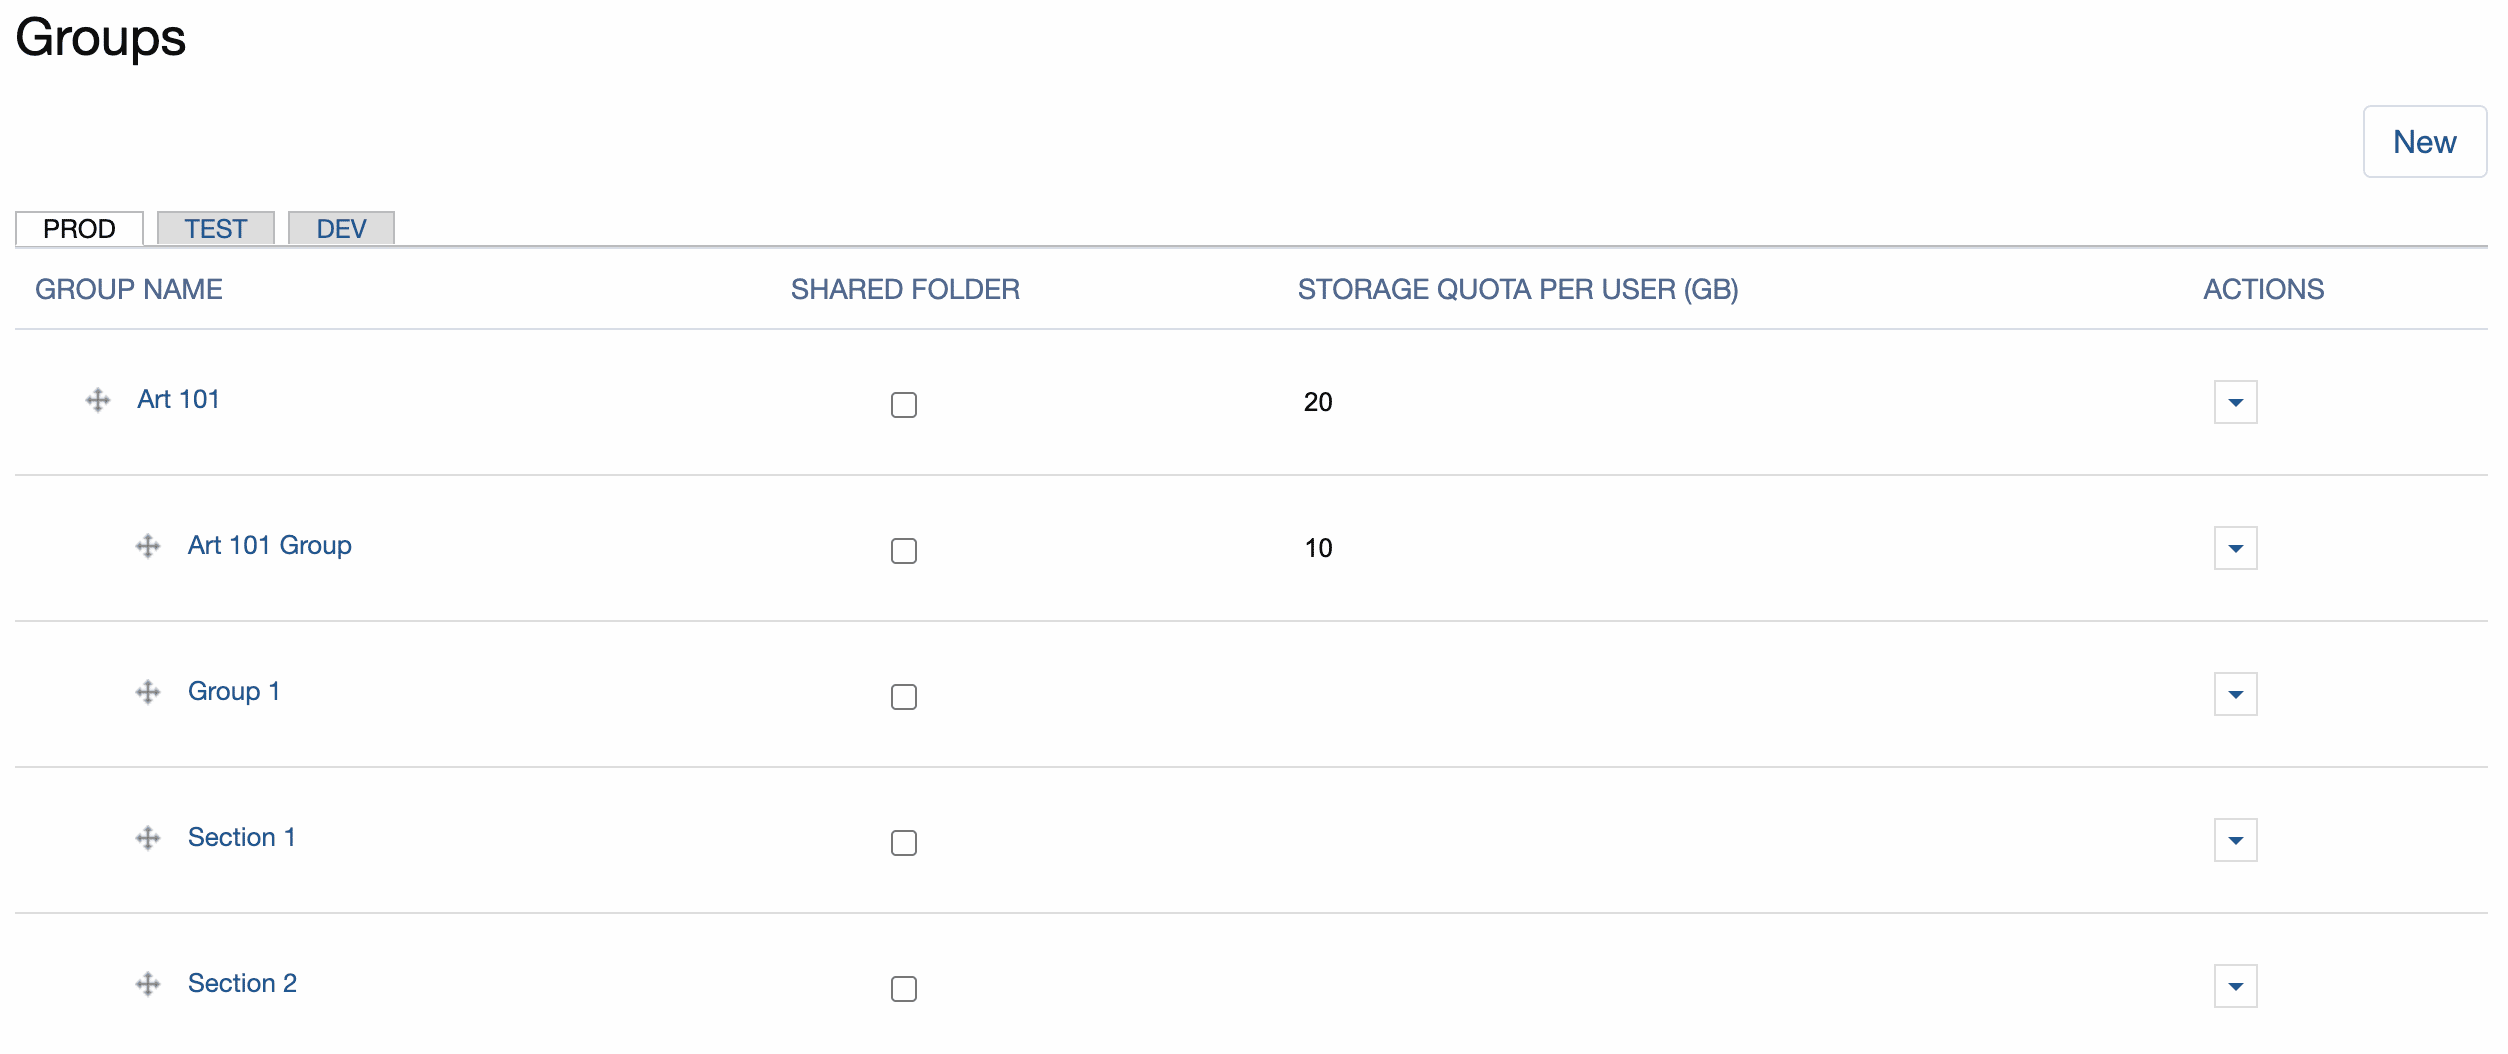
The screen shows a list of groups in your Apporto instance.
Click New
The ‘Add Group’ window displays.
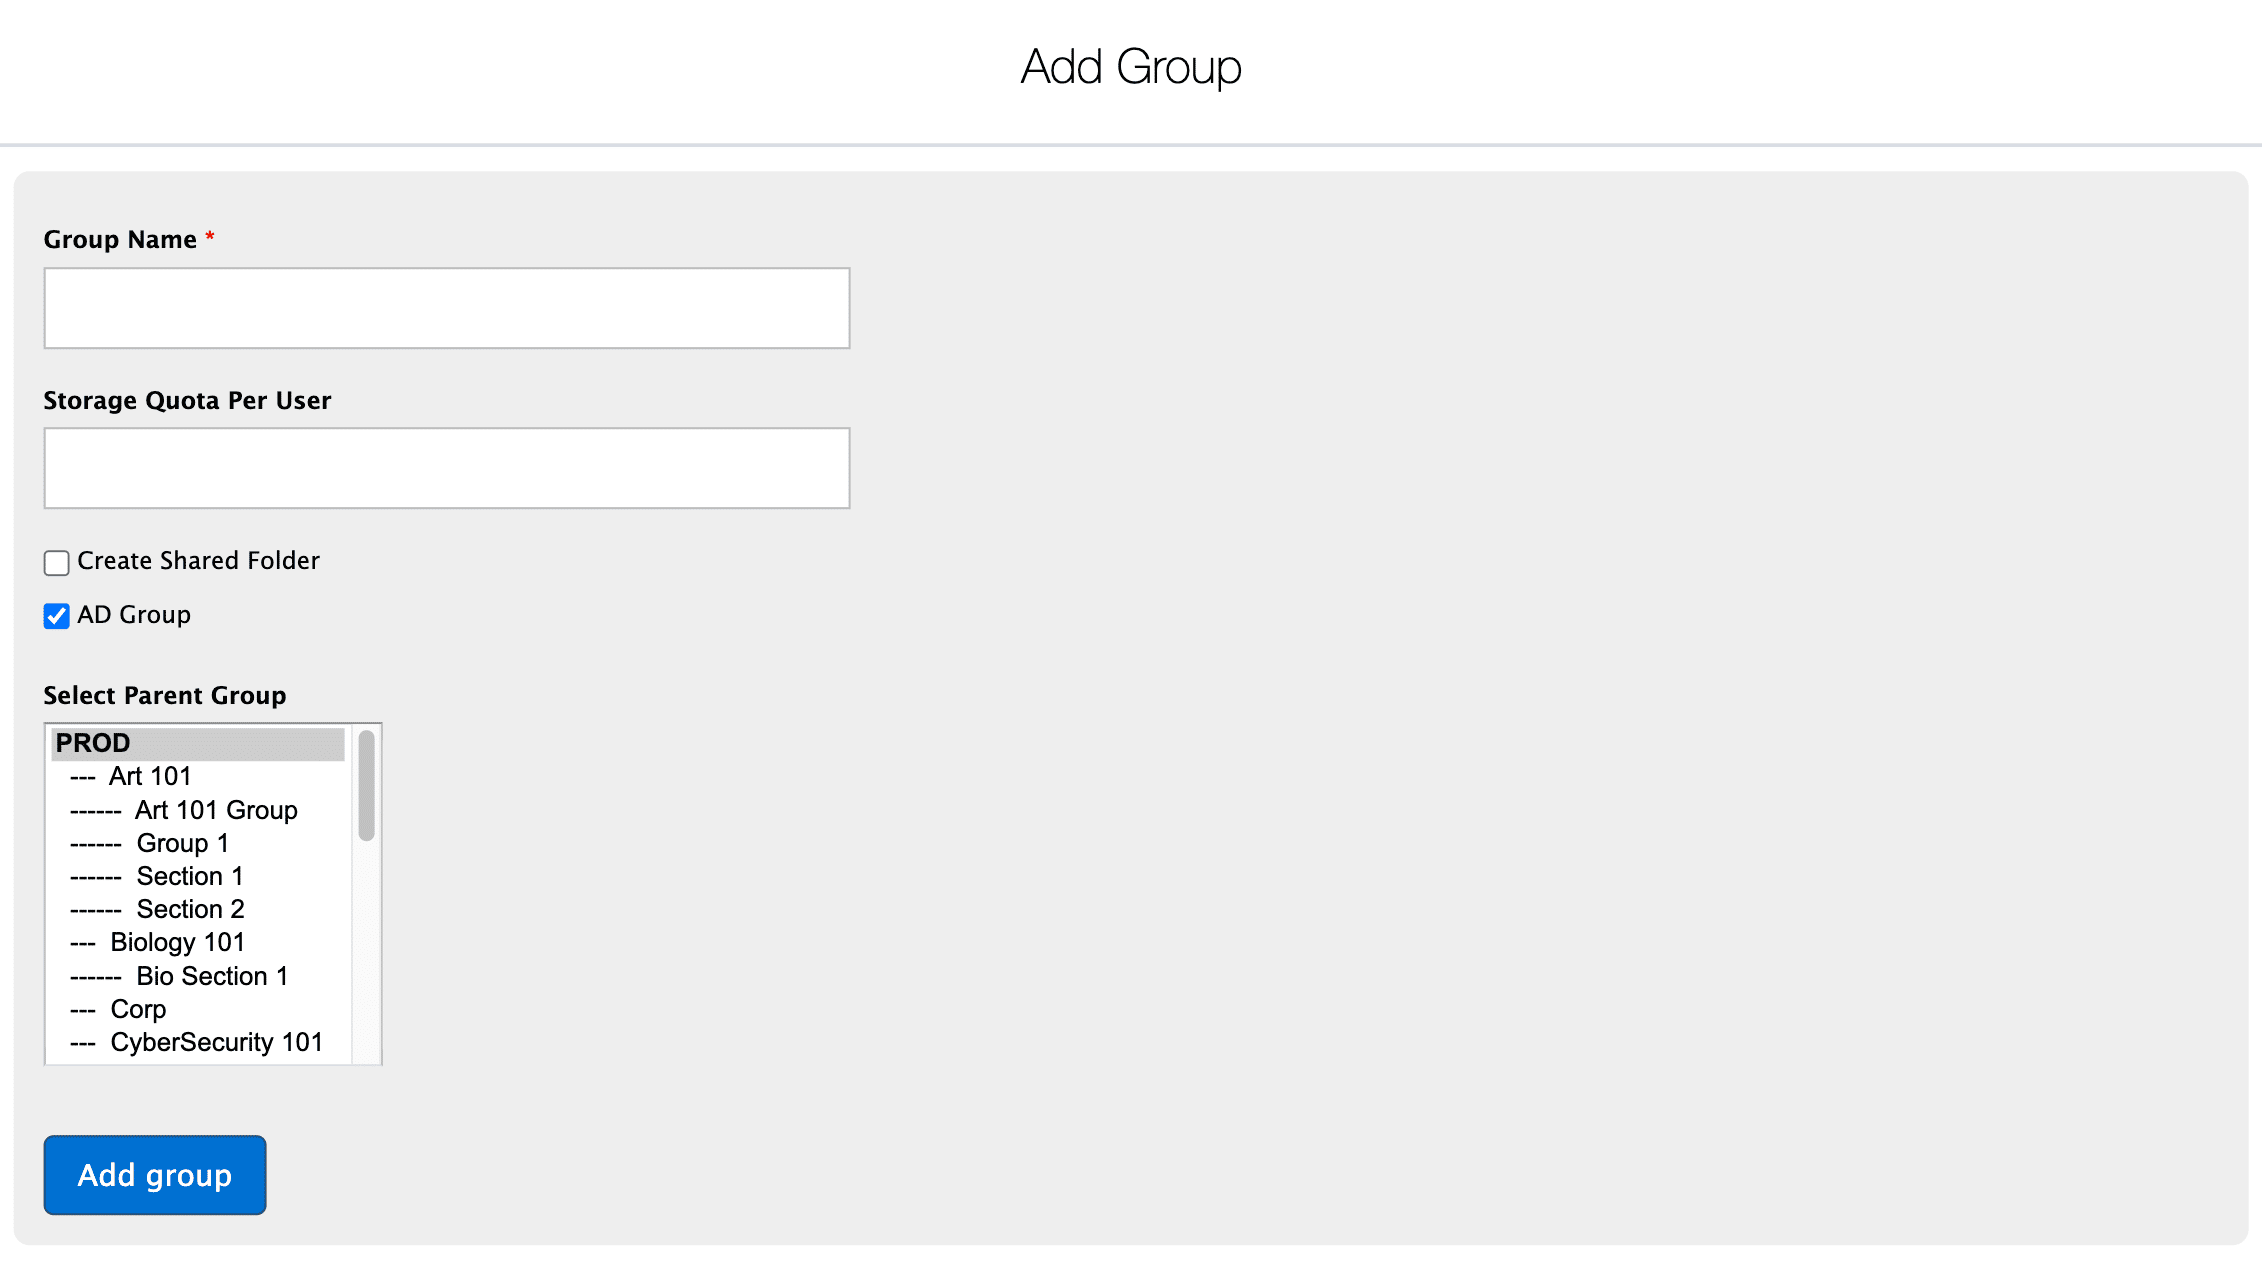
Enter a Group Name (eg. “Math 101”).
By default each user is granted 10GB of storage, but you can increase or decrease this amount by entering a Storage Quota Per User for the group (up to a maximum of 30GB).
Check the Create Shared Folder checkbox if you’d want a shared folder to be created on the desktop. Shared folders are accessible to all users in the group. Faculty can place the syllabus, assignments, and other course materials in this folder for students to access.
AD Group is checked by default. This ensures an Active Directory security group is created to enable features like shared folders and desktop variants. In the rare case that your Apporto implementation uses your own Active Directory, uncheck this box.
Select a “parent” for the new group from the Select Parent menu. By default, PROD (ie. production) is the parent group. You may scroll to select another parent if desired. You may create group hierarchies up to 8 levels deep.
Click Add group to add the new group to the database. This may take several seconds.
The screen refreshes and a confirmation message shows at the top of the screen.
Edit a Group
From the Groups screen locate the group you want to edit.
Click the Actions  button for the desired group, then choose Edit.
The ‘Edit group’ screen displays.
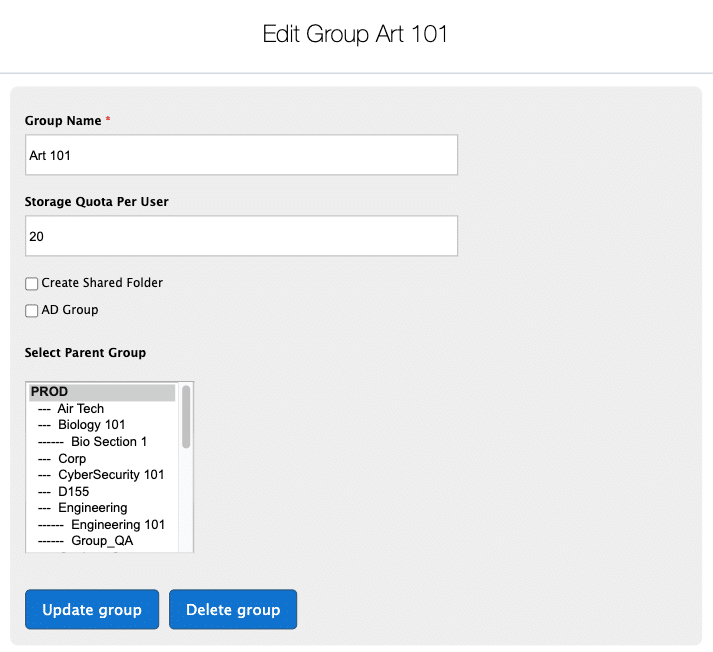
Edit the group options as needed and click Update Group to save changes.
The screen refreshes to display your changes and a confirmation message shows at the top of the screen.
Add / Edit a Storage Quota
Click the STORAGE QUOTA PER USER field for the desired group or subgroup to place the cursor in the field.
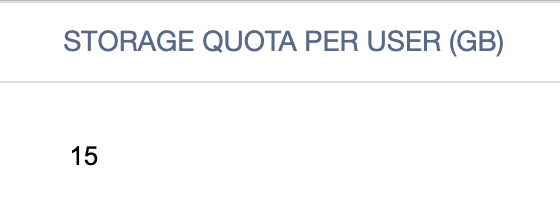
Enter or edit the maximum amount of storage allowed (up to 30 Gigabytes maximum) for each user that is a member of the group or subgroup.
Click the cursor outside the STORAGE QUOTA PER USER field to complete the update.
A confirmation message displays.
![]() Storage quotas are inherited by subgroups, unless a different quota is specified for the subgroup.
Storage quotas are inherited by subgroups, unless a different quota is specified for the subgroup.
A shared folder is a folder that can be created for a group (e.g. class), for example, where faculty can upload project files or a syllabus. The folder appears on the desktop and is accessible only to users in the group. To create a shared folder, simply check the checkbox.

The shared folder will appear on the desktops of users in the group.

Uncheck the box to remove the shared folder for the group.
Add a Network Object
For security purposes (such as Zero Trust Access initiatives), you may wish to limit network access. Network Objects allow you to control which IPs or IP ranges may be accessed by a group of users. This feature is only available with the Apporto Zero Trust Desktop. Contact [email protected] to learn more about this product.
If this feature is enabled for your instance, you may define a list of Network Objects in the Network Objects Setup page.
The list of defined objects will display in the Add / Edit Group screens.
Then, you simply need to check the box next to the relevant Network Object to enable the group to access the associated IP or IP range.
Click Update Group to confirm changes.
Delete a Group
From the Groups screen locate the group you want to delete.
Click the Actions button for the desired group, then choose Delete.
A confirmation dialog displays.

Click Confirm to proceed with the deletion.
The screen refreshes to display your changes, and a confirmation message shows at the top of the screen.