Configuring the Login Page
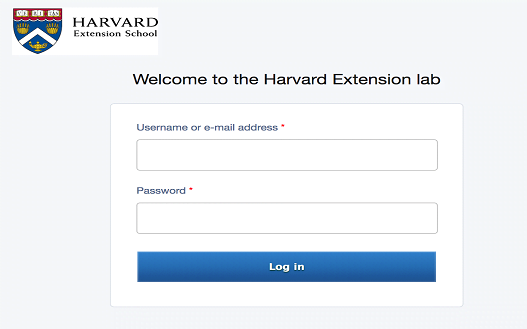
When users navigate to your Apporto instance, for example, ‘mycollege.www.apporto.com’, they will see the Apporto Login Page. Users with local accounts can login to Apporto directly from this page. Or, if your instance has a Single Sign-on (SSO) integration, this page will enable users to click through to your university login page.
You can customize the image and text on the Login Page. A default image and text will be displayed if you make no changes.
You may also enable multi-factor authentication (MFA). This feature requires users to download Google Authenticator.
Customize Login Page
Open Login Page Setup
Using your preferred web browser, navigate to the URL for your Apporto system, for example, “mycollege.www.apporto.com”, and log in to the system using your Admin credentials.
Click the Setup ![]() icon at the bottom of the Navigation panel.
icon at the bottom of the Navigation panel.
The ‘Setup’ submenu displays.
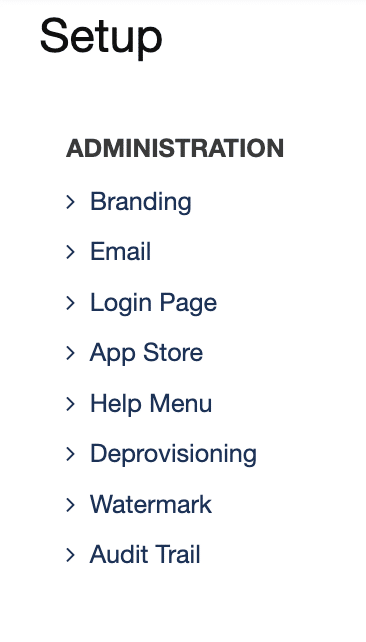
Click Login Page
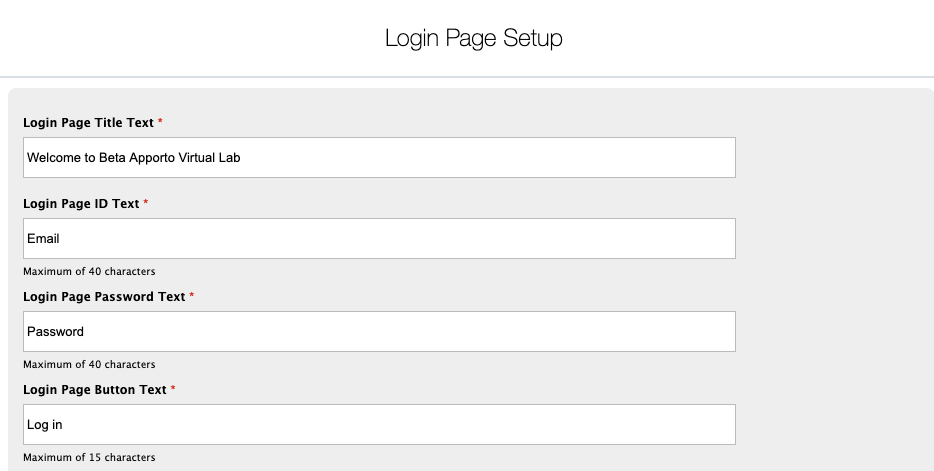
The ‘Login Page Setup’ popup displays.
Edit Login Page Title
You can change the Login Page Title by cursoring into the text box and editing the title.
Edit Login Instructions
You can change the ID and Password instructions by editing the text in the corresponding text boxes. Similarly, you may also edit the login Button text.
Agent Download Prompt
If you use Native Apps (this is uncommon), you may want to prompt users to download and install the Apporto agent. Simply check the Always prompt the user to download the agent on login checkbox and a reminder will be displayed on the login page.
Right Side Title Text
You can optionally add Right Side Title Text by cursoring into the text box and entering a title.
Right Side Description
You can optionally add a Right Side Description by cursoring into the text box and entering text.
Right Side Background Image
You can optionally change the Right Side Background Image. First, click Remove to remove the default image. Then, click Choose File and navigate to the file you want. Click Open to upload the file. The ideal image size is 800 x 600 pixels.
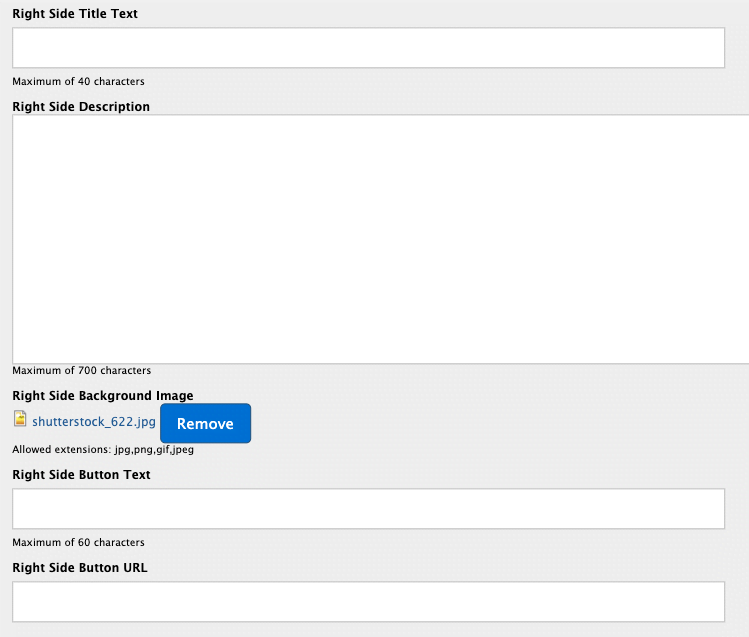
Right Side Button Text
You may optionally add a button (ex. to point to help or training materials). Simply, cursor into the Right Side Button Text box and enter button text.
Right Side Button URL
To add a button URL, cursor into the Right Side Button URL text box and paste a URL.
Multi-factor Authentication
If you do NOT have a Single Sign-on integration, we recommend enabling Multi-factor Authentication (MFA) for added security.
This feature requires users to download Google Authenticator.
To enable multi-factor authentication, contact your Customer Success Manager or email [email protected].
Once this feature has been enabled, you will see the following options.
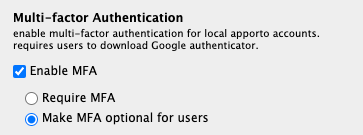
Check the Enable MFA checkbox.
Select Require MFA if you want all users to be required to use MFA.
Or, select Make MFA optional for users if you want this feature to be optional.
Save Settings
When you’ve finished configuring the Login Page, click Submit to save your changes.
To see your changes, navigate to your Login Page (eg. “mycollege.www.apporto.com”).
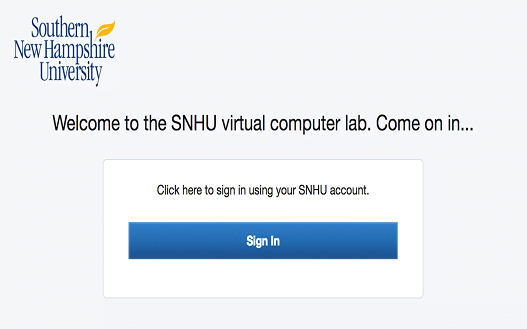
Here are examples of SSO-enabled and regular login pages. Since most Apporto customers opt for SSO, the most common login page format will resemble the following image.
SSO Enabled Login Screen
Standard Apporto Login Screen