How Colleges Integrate Academic and Professional Development?

Quick Answer

How Do Colleges Integrate Academic and Professional Development?

Colleges integrate academic and professional development by embedding career readiness, experiential learning, and industry-aligned skills directly into coursework and advising. This approach helps students connect classroom learning with workforce expectations. Tools like Apporto’s TrustEd support authentic assessment and protect the credibility of career-ready educational outcomes

In higher education, the degree can no longer stand alone. You see it in employer surveys, in hiring data, and in conversations across universities. Employers report persistent skills gaps, particularly in communication, problem solving, and applied critical thinking. A transcript signals academic achievement, but it does not always clarify professional readiness.

That reality places responsibility on institutions. Integrating career development into the student journey is now essential for modern education. Professional development cannot remain an optional workshop or a final-year activity managed only by career services. It must be woven into the academic experience itself.

Career engagement begins at enrollment. From the first semester, you encounter conversations about skills, purpose, and future pathways. Colleges increasingly embed career preparation directly into coursework, advising, and experiential learning. Academic and professional development become interconnected, not separate tracks.

If education aims to prepare you for meaningful contribution, then career readiness becomes an integral part of the foundation, not an afterthought at graduation.


What Does True Integration Look Like in Practice?

True integration is deliberate. It is designed into curriculum, advising structures, and institutional strategy, not added as a final requirement. In practice, academic affairs and career services do not operate in isolation.

Departments coordinate programs so that courses reflect both disciplinary knowledge and professional development. Teaching evolves to include applied assignments and reflective exercises that connect classroom learning to real roles.

Early counseling plays a central role. You encounter structured career exploration before choosing a major, and that exploration continues through each stage of development. Technology supports this process by tracking academic progress alongside professional milestones.

Industry alignment ensures that what you learn remains relevant to workforce expectations. Integration becomes visible when these elements reinforce one another across the institution.

Key structural pillars include:

  • Curriculum alignment that connects course objectives to professional skills and workforce expectations
  • Experiential learning integration through internships, co-ops, and applied projects embedded in programs
  • Embedded career coaching introduced early and sustained throughout enrollment
  • Technology milestone tracking that monitors academic progress and career readiness together
  • Cross-department collaboration between faculty, academic affairs, and career services


Embedding Career Readiness Directly Into the Curriculum

Professor guiding students through a project-based learning session solving a real-world industry problem in a collaborative classroom.

Career readiness becomes meaningful when it is visible inside the curriculum itself. You do not develop durable skills by attending a single workshop. You build them through structured repetition across courses, guided by faculty members who intentionally connect academic knowledge with professional application.

Many colleges now use competency mapping aligned with NACE career readiness competencies. In practical terms, that means learning goals are not limited to content mastery. They include communication, critical thinking, problem solving, teamwork, and digital literacy.

Faculty modify coursework to reflect this broader purpose. Assignments that once measured recall now require analysis, collaboration, and presentation.

Skill mapping in syllabi makes expectations explicit. When you review a course outline, you see how each assignment contributes to specific competencies. Career readiness becomes a required component of academic programs, not an optional supplement.

Project-based learning strengthens this connection, asking you to solve real problems that resemble entry level job responsibilities. The classroom becomes a rehearsal space for professional practice.

Examples of how institutions operationalize this integration include:

  • Competency mapping in syllabi that links assignments to defined career readiness standards
  • Project-based assignments tied directly to job roles or industry challenges
  • Explicit skill articulation exercises that help you describe communication and problem solving abilities
  • Career competencies embedded within standard coursework rather than added as separate modules


Why Faculty Professional Development Is a Critical Lever?

Curriculum design alone does not guarantee strong outcomes. Faculty members translate strategy into daily teaching practice, and that work requires continuous professional development. When educators remain current with new methodologies and technologies, the quality of instruction improves.

Research consistently shows that faculty who engage in ongoing development tend to have students who perform better academically and persist at higher rates. Retention, engagement, and long term success are closely connected to instructional quality.

Sustained professional development produces stronger results than isolated workshops. One afternoon session rarely changes practice in lasting ways. Faculty learning communities, structured peer conversations, and collaborative inquiry allow educators to reflect, test new approaches, and refine their expertise over time.

Institutions that treat professional development as an integral part of strategic planning, with dedicated resources and accountability, see measurable gains in outcomes. At the same time, many adjunct faculty lack equitable access to these opportunities, which can limit their effectiveness.

Key levers include:

  • Sustained faculty learning communities that encourage reflection and peer collaboration
  • Technology and methodology updates that keep teaching aligned with evolving student needs
  • Strategic institutional investment that embeds professional development in planning processes
  • Expanding access for adjunct faculty so all educators receive meaningful support


Experiential Learning as the Bridge Between Classroom and Career

College student transitioning from classroom lecture to internship office environment in a split-scene visual showing theory meeting practice.

Experiential learning gives professional development a concrete form. You do not fully understand a field by reading about it alone. You test knowledge through practice, reflection, and feedback. Colleges embed internships, co-ops, practicums, and applied projects directly into academic programs so that theory and application reinforce one another.

Internships consistently enhance job prospects after graduation. Employers value internship experience because it signals familiarity with workplace expectations, communication norms, and professional responsibility.

Many institutions now offer credit-bearing work to ensure that applied experience remains academically grounded. Structured co-ops go further, allowing you to alternate between academic semesters and paid, full-time work aligned with learning objectives.

Practicums and clinicals, common in fields such as nursing, psychology, and education, require observation, documentation, and supervised practice. These experiences cultivate professional judgment, not just technical competence.

Experiential learning strengthens outcomes because it demands accountability. You apply knowledge in real settings, reflect on performance, and return to the classroom with deeper understanding.

Experiential Model Academic Integration Professional Outcome
Internships Course credit + applied work Stronger job placement
Co-ops Alternating work/study Paid experience + structured objectives
Practicums/Clinicals Observation + documentation Professional performance readiness
Industry Projects Employer-designed assignments Portfolio-ready skills


Early Career Coaching and First-Year Integration

Career development now begins at entry, not at the end of a degree. Many colleges introduce first-year success coaches who help you think about goals before you even meet with an academic advisor.

This early career exploration shapes how you choose courses, join programs, and engage in campus life. Instead of asking what you will do after graduation, you begin asking how each semester builds toward long term outcomes.

Early engagement with career centers improves results. Students who connect with career coaching in their first year are more likely to secure internships and jobs later. Career coaching provides structured conversations that define goals, identify skills gaps, and clarify professional identity.

This support matters especially for first generation students, who may not have informal networks to guide career decisions. When integration begins early, the student experience becomes more coherent, intentional, and aligned with success.

Key mechanisms include:

  • First-year milestone mapping that connects academic progress with professional development goals
  • Personalized career coaching that clarifies direction and identifies skill gaps
  • Skills reflection exercises embedded in introductory courses
  • Targeted support structures designed for first-generation students to increase access and confidence


Technology as the Infrastructure for Integration

University student viewing a dual-progress dashboard tracking academic credits and career readiness milestones on a laptop.

Integration at scale requires more than intention. It requires systems. Technology provides the infrastructure that connects academic progress with professional development in measurable ways.

Through digital tools, institutions can track professional growth alongside coursework, identifying patterns and gaps early. Milestone dashboards allow you to see progress in both degree requirements and career readiness benchmarks, which reinforces accountability.

Virtual simulations extend access to experiential learning. You can experience a day in the life of a role, test decision making, and reflect on performance without leaving campus. These tools make career exploration more concrete, especially when internship access is limited.

Technology also allows colleges to scale support, ensuring that career centers and advising teams reach more students without sacrificing personalization.

Core tools often include:

  • Career milestone dashboards that align academic and professional progress
  • Skills tracking platforms that document competencies across programs
  • Virtual role simulations that expose you to real-world scenarios
  • Digital portfolio systems that capture projects and applied learning
  • Integrated advising platforms that connect faculty, coaches, and career services


Employer Collaboration and Industry Co-Design

Integration strengthens when employers move from peripheral partners to active contributors. Advisory boards composed of industry leaders help shape curriculum alignment so that programs reflect current workforce needs.

When employers participate in academic boards, they provide insight into tools, expectations, and evolving professional standards. This collaboration ensures that what you study connects directly to what organizations require.

Some institutions take collaboration further by co-designing programs with businesses. Courses incorporate real projects, current software, and applied challenges drawn from industry practice. Direct collaboration builds durable skills because you engage with authentic constraints and expectations.

Alumni networks also play a critical role. Platforms such as Tritons Connect link students with graduates for mentoring and networking, while initiatives like Pay It Forward mobilize alumni to create job opportunities for new graduates. These partnerships reinforce professional identity long before graduation.

Key collaboration mechanisms include:

  • Industry advisory boards that review and refine curriculum alignment
  • Co-designed curriculum developed in partnership with employers
  • Alumni mentorship platforms that connect students with experienced professionals
  • Employer-led projects embedded in courses to simulate real workplace challenges


The Emerging Challenge: Trust, Verification, and Credential Integrity

Digital diploma and verified skills badge protected by a secure shield icon, symbolizing credential integrity in higher education.

As colleges weave career development into academic programs, a new responsibility emerges. Verification becomes essential. When courses promise durable skills and professional readiness, institutions must ensure that demonstrated competencies are authentic.

Employers depend on that credibility. A degree that signals communication, problem solving, and applied expertise must rest on verified assessment, not assumption.

Authentic student work therefore carries weight beyond the classroom. It shapes professional identity. It influences hiring decisions. When learning occurs across online platforms, collaborative tools, and remote environments, integrity challenges grow more complex.

Assessment in digital spaces can obscure authorship and blur accountability. That reality does not diminish integration, but it raises expectations for oversight.

Employers must trust that projects, portfolios, and experiential outcomes reflect genuine performance. Faculty must feel confident that evaluation methods preserve fairness. Academic integrity becomes inseparable from professional credibility.

As integration deepens, institutions must strengthen systems that protect authenticity while preserving flexibility and access. The next step is not to slow integration, but to secure it.


How Apporto’s TrustEd Protects the Integrity of Career-Ready Education?

When career development becomes integrated into coursework, assessment carries higher stakes. Projects, simulations, internships, and applied assignments now serve as evidence of readiness. For that evidence to retain meaning, authorship must be clear and evaluation must be trustworthy. This is where Apporto TrustEd plays a critical role.

TrustEd provides instructor-controlled authorship verification designed specifically for academic environments. Instead of removing faculty judgment, it strengthens it. You retain oversight of assessment while gaining tools that help verify that submitted work reflects authentic student effort. This protects institutional credibility at a time when employers rely on portfolios, competency mapping, and experiential outcomes to make hiring decisions.

TrustEd follows a human-in-the-loop design. Technology supports review, but faculty remain central. When verification is transparent and embedded into assessment processes, confidence grows across stakeholders, from educators to employers. Career-ready education depends on credibility. TrustEd ensures that credibility remains intact.

Key benefits include:


What the Future of Higher Education Demands?

The future of higher education demands coherence. You are no longer preparing for a single job, but for a career that evolves over decades. Lifelong learning becomes a practical necessity, not an abstract ideal.

As industries adapt and knowledge expands, professional identity forms continuously. Education must support that ongoing development rather than conclude at graduation.

Durable skills such as communication, critical thinking, and problem solving anchor this long trajectory. Technical knowledge changes, but these capabilities persist.

Institutions therefore face a responsibility to design integration as a structural baseline, not a temporary initiative. Academic learning and professional development must function as one system.

At the same time, ethical technology governance becomes central. As digital tools support tracking, assessment, and verification, oversight must remain thoughtful and human-centered.

If higher education aims to sustain credibility and relevance, integration must be intentional, accountable, and designed for endurance rather than convenience.


Conclusion

Integrating academic and professional development requires intention across every layer of an institution. Curriculum integration connects classroom learning with real job responsibilities. Faculty development strengthens teaching and improves outcomes.

Experiential learning brings theory into contact with practice. Employer collaboration aligns programs with workforce needs. Technology provides the infrastructure to track progress and scale support. Integrity safeguards protect credibility and ensure that demonstrated competencies remain authentic.

When these elements work together, education becomes coherent. You see how knowledge, skills, and professional identity develop in parallel. That coherence builds trust among students, faculty, and employers.

If you are strengthening career-ready education at your institution, explore how TrustEd can help protect the integrity behind every credential you award.


Frequently Asked Questions (FAQs)


1. How do colleges integrate academic and professional development?

Colleges align curriculum with career readiness competencies, embed experiential learning into programs, and introduce early career coaching. Academic affairs, career services, and employers collaborate so that learning outcomes connect directly to workforce expectations.

2. Why is career readiness embedded into the curriculum?

Embedding career readiness ensures that students develop durable skills such as communication and problem solving alongside academic knowledge. This integration helps you connect coursework to real job responsibilities.

3. Do internships really improve job prospects?

Yes. Employers consistently value internship experience when making hiring decisions. Structured internships and co-ops allow you to apply knowledge in real settings, strengthening employability after graduation.

4. What role do faculty play in professional development?

Faculty members integrate competencies into teaching, revise syllabi to highlight skills, and participate in sustained professional development to improve instruction and student outcomes.

5. How does technology support career integration?

Technology tracks professional milestones alongside academic progress, offers virtual simulations, and scales advising support. These tools make career development measurable and accessible.

6. Why is academic integrity important for career-ready education?

Authentic assessment protects credential credibility. Employers must trust that demonstrated competencies reflect genuine student performance, especially in technology-supported learning environments.


What is Citrix NetScaler? A Complete Guide

Quick Answer

What is Citrix NetScaler?

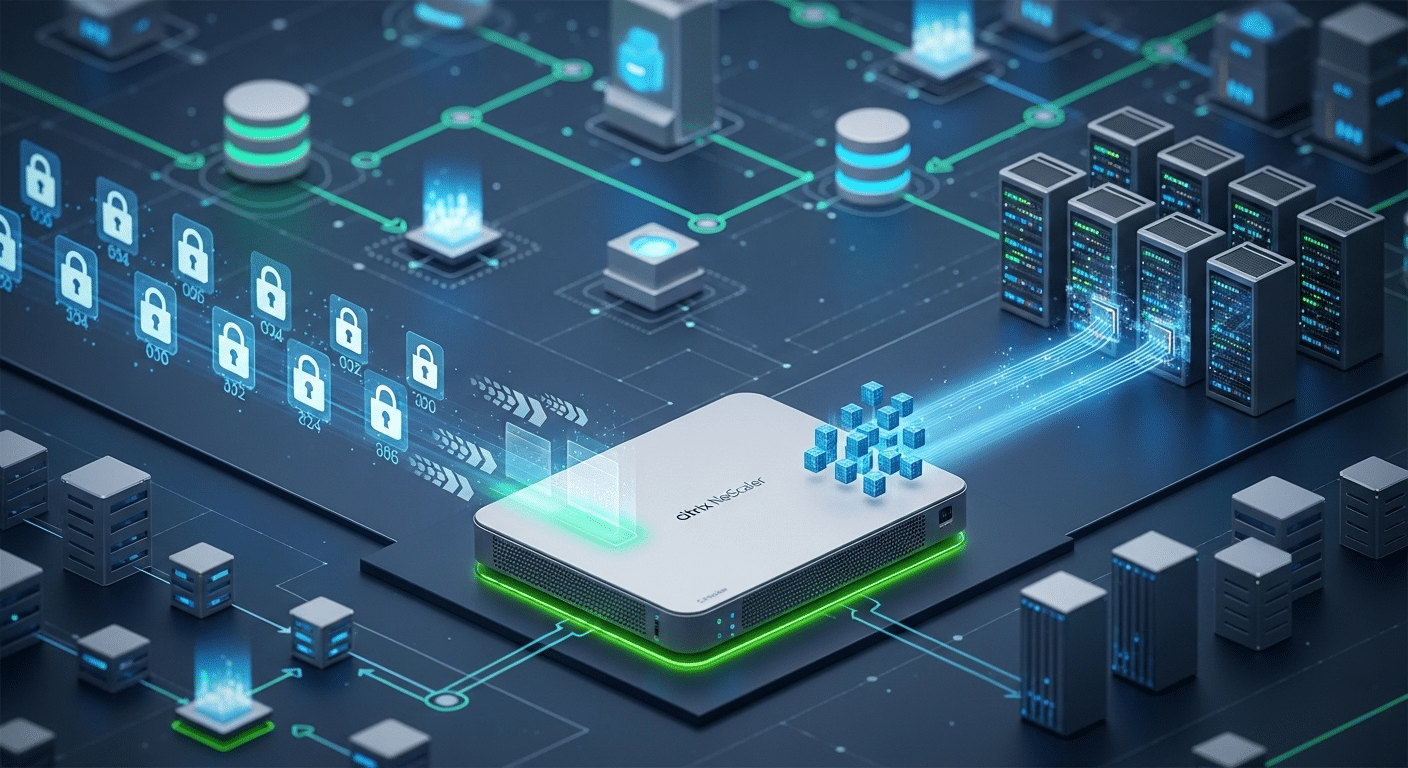
Citrix NetScaler is an application delivery controller (ADC) that improves application performance, balances traffic, and protects systems from security threats. Organizations use it to manage secure application delivery across cloud and hybrid environments, while browser-based platforms like Apporto offer a simpler alternative for secure remote application access.

Every time you open a web application, something important happens behind the scenes. Requests move across networks, servers respond, and systems work quietly to keep everything fast, secure, and available. As organizations rely more heavily on cloud services and online platforms, managing incoming traffic efficiently has become a serious priority.

That responsibility often falls to application delivery controllers, specialized networking products designed to balance performance with network security. One well-known example is Citrix NetScaler, a platform used by many enterprises to optimize application delivery, distribute traffic, and protect applications from threats.

In this blog, you’ll learn what Citrix NetScaler is, how it works, and why organizations rely on it to maintain secure, high-performance application environments.


What Is Citrix NetScaler and What Does It Actually Do?

Citrix NetScaler is an application delivery controller, usually shortened to ADC. Its job sounds straightforward, but the work behind it is anything but small.

NetScaler sits between users and the applications they’re trying to reach. Quietly, almost invisibly, it helps manage traffic, route requests, and keep systems running smoothly.

Originally developed within the Citrix ecosystem and now part of the Cloud Software Group, NetScaler plays a central role in modern application infrastructure. Every request to a web application, every piece of application traffic, passes through a layer that decides where it should go next.

One server might be busy. Another might have spare capacity. NetScaler evaluates the situation and distributes the request accordingly.

This is where application delivery controllers earn their reputation. Instead of allowing a single machine to carry the full load, NetScaler spreads incoming requests across multiple servers. The result is better stability and, more importantly, high availability.

When demand spikes, the system adjusts automatically. Traffic flows, applications remain reachable, and response times stay reasonable.

Large organizations rely on this kind of control. Many Fortune 500 companies deploy NetScaler across their data centers and cloud platforms because the stakes are high.

If applications slow down or fail, business operations suffer. NetScaler helps prevent that scenario, quietly orchestrating the movement of requests so users experience consistent performance.


How Does Citrix NetScaler Work to Manage Application Traffic?

Visualization of a network traffic controller directing incoming user requests to different backend servers to prevent overload.

A request leaves the user’s device and heads toward the company infrastructure. Without coordination, that request could land on an already overloaded server. Performance drops. Response times stretch. Users notice immediately. This is exactly where Citrix NetScaler steps in.

NetScaler sits quietly between users and application servers. Every request, every piece of incoming traffic, passes through it first. Instead of letting traffic hit servers randomly, NetScaler evaluates where that request should go.

One server may be under heavy load, another might be mostly idle. NetScaler routes the request intelligently, helping manage traffic and preventing bottlenecks.

The result is stability. Applications remain available even during periods of high traffic, and systems avoid the dangerous situation where a single server becomes a failure point.

Several core functions make this possible:

  • Load Balancing: NetScaler distributes user requests across multiple servers so applications remain available and responsive even when traffic volumes increase.
  • Server Offloading: Encryption tasks such as SSL and TLS processing are handled by NetScaler rather than the application server, reducing server workload and improving high performance across the system.
  • Traffic Optimization: Techniques like data compression, buffering, and caching reduce the amount of data transmitted across the network, improving delivery speed.
  • Protocol Acceleration: NetScaler optimizes how network protocols operate, helping reduce latency and improving response times for users accessing applications.

NetScaler acts as a traffic controller. Requests arrive. The system evaluates them, distributes them wisely, and keeps application infrastructure running smoothly.


How Does Citrix NetScaler Protect Applications and Data?

Performance matters, yes. But speed alone does not keep systems safe. Every application connected to the internet faces constant probing, automated attacks, and attempts to sneak in malicious code. That reality explains why Citrix NetScaler includes strong built-in security features alongside traffic management tools.

At the center of its security capabilities sits a web application firewall, often shortened to WAF. Think of it as a protective inspection layer placed in front of your applications.

Every request moving toward a server passes through this checkpoint first. If something suspicious appears, the system can block the request before it ever reaches the application itself.

This filtering happens at a detailed level. NetScaler evaluates HTTP headers, request patterns, and behavioral signals. Known attack techniques like SQL injection or cross site scripting attempts are detected early and stopped immediately.

Instead of letting dangerous traffic reach your infrastructure, the application firewall WAF screens and filters it in real time.

That protection becomes especially valuable for organizations handling sensitive data or high volumes of application traffic. The system creates a defensive perimeter that shields applications from common security exploits while maintaining performance.

Several built-in protections strengthen this layer of defense:

  • Web Application Firewall (WAF): Filters incoming application requests and blocks suspicious activity before it reaches backend servers.
  • API Security: Monitors and protects application programming interfaces from misuse, unauthorized access, and abuse.
  • Bot Protection: Detects automated scripts attempting to scrape data or overwhelm services.
  • Access Control: Verifies that only authorized users can access protected applications and services.
  • Threat Detection: Uses signature libraries and behavioral analysis to identify known attack patterns.


How Does NetScaler Improve Application Performance and Speed?

Enterprise cloud infrastructure with Citrix NetScaler handling encryption and traffic optimization before requests reach application servers.

Security keeps systems safe, but speed keeps users happy. Slow applications frustrate people quickly. Pages stall, dashboards take too long to load, and productivity dips before anyone realizes what went wrong.

This is where Citrix NetScaler shows another strength, improving application performance without requiring major infrastructure changes.

When users interact with a web application, a surprising amount of network activity happens behind the scenes. Data travels back and forth, servers process requests, and encryption tasks consume valuable computing power. If every server handles every task on its own, performance starts to drag.

NetScaler acts like a performance assistant for your infrastructure. It intercepts requests, optimizes how information moves across the network, and handles certain processing tasks before traffic reaches the application servers.

The outcome can be significant. In many deployments, applications can run up to five times faster compared with environments that lack an optimization layer.

These improvements also help reduce infrastructure pressure. Servers spend less time dealing with heavy processing tasks, which can lower operating costs and extend hardware capacity.

Optimization techniques drive these gains:

  • Data Compression: Reduces the amount of data transferred between servers and users, improving delivery speed and reducing bandwidth consumption.
  • Content Caching: Stores commonly requested data closer to users, helping lower response times for frequently accessed content.
  • TCP Optimization: Improves how network protocols handle traffic, boosting efficiency and overall responsiveness.
  • SSL Offloading: Handles encryption tasks centrally so application servers can focus on processing requests rather than cryptographic operations.


What Deployment Options Are Available for Citrix NetScaler?

Infrastructure rarely looks the same across organizations. Some companies run applications entirely on premises inside traditional data centers. Others rely heavily on cloud environments. Many operate somewhere in the middle, blending both into hybrid systems. One reason Citrix NetScaler remains widely used is its flexibility across these different deployment models.

NetScaler can operate as hardware, software, or container-based infrastructure. That flexibility allows teams to place application delivery controls wherever their workloads live. A large enterprise running critical services in private data centers might deploy dedicated appliances.

Smaller teams may choose virtual instances that run inside public cloud platforms. And modern application teams working with microservices often prefer containerized deployments.

This adaptability becomes especially useful in hybrid environments, where applications may run across multiple locations at once. NetScaler can maintain consistent traffic management and security policies regardless of where the application is hosted.

Several deployment options are available depending on business needs:

NetScaler Type Deployment Scenario
NetScaler MPX Physical appliance designed for high-performance data centers handling large traffic volumes
NetScaler VPX Virtual appliance suited for flexible cloud environments or on-prem deployments
NetScaler SDX Multi-tenant hardware platform allowing multiple NetScaler instances on one appliance
NetScaler CPX Lightweight version designed for containerized environments and microservices
NetScaler ADC Core application delivery controller platform that powers NetScaler services


How Does NetScaler Enable Secure Remote Access to Applications?

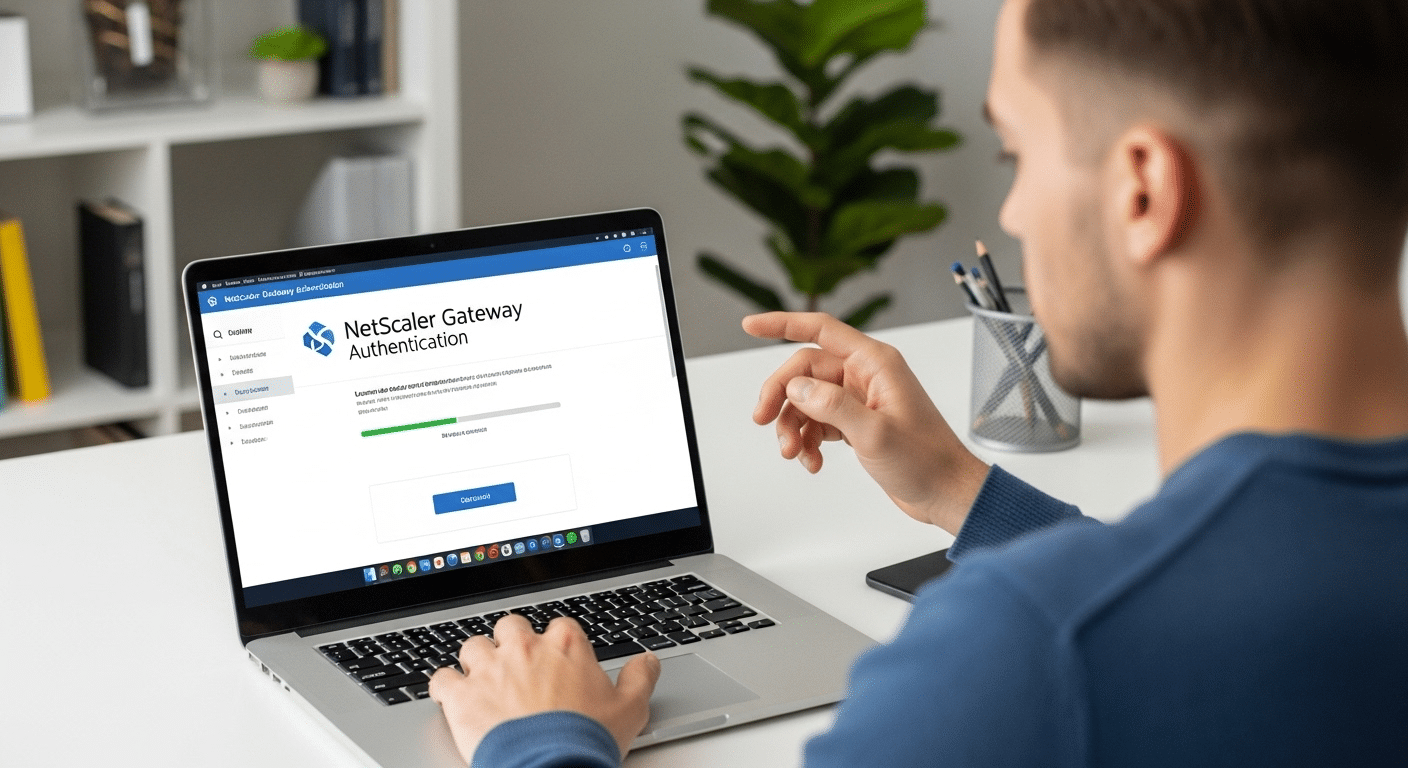
Remote worker launching a virtual application through a secure portal powered by NetScaler Gateway authentication.

Remote work changed the expectations around application access. Employees connect from homes, shared workspaces, airports, practically anywhere with an internet signal. That flexibility is useful, but it also introduces risk. Systems must verify who is connecting and ensure that internal resources remain protected. This is where NetScaler Gateway becomes important.

NetScaler Gateway acts as a secure entry point for remote access. Instead of exposing internal systems directly to the internet, it creates a controlled layer where users must authenticate before reaching any applications.

Once credentials are verified, the system establishes a secure connection and allows access only to the services the user is authorized to use.

For organizations running Citrix Virtual Apps, this gateway plays an essential role. Users connect through a portal, launch applications remotely, and interact with them as if they were installed locally. Behind the scenes, the application itself continues running inside the company infrastructure.

This architecture also improves visibility and control. Administrators can track each user session, apply authentication policies, and limit which applications a user can reach.

The result is flexible access from almost any device, while still protecting sensitive internal applications from unauthorized exposure.


How Does Global Server Load Balancing Improve Availability?

Applications rarely live in just one location anymore. Many organizations run services across multiple data centers or cloud regions. The reason is simple, resilience. If one system fails, another can take over. This is where Global Server Load Balancing plays an important role.

Global server load balancing, often called GSLB, directs users to the most appropriate application server based on factors like location, performance, and system availability. When someone opens an application, the system automatically routes the request to the nearest or healthiest data center. That decision happens quickly, almost instantly.

This approach supports high availability in a meaningful way. If a primary site becomes unavailable, traffic can be redirected to another operational location without interrupting user access. Applications remain reachable, even during infrastructure failures.

Organizations rely on this capability to maintain business continuity. By distributing traffic across multiple locations and intelligently rerouting requests when issues occur, NetScaler helps prevent outages and significantly reduces the risk of unplanned downtime.


Citrix NetScaler vs Other Application Delivery Controllers

Not every application delivery controller offers the same level of performance or security. While many platforms function as a basic load balancer, Citrix NetScaler ADC goes further by combining advanced traffic management, application security, and flexible deployment models into one system.

Traditional ADC platforms typically focus on distributing traffic between servers. NetScaler still performs that role, but it layers additional capabilities on top, helping maintain strong application availability, protect applications from threats, and support modern cloud architectures.

The comparison below highlights the differences.

Feature Citrix NetScaler Typical ADC
Load Balancing Advanced multi-layer traffic management that distributes application requests intelligently Standard load balancing across servers
Security Integrated web application firewall and API protection capabilities Basic security tools with limited application protection
Deployment Flexible deployment across cloud, on-prem, and containerized environments Limited deployment options depending on infrastructure
Performance High performance application acceleration and optimization Standard optimization focused primarily on traffic routing


How Modern Cloud Desktop Platforms Simplify Secure Application Access?

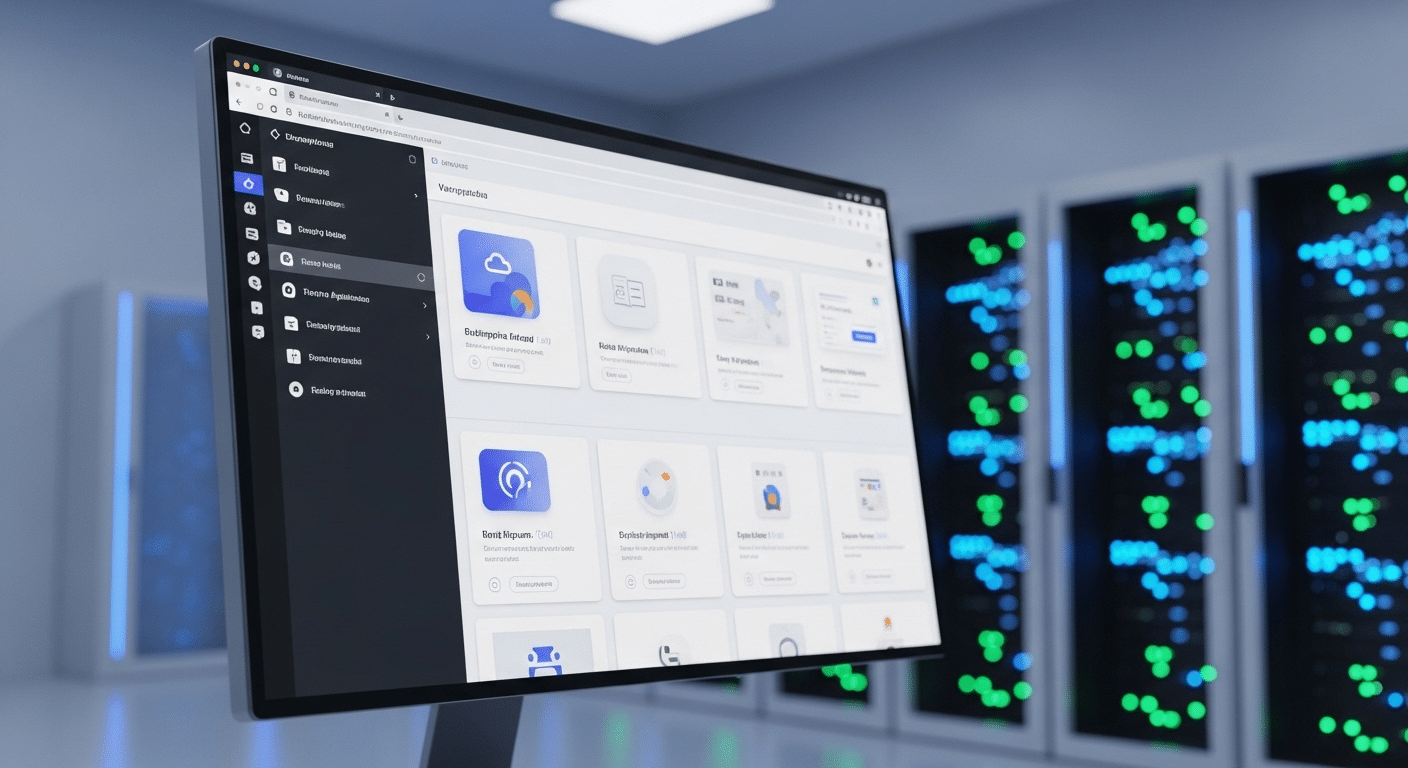
Modern cloud workspace interface running enterprise apps inside a browser with simplified infrastructure in the background.

Infrastructure has grown more complicated over the years. Application gateways, load balancers, remote access tools, security layers, monitoring systems.

Each piece serves a purpose, yet together they can form a fairly heavy stack to manage. Because of this, many organizations have begun exploring simpler ways to deliver applications.

One direction gaining attention involves cloud-native application delivery combined with browser-based workspaces. Instead of routing traffic through several networking layers and maintaining specialized hardware, applications run in secure cloud environments while users access them directly through a web browser.

The benefits are straightforward. Infrastructure complexity drops, because fewer components are required to maintain application availability. Scaling becomes easier as well, cloud platforms expand resources automatically when demand increases.

And perhaps most importantly, application access becomes simpler for users. Log in through a browser, open the workspace, launch the application. No complicated client software, no complex network configuration, just a streamlined path to the tools people need.


Why Apporto Offers a Simpler Approach to Secure Application Access?

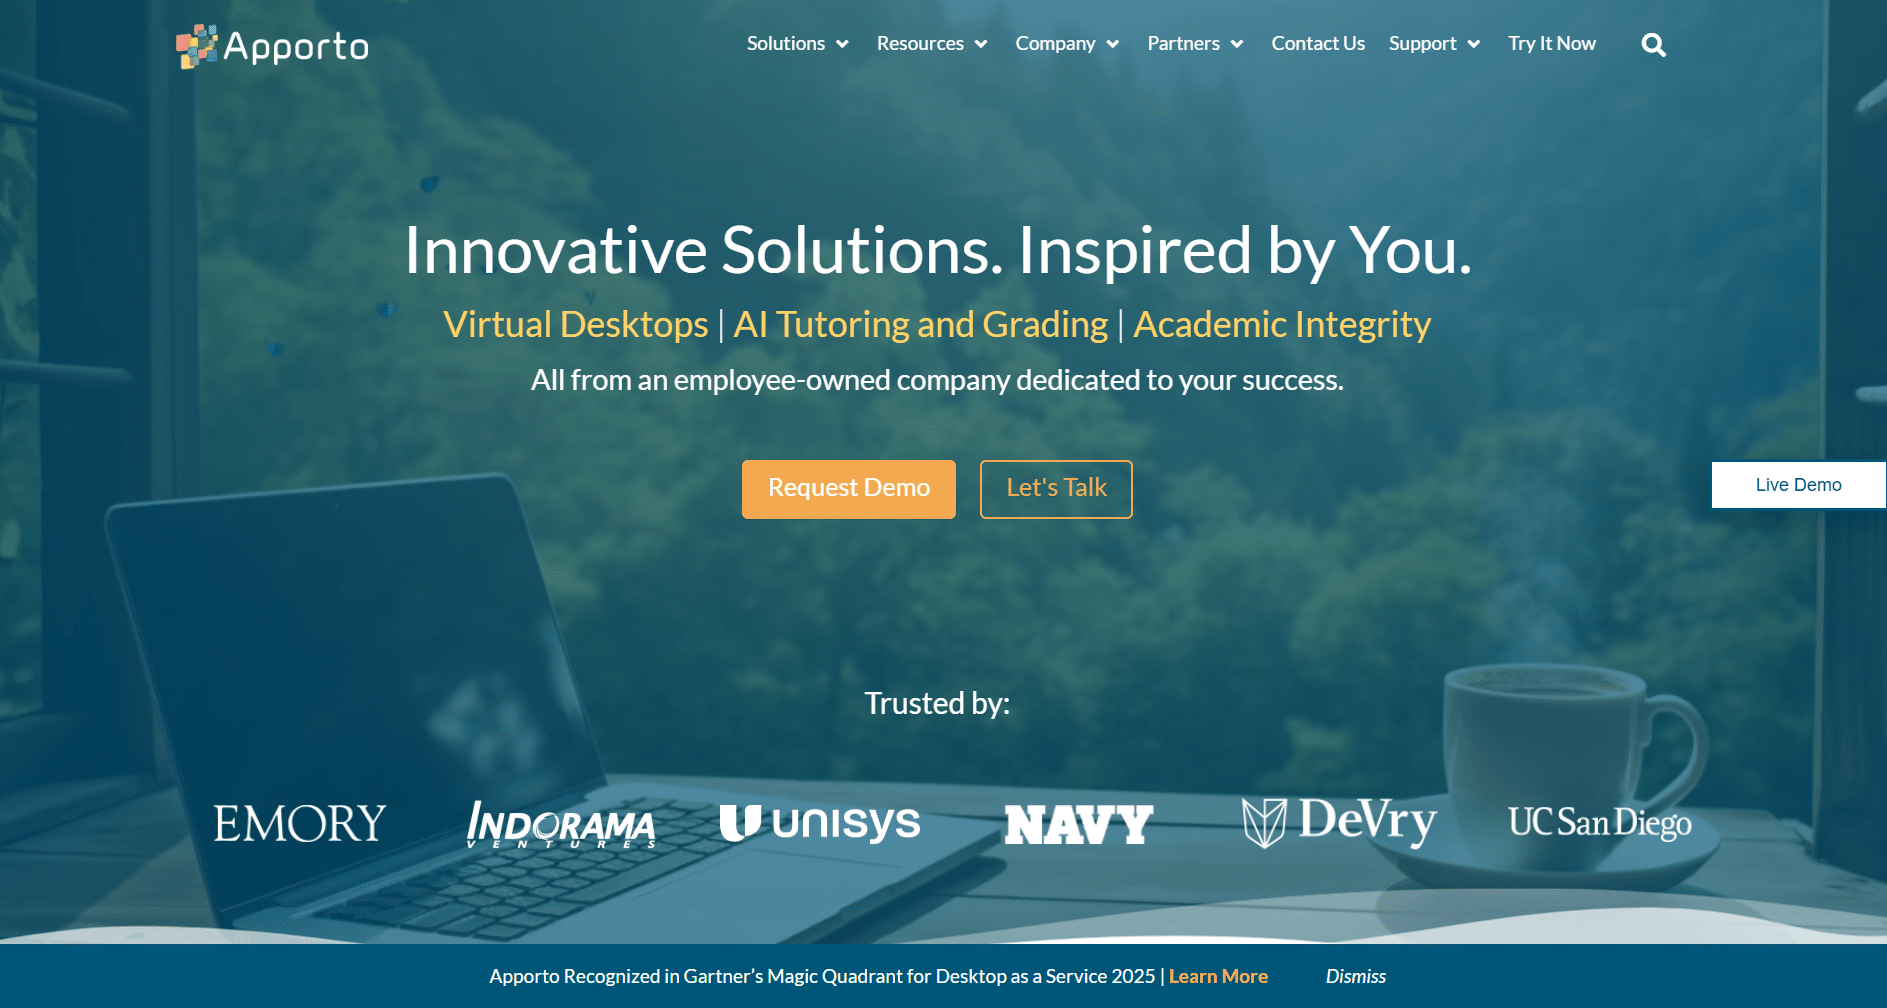
Homepage of Apporto highlighting virtual desktops, AI tutoring and grading solutions, and academic integrity services trusted by universities and organizations.

As application infrastructure grows more complex, many organizations start looking for simpler ways to deliver secure work environments. This is where platforms like Apporto come into play. Instead of relying on multiple networking layers, hardware appliances, or complicated remote access tools, Apporto focuses on browser-based virtual desktops.

With browser-based access, users simply open a web browser and launch their desktop environment. No client installation, no VPN configuration, and no specialized networking setup required. Applications remain centralized in secure cloud environments, which helps protect sensitive systems while keeping user access simple.

This design also reduces infrastructure overhead. IT teams can manage applications and permissions through centralized authentication while maintaining secure application delivery. The result is streamlined access for users and far less complexity behind the scenes.


Final Thoughts

At its core, Citrix NetScaler is an application delivery controller designed to help organizations keep their applications fast, available, and protected. By managing application traffic, balancing requests across servers, and applying strong security controls, NetScaler improves performance, reliability, and overall system resilience.

This combination of traffic management and security is one reason the platform is widely used in enterprise environments. Large organizations often rely on NetScaler to support critical systems running across data centers, hybrid deployments, and multi-cloud infrastructure. The platform helps maintain consistent access to applications even as demand grows.

At the same time, technology continues to evolve. Many organizations now explore cloud-native platforms and browser-based environments that can simplify infrastructure while still delivering secure application access.


Frequently Asked Questions (FAQs)


1. What is Citrix NetScaler used for?

Citrix NetScaler is used to manage and optimize application delivery across networks and cloud environments. It helps balance traffic, improve application performance, secure applications from threats, and maintain high availability. Organizations also use NetScaler to support secure remote access for users and distributed application infrastructure.

2. Is Citrix NetScaler a load balancer?

Yes, NetScaler functions as a load balancer, but it does much more than basic traffic distribution. In addition to balancing requests across multiple servers, NetScaler includes security features, application optimization tools, and monitoring capabilities that improve both application availability and system performance.

3. What is the difference between NetScaler and a web application firewall?

A web application firewall focuses mainly on security, filtering traffic to block attacks like SQL injection or cross site scripting. NetScaler includes WAF functionality but also manages application traffic, improves performance, and ensures application availability across multiple servers and environments.

4. How does NetScaler improve application performance?

NetScaler improves performance by optimizing how data travels between users and servers. Features such as data compression, caching, SSL offloading, and intelligent traffic routing help reduce response times and maintain stable application performance during periods of heavy traffic.

5. Can NetScaler run in cloud environments?

Yes, NetScaler supports deployments in cloud environments as well as on premises infrastructure. Organizations can run virtual NetScaler instances in public clouds, private data centers, or hybrid setups while maintaining consistent application delivery and security policies.

6. What is NetScaler Gateway used for?

NetScaler Gateway provides secure remote access to applications and desktops. It authenticates users, establishes secure connections, and allows employees to reach internal systems from remote locations while maintaining control over application access and user sessions.

7. Is NetScaler still used today?

Yes, NetScaler continues to be widely used in enterprise environments. Many organizations rely on it to manage application delivery, maintain performance, and protect applications. Its flexibility across on premises, hybrid, and cloud deployments keeps it relevant for modern infrastructure.

VirtualBox vs VMware: Which is Better?

Quick Answer

What Is the Difference Between VirtualBox and VMware?

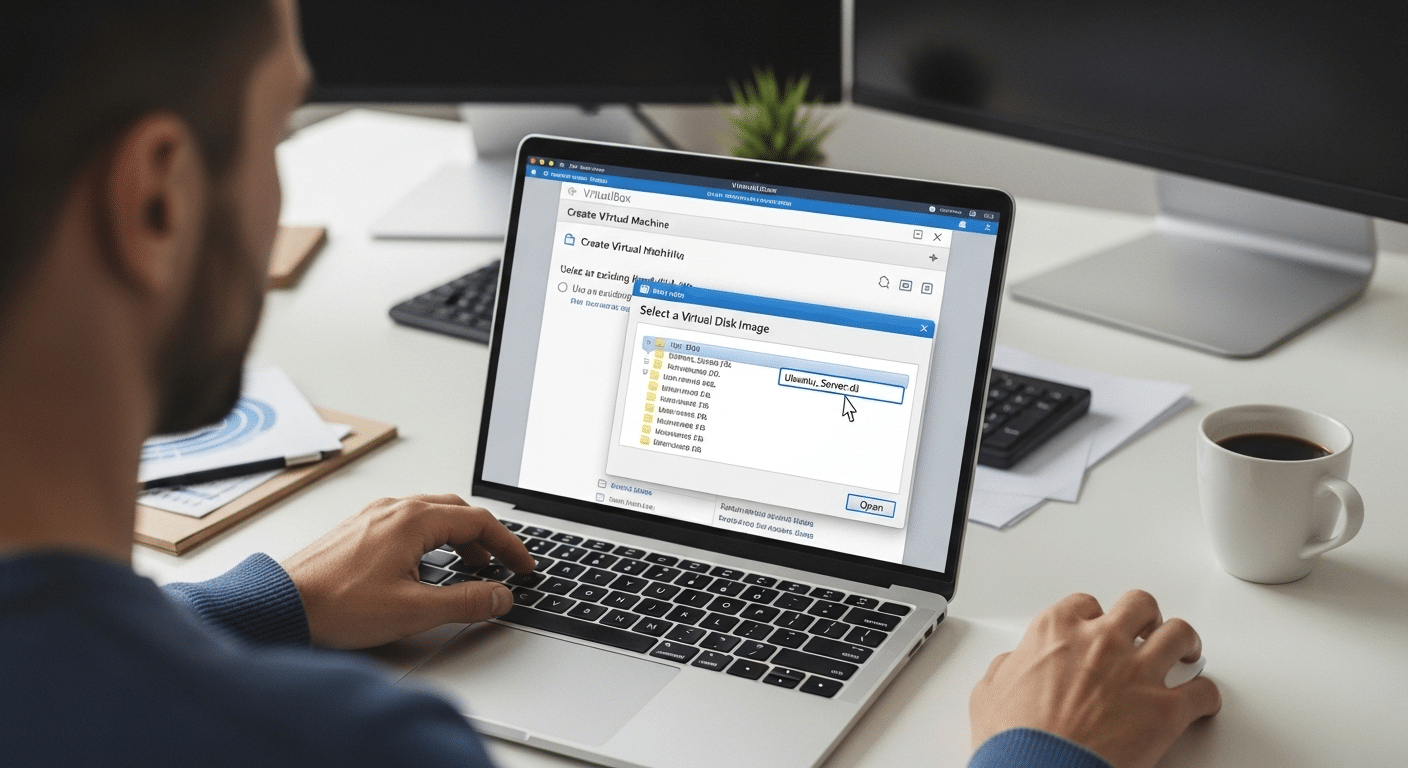
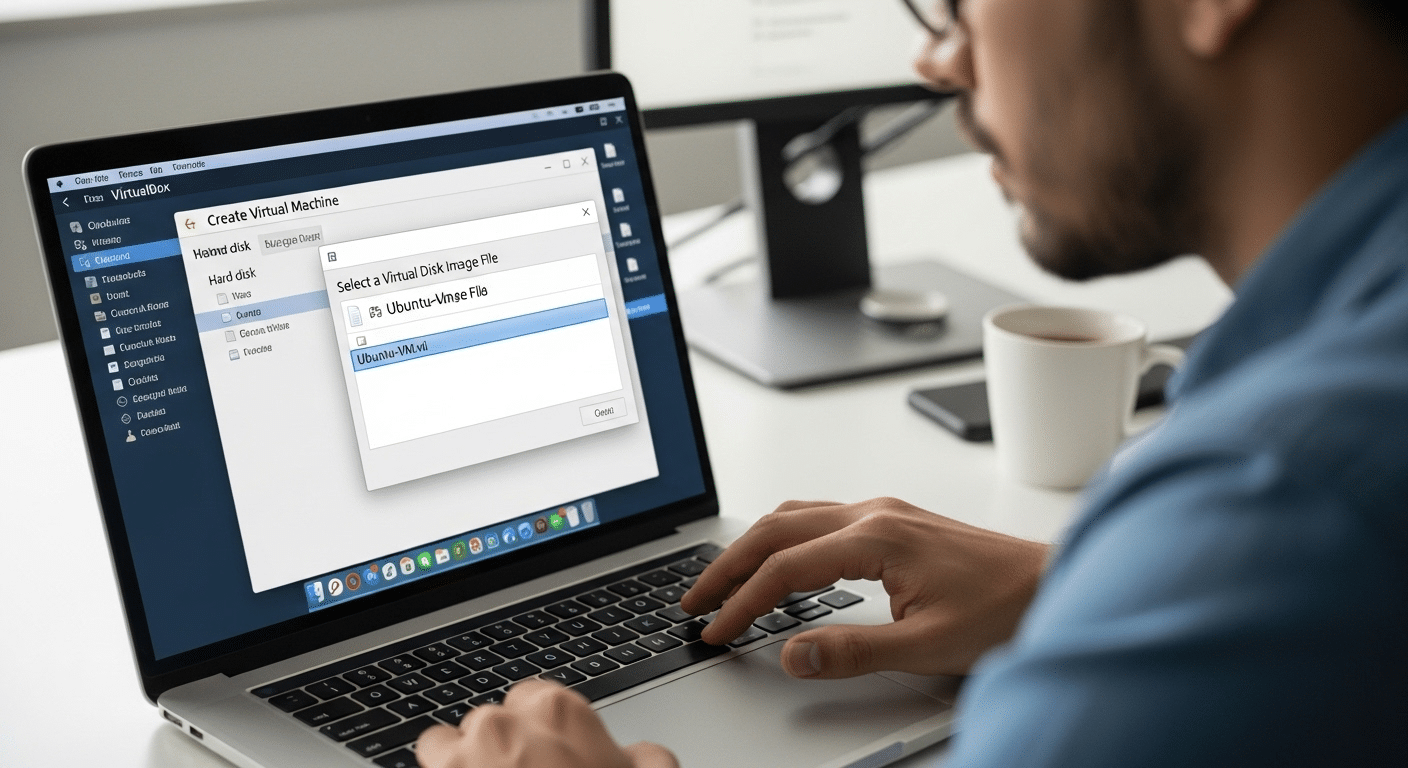
VirtualBox and VMware are virtualization tools that let you run multiple operating systems on one machine. VirtualBox is free and flexible, while VMware offers better performance and enterprise features. For simpler access without local setup, platforms like Apporto provide browser-based virtual environments.

At some point, you need more than one system on the same computer. Maybe for development, maybe for testing, maybe just to try something without breaking your main setup. That’s where a virtualization platform comes in.

Tools like VirtualBox and VMware Workstation let you run multiple operating systems on a single physical machine. Your main system becomes the host OS, while each virtual machine runs its own guest OS, isolated but fully functional.

This matters more than it seems. Developers, testers, enterprises, even small businesses rely on it daily.

In this guide, you’ll explore virtualbox vs vmware across performance, cost, scalability, and real-world use cases, so you can decide what actually fits your setup.


What Is Oracle VirtualBox and How Does It Work Across Different Operating Systems?

Oracle VirtualBox is an open source virtualization platform that lets you run separate systems inside your existing one. It works as a Type 2 hypervisor, which simply means it runs on top of your host OS, not directly on hardware. So your Windows hosts, Linux hosts, macOS, even Solaris setups can all run additional operating systems without needing another computer.

Inside that environment, you create virtual machines. Each one gets its own guest OS, maybe Ubuntu for development, Windows XP for legacy testing, or FreeBSD if you’re experimenting. It’s flexible. Sometimes surprisingly so.

Here’s how it different from others:

  • Open Source Nature: VirtualBox is maintained by Oracle and benefits from constant community-driven improvements and feedback.
  • Broad OS Compatibility: It supports Windows, Linux, macOS, Solaris, and a wide range of legacy systems for testing environments.
  • Flexible VM Management: You can run multiple VMs on a single physical machine with fine control over settings.
  • Command Line Interface: Advanced users can automate workflows using scripting and CLI tools.
  • Cost Effective: It’s completely free, no licensing layers, no hidden upgrades.

It also handles different disk formats, supports snapshots for rollback, and integrates well with tools like Vagrant and Docker. Not perfect, but adaptable in ways that matter.


What Is VMware Workstation Pro and Player and How Do They Compare as Enterprise Virtualization Tools?

Professional workstation running VMware Workstation Pro with multiple high-performance virtual machines and system monitoring dashboards.

At some point, VirtualBox starts to feel a bit… loose. Flexible, yes. But not always tight where it matters. That’s usually where VMware enters the picture.

VMware Workstation Pro and VMware Workstation Player are part of a more structured ecosystem. Still a Type 2 hypervisor, so it runs on your existing system, but built with a stronger focus on enterprise virtualization and stability under pressure.

There’s also a broader context here. VMware ESXi, often mentioned alongside it, is a Type 1 hypervisor that runs directly on hardware. Different layer, different use case, but it hints at where VMware is positioned overall.

Here’s what defines it:

  • High Performance Virtualization: VMware uses hardware-assisted virtualization and optimized CPU handling to deliver consistently better performance in demanding environments.
  • Enterprise Virtualization Platform: It’s designed for developers, IT teams, and businesses that need scalability and reliability.
  • Advanced Features: Includes networking controls, backup integration, snapshots, and deeper system integration.
  • User Experience: The interface feels more polished, with fewer rough edges during setup and operation.
  • Licensing Model: Some versions are free, but advanced features are often tied to a paid license, though recent changes have relaxed that in certain cases.

It also supports DirectX 11 and OpenGL 4.3, which improves graphics handling. Faster, smoother, more predictable, especially when workloads get heavier.


What Are the Differences Between VirtualBox and VMware?

Both tools seem to do the same thing. Run virtual machines, isolate environments, let you experiment without breaking your main system. But once you start comparing them closely, the differences become harder to ignore.

VirtualBox vs VMware Comparison 

Feature VirtualBox VMware
Cost Free, open source Free + paid license
Performance Good, better memory management High performance, faster speed
OS Support Wide (Windows, Linux, Solaris) Wide but optimized
Features Flexible, manual control Advanced, enterprise-ready
Integration Limited Seamless integration
Scalability Moderate High scalability
UI Basic Polished


VirtualBox leans toward flexibility. It gives you control, sometimes a bit too much, over how your virtualization software behaves. You can tweak settings, experiment with configurations, and run a wide range of environments without worrying about cost. It feels open, adaptable, occasionally rough around the edges.

VMware, on the other hand, feels more structured. Its features, performance tuning, and system integration are designed for stability and scale. You get fewer surprises. Better consistency. And usually, stronger performance when workloads grow. In simple terms, VirtualBox prioritizes freedom. VMware prioritizes refinement and scalability.


Which Platform Delivers Better Performance, Speed, and Resource Management?

Developer stress-testing virtual machines with performance graphs highlighting speed vs resource balance.

Start a VM on both platforms and the difference shows up in small ways, boot time, responsiveness, how quickly the system reacts when you push it. VMware Workstation Pro tends to load faster and run smoother, especially when the workload gets heavier. It leans more on hardware-assisted virtualization, which means your CPU does more of the heavy lifting.

Oracle VirtualBox, on the other hand, handles memory in a surprisingly efficient way. When you’re running multiple environments on the same machine, that balance starts to matter more than raw speed.

Here’s how it breaks down:

  • VMware Speed Advantage: Optimized for high performance workloads, with better CPU utilization and faster execution under pressure.
  • VirtualBox Memory Efficiency: Handles multiple VMs more gracefully in multi-platform setups, especially when resources are limited.
  • Graphics Capability: VMware supports advanced 3D acceleration, improving rendering and visual responsiveness.

So the tradeoff becomes clear. VMware leans toward speed and consistency. VirtualBox leans toward flexibility and resource balance. It depends on what your setup demands.


How Do Features Like Snapshots, USB Support, and Integration Compare?

Once you move past basic setup, features start to matter more than you expect. Not the flashy ones. The practical ones you rely on every day, rollback, device access, smooth interaction between systems.

Here’s where the differences become clearer:

  • Snapshot Management: VirtualBox gives you more freedom with snapshots, making it easier to save states and roll back during testing environments. It feels flexible, almost experimental at times.

  • USB Support: Both platforms offer solid USB support, allowing you to connect external devices across host and guest systems without much friction.
  • Automation Tools: VirtualBox integrates well with development tools like Vagrant and Docker, which makes it a strong option for automated workflows and repeatable environments.

  • Enterprise Integration: VMware stands out when it comes to integration, especially in enterprise setups involving backup systems, networking layers, and larger infrastructure.
  • Seamless Experience: VMware delivers a more consistent host-guest interaction, fewer hiccups, smoother transitions, better overall stability.

So again, it splits along familiar lines. VirtualBox gives you flexibility and control. VMware gives you structure and reliability, especially when systems need to work together without friction.


Which One Is Better for Beginners vs Advanced Users?

Modern workspace with entry-level user running a basic VM and expert user managing complex virtual environments.

This usually comes down to how much control you actually want. Or maybe how much complexity you’re willing to tolerate.

For most beginners, Oracle VirtualBox feels easier to start with. The setup is straightforward, the interface is simple enough, and you can get a virtual machine running without digging too deep into configuration. It doesn’t ask much upfront.

VMware takes a different approach. VMware Workstation Pro offers a more polished interface, but underneath that, there’s more structure, more settings, more decisions to make. It can feel a bit heavy at first, especially if you’re not familiar with virtualization concepts.

For advanced users, though, that complexity becomes useful. You get finer control, better integration, and more predictable behavior in larger environments. VirtualBox leans toward simplicity and flexibility. VMware leans toward depth and control.

 

How Do Pricing, Licensing, and Cost Compare Over Time?

Cost looks simple at first. Then you start digging into licensing, features, and long-term usage, and it gets a bit less obvious.

Here’s how it breaks down:

  • VirtualBox Free Model: VirtualBox is completely free for all users, including businesses. No tiers, no feature restrictions, no upgrade path you’re forced into later. It stays predictable over time.
  • VMware Licensing: VMware offers both free and paid license options. Basic usage may not cost anything, but advanced features often sit behind licensing layers.
  • Recent Licensing Changes: VMware Workstation Pro becoming free in certain cases has changed how some users approach adoption, though not all enterprise features are included.
  • Cost for Small Businesses: For small businesses, VirtualBox tends to be more cost effective, especially when scaling across multiple machines or environments.
 

What Are the Best Use Cases for VirtualBox vs VMware in Real Environments?

"High-performance computing setup with VMware handling heavy workloads like large builds and data processing.

Once you move past features and pricing, the real question becomes simpler. Where does each tool actually fit in everyday work?

Here’s are some use cases:

  • Development and Testing Environments: VirtualBox works well for developers building flexible testing environments, especially when you need quick setup and frequent changes.
  • Enterprise Virtualization: VMware is better suited for production systems where stability, scalability, and structured enterprise virtualization matter more than flexibility.
  • Running Multiple Operating Systems: VirtualBox handles diverse systems easily, including older or niche operating systems that still show up in real workflows.
  • High Performance Workloads: VMware performs better when workloads get heavy, large applications, complex builds, or anything resource-intensive.
  • Students and Learning: VirtualBox is often the first choice for users learning virtualization, mostly because it’s free and easy to experiment with.
  • Backup and Integration: VMware integrates more smoothly with enterprise tools, making backup, networking, and system coordination easier at scale.

So the pattern repeats. VirtualBox adapts. VMware stabilizes. The right choice depends on what your environment demands.


What Limitations Should You Expect from VirtualBox and VMware?

No tool is without friction. It just shows up in different places depending on what you’re trying to do.

Here’s are some limitations:

  1. VirtualBox Limitations: Performance can drop in high-demand environments, especially when multiple virtual machines compete for resources. It also lacks deeper enterprise integration.
  2. VMware Limitations: Licensing can become complicated, and some advanced features still depend on a paid model, which adds layers over time.
  3. Hardware Dependency: VMware relies more heavily on hardware-assisted virtualization, so your machine’s capabilities directly affect performance.
  4. Configuration Complexity: VirtualBox often requires manual tuning to reach optimal performance, which can slow things down for less experienced users.

None of these issues are immediate deal breakers. But over time, they shape how reliable, or frustrating, your setup feels.


Why Traditional Virtualization Software Can Feel Heavy for Modern Workflows?

Frustrated developer facing slow performance while managing several local virtual machines on one device.

At first, it feels manageable. Install the software, create a virtual machine, get to work. Simple enough. Then the layers start to build.

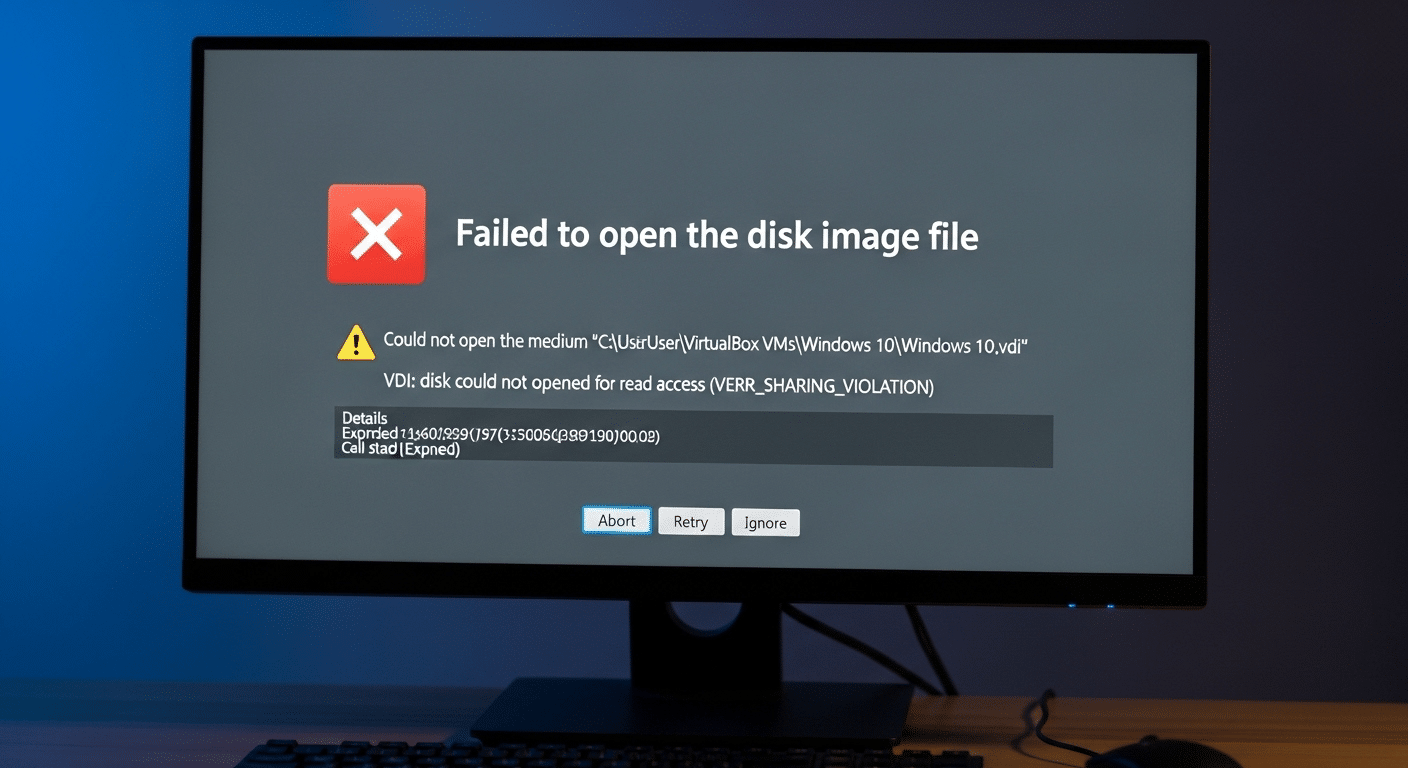
There’s installation complexity, small steps that don’t seem important until something breaks. Then resource usage creeps in. Your system is suddenly running multiple environments, each pulling from the same CPU, the same memory, the same storage. It adds up quietly.

Everything depends on your local machine. That’s the part that rarely gets questioned. If your hardware struggles, everything slows with it. No buffer. No fallback.

Scaling makes it more noticeable. Adding new environments isn’t just a click, it’s more setup, more configuration, more time. None of this is dramatic. It just accumulates. And over time, that weight becomes harder to ignore.


Why Browser-Based Virtual Desktops Are Replacing Local Virtual Machines?

You open a browser, sign in, and your desktops are already there. No installer. No configuration screens. Just immediate access to a ready-made environment that doesn’t depend on your local system.

Because everything runs in the cloud, your device stops being the bottleneck. You’re not managing CPU limits or memory allocation anymore. The heavy work happens elsewhere, quietly, out of sight.

It also scales differently. Need another workspace? You don’t build it from scratch. You simply access it. Faster setup, fewer steps, less friction.

It’s not perfect, of course. Network quality still matters. But the overall experience feels lighter, more predictable.

And once that simplicity becomes normal, going back to local virtual machines starts to feel unnecessarily complicated.


Why Apporto Is a Simpler Alternative to VirtualBox and VMware?

Apporto homepage showcasing virtual desktop solutions with call-to-action buttons and trusted partner logos.

At some point, the question changes. It’s no longer just virtualbox vs vmware. It becomes, do you really need to manage all this locally?

Apporto approaches it differently. Everything runs through the browser. No installation, no setup loops, no dependency on your machine’s hardware. You open a tab, log in, and your virtual desktops are ready.

Because it’s fully browser-based, the complexity stays behind the scenes. You don’t deal with version mismatches or system configuration. You simply get access to a clean, controlled environment that works across devices.


Final Thoughts

VirtualBox gives you flexibility. It’s free, adaptable, and easy to experiment with. VMware leans toward performance, structure, and enterprise-level reliability. Both work, just in different ways.

The decision depends on your requirements. Simple testing setups, learning, smaller environments, VirtualBox fits naturally. Larger systems, heavier workloads, VMware starts to make more sense.

But there’s a third direction quietly emerging. One that removes local complexity altogether. And once you experience that, the comparison starts to feel a little different.


Frequently Asked Questions (FAQs)


1. Is VirtualBox better than VMware for beginners?

In most cases, yes. VirtualBox feels easier to start with, simpler setup, fewer barriers, and completely free. You install it, create a VM, and you’re running. VMware is more structured, but that structure can feel heavier early on.

2. Which is faster, VirtualBox or VMware?

VMware is generally faster, especially under heavier workloads. It uses hardware-assisted virtualization more effectively, which improves performance. VirtualBox is slightly slower in execution, but it often manages memory better when running multiple virtual machines.

3. Can VirtualBox run multiple operating systems on one machine?

Yes, that’s exactly what it’s designed for. VirtualBox lets you run multiple operating systems simultaneously on a single machine, each inside its own isolated virtual environment, without affecting your main system.

4. Is VMware free or does it require a paid license?

VMware offers both free and paid versions. Basic use may be free, especially after recent changes, but advanced features and enterprise capabilities are often tied to a paid license, depending on your setup and requirements.

5. Which platform is better for enterprise virtualization?

VMware is typically the better choice for enterprise virtualization. It offers stronger performance, better integration, and more advanced features suited for large-scale environments where stability and scalability matter.

6. Does VirtualBox support Linux, Windows, and Solaris?

Yes, VirtualBox supports a wide range of operating systems, including Linux, Windows, and Solaris, along with older systems like XP or FreeBSD, making it a flexible option for testing and development environments.

Can Citrix Run on Mac? How to Run It?

At first glance, it seems straightforward. You have a Mac, a clean system, fast, reliable, built for everyday work. Then the question comes up, can citrix run on mac without adding friction?

It can. But the experience depends on more than just your device.

Platforms like Citrix Workspace bring enterprise desktops and apps into macOS through remote access. That means your Mac becomes a window into another environment, one managed somewhere else, often with layers of infrastructure behind it.

In this guide, you’ll see how it works, what affects performance, and where simpler alternatives might offer a cleaner path forward.


Can Citrix Run on a Mac?

Yes, Citrix can run on a Mac. In most cases, it runs quite well. You access it through the Citrix Workspace app for Mac, which is the standard client designed for macOS.

There’s also the option to connect through a browser like Safari, Chrome, or Firefox, depending on how your organization has set things up. Both paths lead to the same place, your remote desktop.

Compatibility matters, though. Newer macOS versions like Ventura and Sonoma are fully supported, while older versions tend to fall behind over time. Hardware plays a role too. Apple Silicon Macs often handle performance more efficiently than older Intel machines.

Still, the experience depends on configuration, network quality, and how well everything lines up behind the scenes.


How Does Citrix Workspace Work on macOS Devices?

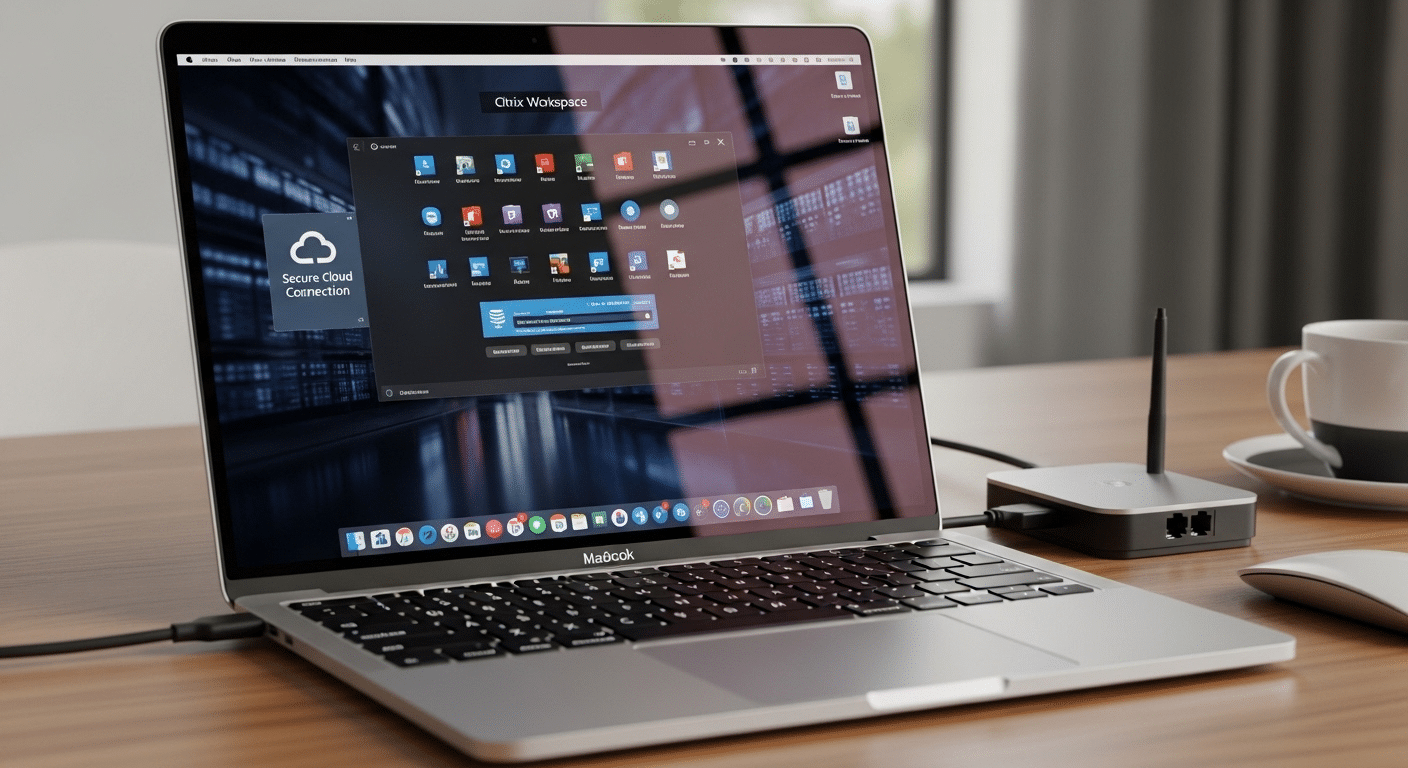
MacBook connected to Citrix Workspace showing remote desktop streamed from a secure cloud server.

Once you get past the setup, the way Citrix works on macOS is actually quite straightforward. Your Mac isn’t running the applications in the traditional sense. It’s acting more like a window, a clean interface that connects you to something running somewhere else.

Through Citrix Workspace, you’re given remote access to virtual desktops hosted on a centralized server. That server could sit in a data center or cloud environment, managed by your organization. Tools like Citrix Gateway or Secure Web Gateway handle the connection, making sure your session reaches the right place securely.


How Do You Install Citrix Workspace App on a Mac?

Getting Citrix running on a Mac is fairly straightforward. Still, a couple of steps can trip you up if you’re not paying attention. The process itself is simple, but it relies on having the right details from your organization, especially the account setup.

You begin with the download, and from there, it’s mostly guided.

  1. Download the App: Visit the Citrix website and start the free download for the workspace app for Mac. Make sure you’re getting the latest version.
  2. Locate the DMG File: Open your download folder, find the DMG file, and double-click it to begin the install software process.
  3. Click Continue: Follow the on-screen prompts and move through the setup steps as they appear.
  4. Accept License Agreement: Click agree to the end user license agreement so the installation can proceed.
  5. Install to Applications Folder: By default, the app installs into your Applications directory on macOS.
  6. Add Account: Use the add account option and enter your email or server address provided by your organization.
  7. Login with Credentials: Enter your username, password, and domain if required to access your workspace.

A few small things to note. You may be prompted for your system password during installation. Some versions also request accessibility permissions, which need to be enabled for full functionality. Newer releases may automatically install the EPA plugin, and in some cases, offer an optional Enterprise Browser during setup.


What Can You Do with Citrix on a Mac?

User working on macOS while accessing remote enterprise applications through Citrix Workspace interface.

Once you’re inside the session, things start to feel familiar. Almost surprisingly so. Your Mac becomes a kind of bridge, not the place where work happens, but where it shows up.

Through Citrix Workspace, you can access full Windows-based environments. That includes tools like Microsoft Office or Adobe apps, all running remotely but appearing on your screen as if they’re local. From the apps tab, you can click apps, launch full desktops, or open specific programs depending on how your workspace is configured.
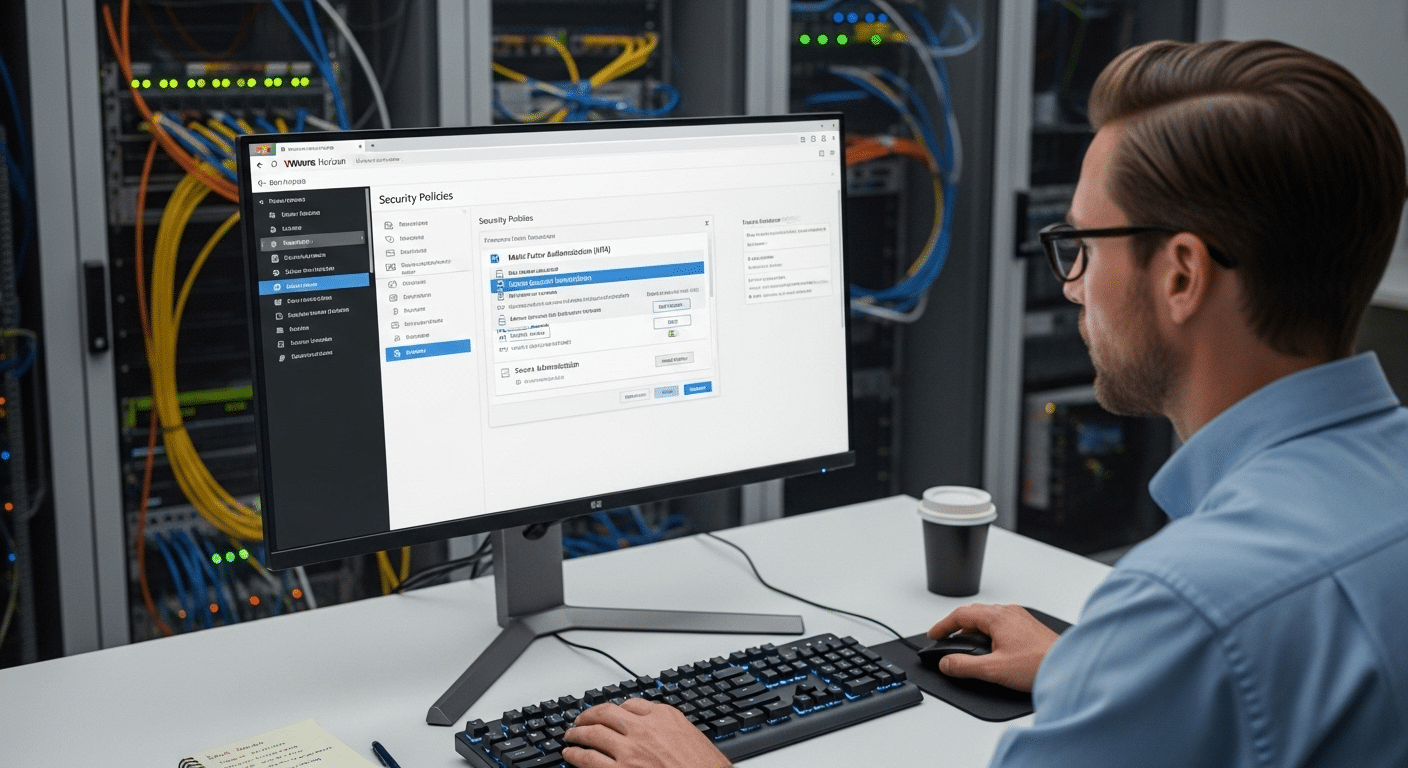
There’s flexibility in how you connect too. You can use the installed app or switch to a browser-based session when needed.

Performance has improved over time. Features like H.264 hardware acceleration make Microsoft Teams calls smoother, especially on newer Macs. Devices powered by Apple Silicon also support enhanced color formats, which helps with visual clarity.

Files move through the session, not always perfectly, but reliably enough. You log in, pick up where you left off, and continue.


What Are the Limitations of Citrix on Mac?

Citrix runs well on Mac in many cases. Still, there are limits, and they tend to show up once you rely on it daily or push it a little harder than usual.

Here are the main constraints to keep in mind:

  • macOS Version Compatibility: Citrix no longer supports macOS versions older than Big Sur, so running an outdated system can lead to immediate compatibility issues.
  • Apple Silicon Differences: Some features behave differently depending on whether your device uses Apple Silicon or Intel processors, which can affect consistency.
  • Performance Variability: Performance depends heavily on network conditions and available system resources, even a small delay can disrupt the experience.
  • Display Configuration Issues: Dual monitor setups require specific settings adjustments, otherwise you may notice lag or rendering problems.
  • Browser Dependency: Certain environments require Chrome or another supported browser for full functionality, especially in web-based sessions.
  • Security Permission Prompts: macOS may ask you to enable accessibility settings after launch, which can interrupt workflow if not configured properly.
  • Version Management Complexity: Keeping both macOS and the Citrix Workspace app updated is necessary, otherwise stability starts to drift.


What Common Issues Do Users Face with Citrix on Mac?

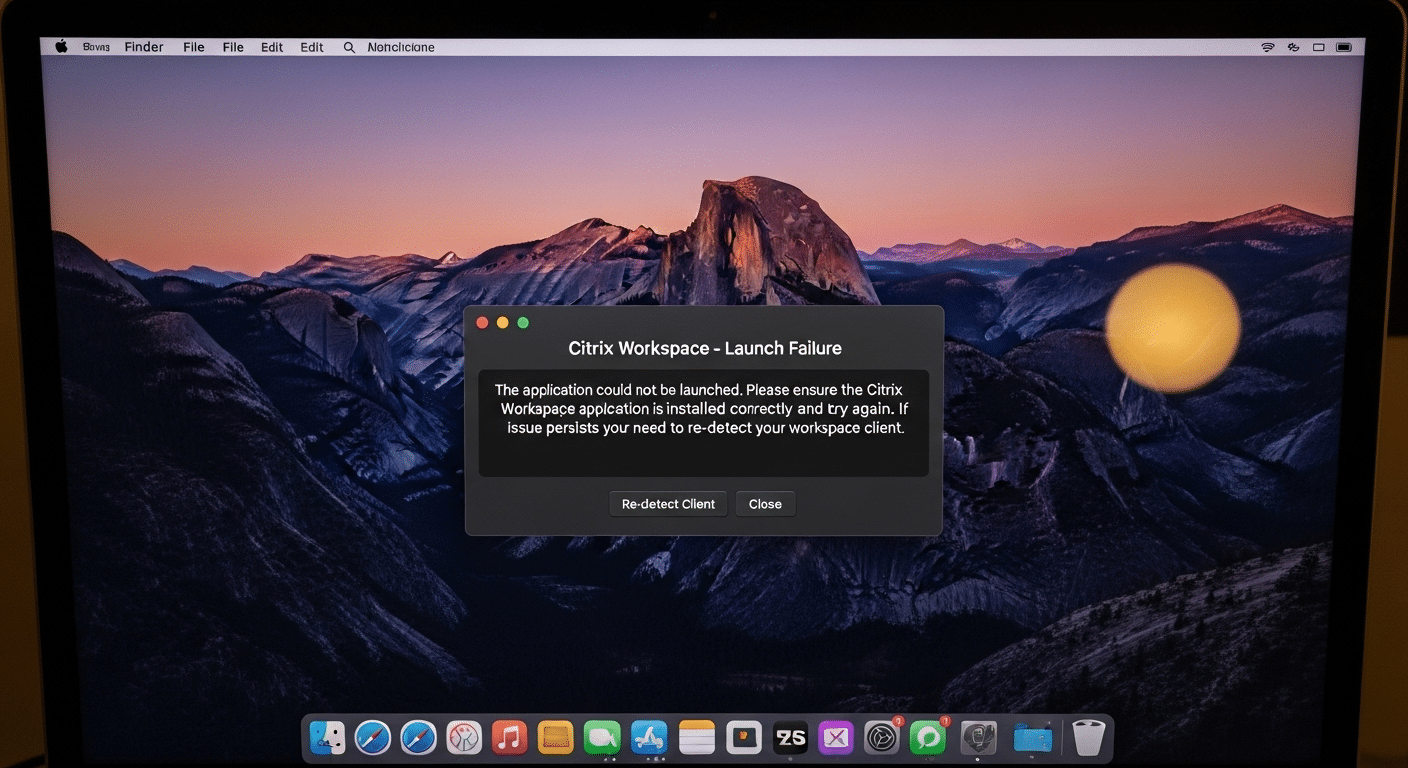
Mac screen showing application launch failure in Citrix with prompt to re-detect workspace client.

Even when everything looks set up correctly, small issues tend to appear over time. Some are minor, almost routine. Others take a bit longer to figure out. Most users run into a similar pattern of problems.

Some common issue:

  • Installation Errors: An incorrect install process or missing permissions in macOS settings can prevent the app from completing setup properly.
  • Login Problems: Issues with your account, domain, or credentials can block access, even when the connection itself is working fine.
  • Application Launch Issues: If apps fail to open, you may need to return to the workspace page and re-detect the client before trying again.
  • Accessibility Prompts: macOS may require manual approval for Citrix to control certain system functions, which can interrupt the session.
  • Uninstall Errors: The app must be completely closed before dragging it to the trash, otherwise the process fails.
  • File Location Confusion: Users often struggle to locate downloaded files or installation folders after setup.


How Can You Improve Citrix Performance on a Mac?

Performance on a Mac isn’t fixed. It improves, sometimes noticeably, with a few practical adjustments. Nothing complex. Just the right tweaks in the right places.

  • Update macOS and Workspace App: Keeping both your macOS and Citrix Workspace app updated ensures better compatibility and avoids issues tied to unsupported versions.
  • Use Low Latency Network: A stable internet connection reduces lag and improves how quickly your session responds to input.
  • Enable Hardware Acceleration: This helps with video calls and graphics-heavy apps, especially on newer machines with better processing capability.
  • Adjust Display Settings: Fine-tuning display settings can reduce rendering issues, particularly when using multiple monitors.
  • Close Background Applications: Freeing up system resources allows your device to focus on the Citrix session instead of competing processes.


Why Browser-Based Virtual Desktops Work Better on Mac?

A Mac already leans heavily on the browser. Open a tab, log in, move on. That pattern feels natural, almost expected. So when virtual desktops follow the same approach, things tend to settle into place more easily.

With browser-based access, you skip the whole install process. No extra software sitting in your Applications folder, no version checks quietly causing problems later. You just navigate to a web page, sign in, and your workspace appears.

There’s also less friction behind the scenes. Since everything runs in the cloud, your device isn’t trying to stay in sync with multiple components. Fewer moving parts, fewer surprises.


Why Apporto Is a Simpler Alternative for Mac Users?

Apporto homepage showcasing virtual desktop solutions with call-to-action buttons and trusted partner logos.

Apporto takes a different route. It’s fully browser-based, which means you don’t install anything, don’t manage updates, don’t worry about whether your version matches what’s running on the other side. You open a tab, log in, and your virtual desktops are ready.

Because it runs through a cloud provider, much of the underlying complexity stays out of sight. No client software conflicts. No layered infrastructure to maintain on your device. Just a cleaner path to secure access.

It feels lighter. More predictable too. And over time, that consistency matters more than you might expect.


Final Thoughts

So, can Citrix run on a Mac? Yes, and in many setups it runs reliably enough to support everyday work. For enterprise environments with established infrastructure, it often fits right in.

But there’s still a layer of complexity that doesn’t quite go away. Configuration, version management, small interruptions that show up when you least expect them. Nothing dramatic, just persistent.

That’s where the decision shifts. If simplicity and consistency matter more, exploring lighter, browser-based options may give you a smoother, more predictable experience over time. Try Apporto.


Frequently Asked Questions (FAQs)


1. Can you install Citrix Workspace on a Mac?

Yes, you can install the Citrix Workspace app on a Mac by downloading it from the official Citrix website. Once installed, you add your account and log in to access desktops and applications.

2. Does Citrix support Apple Silicon Macs?

Yes, Citrix Workspace supports Apple Silicon Macs and generally performs well. Some features may behave slightly differently compared to Intel-based systems, but overall compatibility and performance are stable in most environments.
3. Can you run Windows apps on Mac using Citrix?

Yes, Citrix allows you to run Windows applications on a Mac by connecting to remote desktops. The apps run on a server, while your Mac streams the interface through the Citrix Workspace session.

4. What macOS versions are supported by Citrix Workspace?

Citrix Workspace supports modern macOS versions like Ventura, Sonoma, and newer releases. Older versions, especially those before Big Sur, are no longer supported and may cause compatibility or performance issues.

5. How do you uninstall Citrix Workspace on Mac?

To uninstall Citrix Workspace, first close the app completely. Then go to the Applications folder and drag the app to the trash. If it’s still running, macOS may prevent removal.

6. Can you access Citrix through a browser on Mac?

Yes, you can access Citrix through browsers like Safari, Chrome, or Firefox. This method allows you to connect without installing the app, though some features may be limited depending on configuration.

How to Set Up a Cybersecurity Lab at Home (A Beginner’s Guide)

Quick Answer

How to Set Up a Cybersecurity Lab at Home?

You can set up a cybersecurity lab at home using virtualization software, multiple virtual machines, isolated networking, and security tools like Wireshark or Metasploit. Many learners start with local hardware, while platforms like Apporto offer browser-based virtual labs without heavy hardware requirements.

Reading about cyber security is useful, but the real learning usually happens when systems behave in unexpected ways. Logs fill with strange entries. A network scan reveals something that shouldn’t exist. Those moments, slightly messy and occasionally confusing, are where understanding starts to deepen.

That’s exactly why many security professionals build a cybersecurity home lab. A home lab creates a controlled lab environment where you can test tools, run experiments, and explore attack simulations without putting real systems at risk.

Instead of experimenting on your main computer or personal network, everything happens inside an isolated setup designed specifically for learning.

Working in this kind of environment helps you observe how operating systems respond to attacks, how monitoring tools detect suspicious behavior, and how defensive strategies actually work in practice.

The good news is that building your own home lab project does not require a data center. In most cases, it starts with a single machine, then gradually evolves into a more capable cybersecurity lab over time.

In this blog, you’ll learn how to set up a cybersecurity lab at home step by step, including the hardware, software, tools, and security practices needed to build a safe and effective learning environment.


What Is a Cybersecurity Home Lab and How Does It Work?

A cybersecurity lab is essentially a small, controlled testing ground where you can explore how systems behave under attack, how defenses respond, and how monitoring tools detect unusual activity. Instead of experimenting on real devices or your everyday network, everything happens inside a carefully designed lab environment built for learning.

Most cybersecurity labs rely on virtual machines, which are simulated computers running inside your main system. Each machine behaves like a real device with its own operating system, services, and network behavior. That setup allows you to recreate real security scenarios without risking damage to your personal network.

Inside a lab, you might run one system that acts as the attacker, another that acts as the target, and a third that monitors traffic. The idea is simple. Observe what happens. Break things occasionally. Then fix them.

What a Typical Cybersecurity Lab Contains?

  • Multiple VMs running at the same time
  • Different operating systems for testing environments
  • Various security monitoring tools
  • Simulated attacker and victim machines
  • A controlled personal network

These labs also give you a place to practice with real tools such as Nmap, Wireshark, and Metasploit.


What Hardware Do You Need for a Cybersecurity Home Lab?

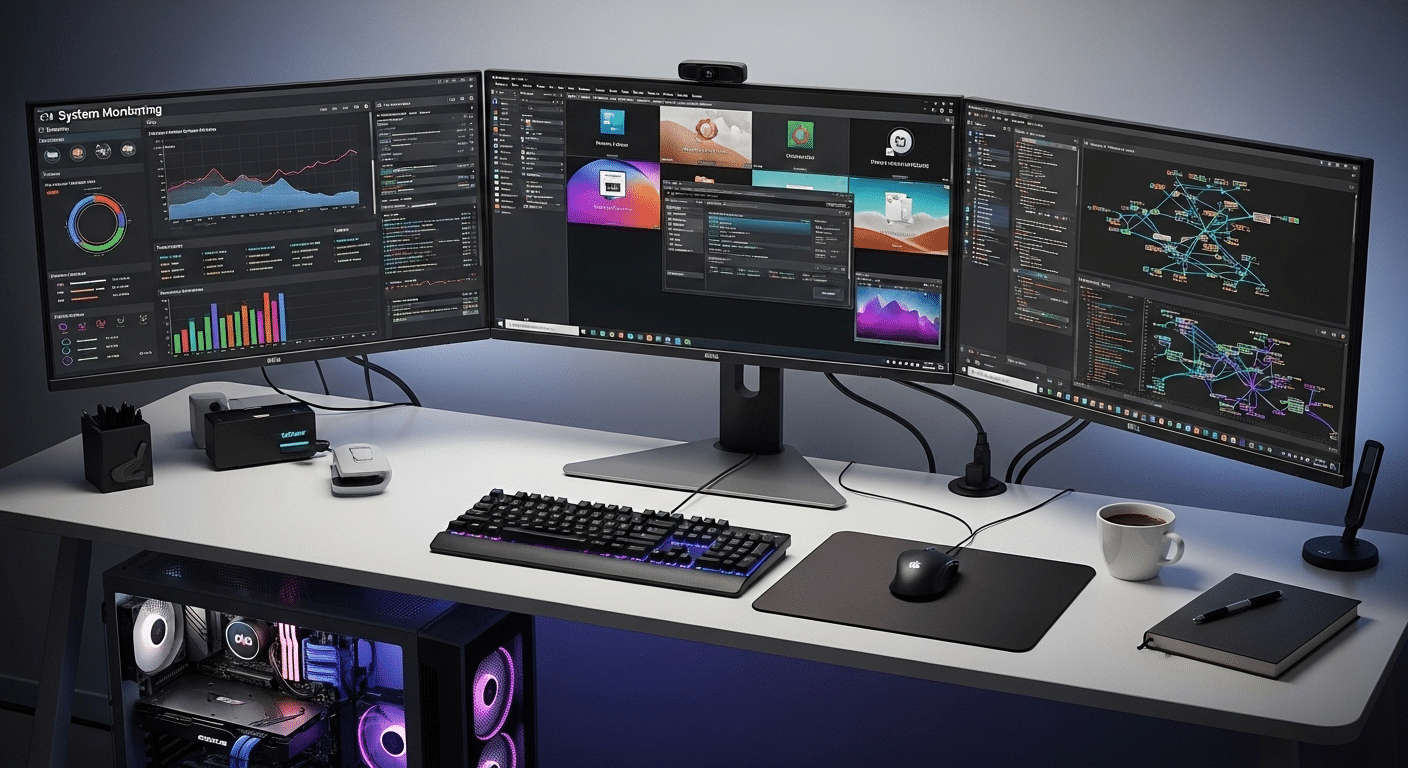
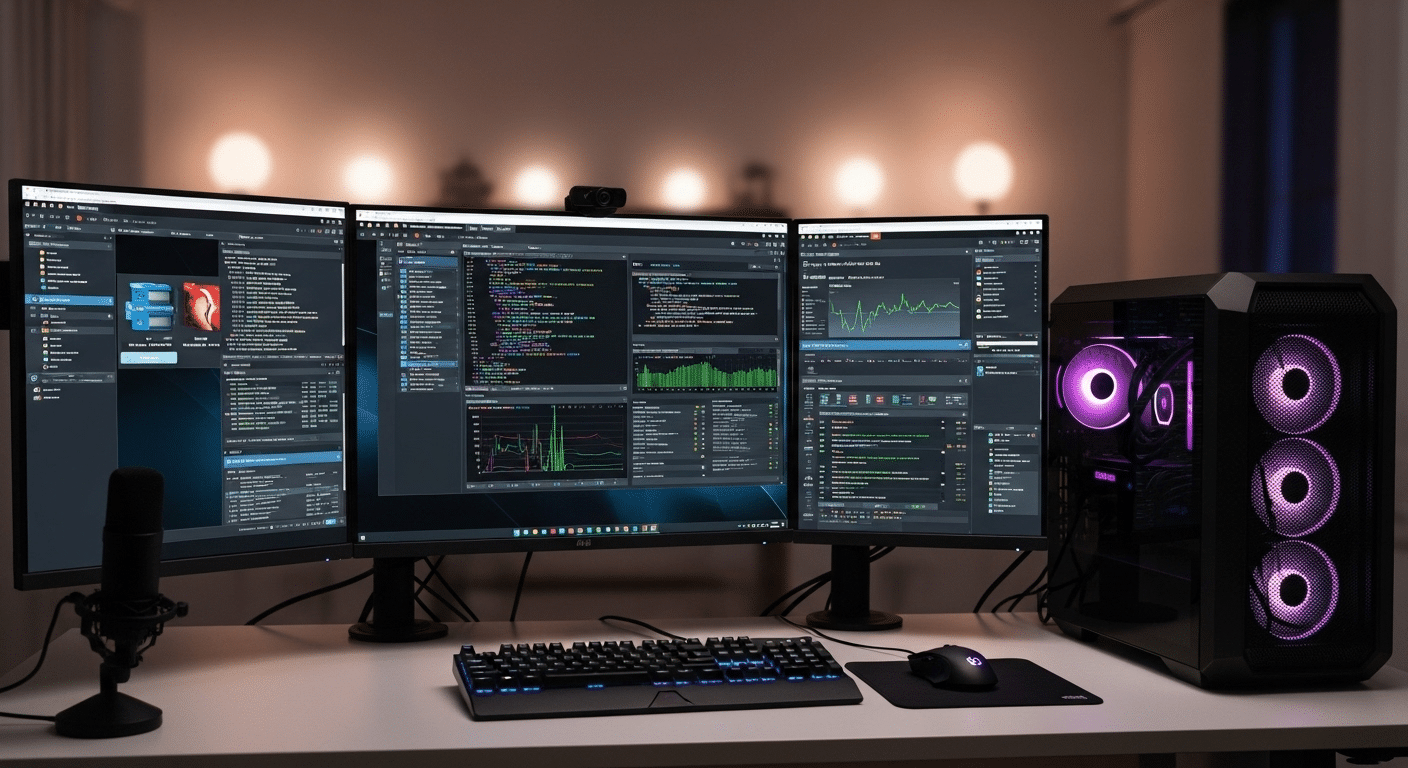
Modern desktop computer used for a cybersecurity home lab with multiple monitors displaying virtual machines and security tools.

A cybersecurity home lab rarely demands exotic equipment. Most setups begin with a single computer running virtualization software. That machine becomes the foundation of your lab, hosting several simulated systems at once.

Still, resources matter. Running multiple virtual machines places real pressure on memory, storage speed, and processor cores. A modest laptop can work for small experiments, though many people eventually notice performance slowing once several machines start running together.

For most home labs, a modern processor such as an Intel i5 or i7 or an AMD Ryzen chip works well. Memory matters even more. 16GB of RAM is typically the practical minimum, while 32GB provides a smoother experience when several systems operate simultaneously. Storage also plays a role. A fast SSD with at least 512GB helps virtual machines load quickly and keeps the lab responsive.

Some enthusiasts add multiple drives to separate operating systems, lab images, and backups. Others use a small NAS device for storage and snapshots. It’s convenient.

Recommended Cybersecurity Lab Hardware 

Component Minimum Requirement Recommended
CPU 4 cores 8+ cores
RAM 16GB 32GB
Storage 512GB SSD 1TB SSD
Network Standard NIC Managed switch


Which Virtualization Software Should You Use for a Cybersecurity Lab?

At the heart of almost every cybersecurity lab sits one critical piece of technology, virtualization software. This software allows a single computer to run multiple operating systems at the same time. Each system behaves like a separate machine, complete with its own network settings, services, and vulnerabilities.

Before installing anything locally, many learners now explore cloud-based virtual desktops. Instead of relying entirely on personal hardware, these environments deliver preconfigured lab systems directly through a browser.

Platforms such as Apporto make it possible to launch virtual machines remotely, experiment with tools, and access lab resources without worrying about hardware limitations. For people with modest computers, this can make learning much easier.

Traditional hypervisors remain extremely common, though. They run directly on your computer and allow you to create and manage multiple virtual machines inside a single operating system.

Popular Virtualization Platforms for Cybersecurity Labs

  • Apporto Virtual Desktops
  • Oracle VirtualBox
  • VMware Workstation Player
  • VMware Workstation Pro
  • Hyper V
  • Proxmox
  • VMware ESXi

These hypervisors allow several operating systems to run simultaneously, making a cybersecurity home lab practical and surprisingly affordable.


Which Operating Systems Should You Install in Your Cybersecurity Lab?

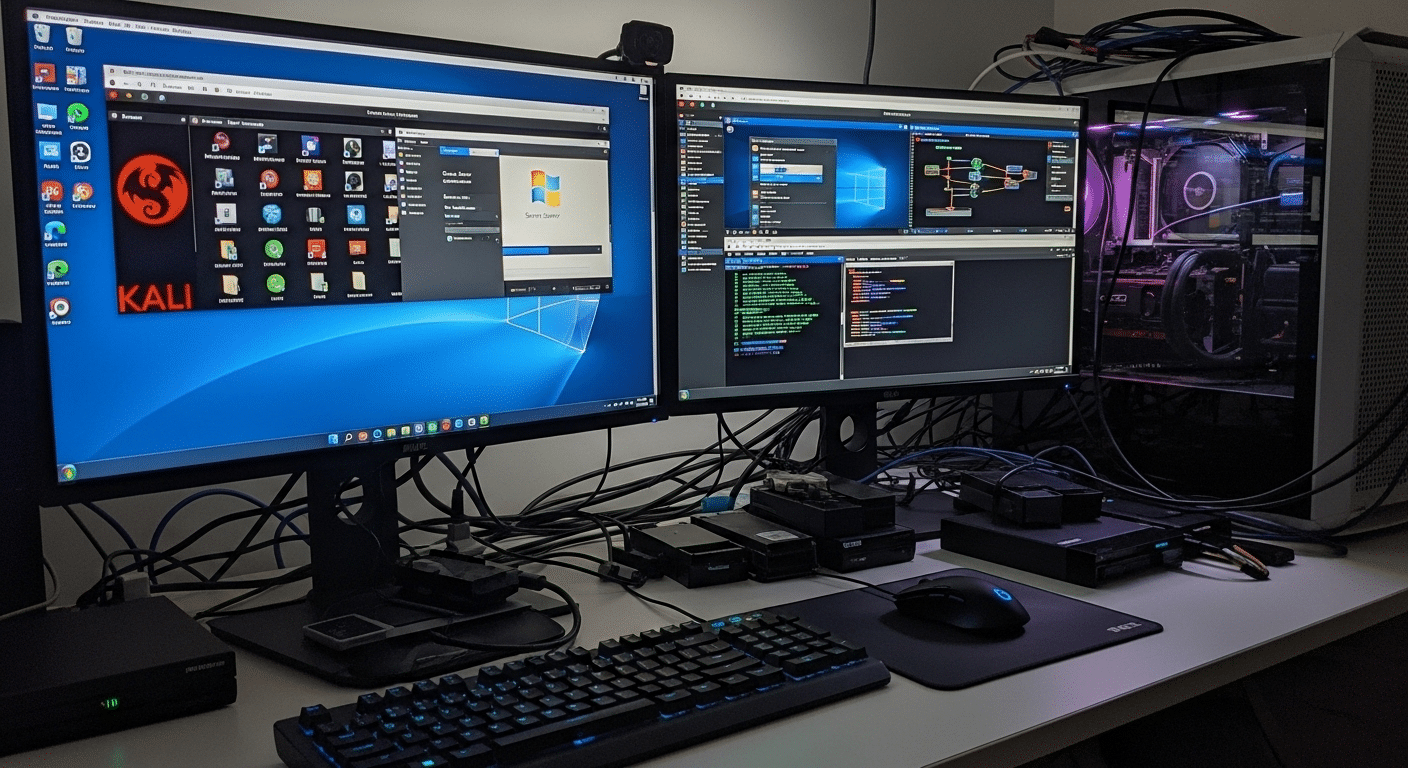
Cybersecurity lab running multiple virtual machines including Kali Linux, Windows Server, Ubuntu, and Metasploitable on a host computer.

Once virtualization is running, the next step is choosing the operating systems that will power your cybersecurity lab. A realistic lab usually contains three types of machines.

One acts as the attacker, another behaves like the target, and a third often serves as the monitoring system that observes network activity and system logs.

This arrangement allows you to recreate situations similar to those seen in real corporate networks. You can launch security scans, simulate attacks, and watch how systems respond. Sometimes the result is messy. That’s part of the learning process.

Common Operating Systems Used in Cybersecurity Labs are:

  • Kali Linux,
  • Windows Server
  • Ubuntu Server
  • Windows 10 or Microsoft Windows
  • Metasploitable

Together these machines create a small but realistic network. With the right combination of systems, your lab begins to resemble the environments security professionals defend every day.


How Do You Create an Isolated Network for Your Cybersecurity Lab?

Network isolation is one of the most important parts of a cybersecurity lab. Without it, experiments can spill into places they shouldn’t. A poorly configured service, a misbehaving script, or a piece of test malware could easily wander onto your home network. That’s not the sort of surprise anyone wants.

A proper lab lives inside an isolated environment. The goal is simple. Keep experimental traffic contained while still allowing the virtual machines inside the lab to communicate with each other. Several techniques make this possible.

One common method involves VLAN segmentation, which logically divides a physical network into smaller sections. Another approach uses subnet separation, creating dedicated network ranges for lab systems.

Many virtualization platforms also offer host only networks, which allow virtual machines to communicate internally without reaching outside devices.

Methods used to Isolate Your Cybersecurity Lab

  • Use VLAN segmentation on managed switches
  • Configure host-only networks in virtualization software
  • Separate lab traffic from the home network
  • Create specific firewall rules to control traffic
  • Use dedicated network equipment when possible

These precautions keep experimental traffic contained. Even if malware runs inside the lab, it stays within the testing environment rather than spreading to personal devices.


What Security Tools Should You Install in Your Cybersecurity Lab?

Cybersecurity home lab dashboard showing tools like Nmap, Wireshark, Metasploit, and ELK Stack monitoring network activity.

A cybersecurity lab becomes far more useful once real security tools enter the picture. These tools are the same ones analysts, penetration testers, and incident responders use every day. Inside a controlled lab, you can observe how they behave, how they collect security information, and how they respond when suspicious activity appears on a network.

Running these tools in isolation makes experimentation safe. You can generate traffic, trigger alerts, and inspect network packets without worrying about damaging real systems. Sometimes the results are surprising. Logs reveal patterns you didn’t expect. Network scans uncover services you forgot were running.

Essential Cybersecurity Lab Tools:

  • Nmap: Widely used for network discovery and vulnerability scanning
  • Wireshark: A powerful packet analysis software that shows how data travels across the network
  • Metasploit: A penetration testing framework used to simulate attacks
  • Security Onion: Platform designed for advanced network monitoring and threat analysis
  • Wazuh: An open source platform for threat detection and response
  • ELK Stack: A popular system for collecting and analyzing security logs
  • Pi hole: A DNS filtering tool often used to study network traffic patterns

Each tool reveals a different piece of the puzzle. Nmap maps networks. Wireshark exposes raw traffic. Security Onion, Wazuh, and the ELK Stack help visualize activity across systems.

Together they create a layered monitoring environment where suspicious behavior, misconfigurations, and simulated malicious activity become visible rather than hidden.


How Many Virtual Machines Should Your Cybersecurity Lab Have?

One of the first questions people ask while building a home lab is simple, how many virtual machines are actually necessary? The honest answer, fewer than you might expect at the beginning.

A small cybersecurity lab setup can start with just two or three machines. One system plays the role of the attacker, another acts as the target, and sometimes a third machine observes what is happening across the network. Even this simple arrangement can teach a lot about system behavior and security monitoring.

As your lab grows, the structure often becomes more detailed. Many labs eventually include four core systems:

  • An attacker machine, often running penetration testing tools
  • A target machine, designed to simulate vulnerable systems
  • A monitoring machine, collecting logs and network traffic
  • A domain controller, commonly built with Windows Server to manage users and policies

At that stage, the lab begins to resemble a miniature enterprise network. Over time, you may run multiple VMs at once, experimenting with different services, vulnerabilities, and defensive strategies. The number of machines expands naturally as your skills develop.


Why Snapshots and Documentation Are Essential in a Cybersecurity Lab?

Security researcher documenting attack simulations and mitigation results while managing virtual machine snapshots.

Spend enough time inside a cybersecurity lab and something inevitable happens. A configuration breaks. A service refuses to start. Sometimes an entire system simply stops responding after a security test goes sideways. That is normal. Experiments are supposed to push systems to their limits.

This is exactly why snapshots and good documentation become so valuable. A snapshot captures the exact state of a virtual machine at a specific moment. If something fails later, you can quickly roll the machine back to that earlier state and try again. No rebuilding the entire environment. Just restore and continue.

Documentation serves a different but equally important role. It turns experiments into lessons you can revisit later.

Best Practices for Managing a Lab

  • Take snapshots before making configuration changes
  • Document system configurations and lab setup details
  • Record attack methods used during testing
  • Record mitigation strategies that stopped the attack
  • Maintain experiment logs for ongoing reference

Over time, these notes become a personal knowledge base. Patterns start to appear. Certain vulnerabilities repeat themselves. Defensive techniques improve.

Without documentation, many insights disappear as quickly as they appear. With it, every experiment contributes to a deeper and more organized understanding of security systems.


How Do You Maintain and Secure Your Cybersecurity Lab?

A cybersecurity lab doesn’t stay useful forever without attention. Systems age. Software becomes outdated. New vulnerabilities appear almost every month. If the lab environment remains frozen in time, the lessons you learn inside it slowly drift away from real-world conditions.

Regular maintenance keeps the system realistic and functional. Operating systems should be updated, security tools refreshed, and lab machines reviewed occasionally to make sure services behave as expected. Even small issues, like an outdated package or a forgotten service running in the background, can distort test results.

Security labs also require a certain level of discipline. Experiments may introduce unstable configurations or broken network settings. Maintenance helps restore order so the lab remains a place for structured learning rather than confusion.

Ongoing Lab Maintenance Tasks

  • Update operating systems to the latest version
  • Update security tools and frameworks regularly
  • Perform routine monitoring of system performance
  • Review and adjust firewall rules inside the lab network
  • Remove outdated or unused virtual machines

Outdated tools can quietly create unrealistic scenarios. A vulnerability that existed years ago may no longer appear in modern systems. Keeping tools and operating systems current ensures your lab reflects the kinds of threats security professionals actually face today.


When Does Local Hardware Become a Limitation?

At some point, many home labs reach the same quiet obstacle. Hardware. Running a small cyber security lab with two virtual machines is usually manageable, but once the environment expands, the demands grow quickly. Add a monitoring server, a domain controller, several vulnerable systems, and suddenly the computer begins to struggle.

Memory is often the first limit people notice. RAM shortages appear when several machines run at the same time. CPU resources can also become tight, especially during scanning or penetration testing tasks that consume processing power. Then there is storage. Virtual machines generate large disk images, and storage bottlenecks can slow the entire lab environment.

These limitations push many learners to explore cloud-based virtual labs. Instead of relying solely on local hardware, computing resources can be delivered remotely through a virtual desktop environment.

Platforms like Apporto provide access to high performance virtual desktops that run directly through a browser. This approach allows students and professionals to launch cybersecurity tools, run multiple lab machines, and experiment with complex environments without upgrading their personal computer.


Final Thoughts

A cybersecurity lab changes how you learn security. Reading articles and watching tutorials can explain concepts, but experimentation turns those ideas into practical understanding. Inside a lab environment you can test defenses, trigger alerts, and observe how systems respond to unusual behavior without putting real networks at risk.

That freedom to experiment matters. Mistakes happen. Services crash. Configurations break. Each of those moments reveals something about how systems operate and how vulnerabilities appear in the first place.

Virtualization has made this kind of learning far more accessible. With a single computer and a few virtual machines, you can simulate entire network environments that once required expensive hardware. As skills grow, the lab can grow with you.

Most cybersecurity professionals began in exactly this way, experimenting inside a small lab built at home. The key is to start simple.

A few machines, basic monitoring tools, and a controlled network are enough to begin exploring real security concepts. Over time the lab expands, and so does your understanding of how modern systems behave under pressure.


Frequently Asked Questions (FAQs)


1. How much RAM do you need for a cybersecurity home lab?

Most cybersecurity home labs work best with at least 16GB of RAM, though 32GB provides a much smoother experience. Running multiple virtual machines consumes memory quickly, especially when several operating systems and monitoring tools operate at the same time.

2. Can you build a cybersecurity lab on a laptop?

Yes, a decent laptop can run a small cybersecurity lab. Many learners start this way. As long as the system supports virtualization and has enough RAM and storage, it can host several virtual machines for experimentation and security practice.

3. What operating systems are best for cybersecurity labs?

Common choices include Kali Linux, Windows Server, Ubuntu Server, and Windows 10. This mix allows you to simulate attacker systems, enterprise servers, and everyday user machines, creating a realistic environment for security testing and monitoring.

4. Is VirtualBox good for cybersecurity labs?

Yes, Oracle VirtualBox is a popular choice for beginners. It is free, easy to install, and supports most operating systems. Many cybersecurity learners use it to create virtual machines and build their first home lab environments.
5. How do you isolate a cybersecurity lab from your home network?

Isolation usually involves creating separate virtual networks, using VLAN segmentation, or configuring host-only adapters inside virtualization software. These methods keep experimental traffic inside the lab environment so malware or misconfigured services cannot affect personal devices.

How to Add a Server to VMware Horizon Client?

Quick Answer

How to Add a Server to VMware Horizon Client?

To add a server in VMware Horizon Client, open the client application, select “Add Server,” and enter the Horizon Connection Server address provided by your organization. After authentication, the client establishes a secure encrypted connection to access remote desktops or applications hosted on VMware Horizon infrastructure.

If you want to access a remote desktop through VMware Horizon, the first step begins with the VMware Horizon Client. This application lets users connect to virtual desktops and applications hosted on VMware Horizon infrastructure. But before any desktop session starts, the client needs a destination. You must add a Horizon Connection Server inside the client to establish the connection.

Most organizations provide a server address or Fully Qualified Domain Name (FQDN) such as view.company.com. When you enter this address, the Horizon Client creates a secure connection to the server using HTTPS protected by TLS encryption.

After authentication, the system establishes a secure tunnel connection that carries desktop data between your device and the remote environment. This guide explains how to add a server, understand the connection process, and resolve common connection issues.


What Is VMware Horizon Client and How It Works?

VMware Horizon Client is the doorway between your device and a remote workspace hosted somewhere else, usually inside a company data center or cloud environment.

When you open the Horizon Client, you are not launching a desktop on your computer. Instead, you are connecting to a VMware Horizon environment where desktops and applications run remotely.

The process starts when you enter the address of a Horizon Connection Server. This server acts as the control point that authenticates users and routes them to the correct desktop or application.

Once the login succeeds, the client establishes a secure pathway so your device can communicate with that remote environment.

How Horizon Client Establishes a Secure Connection?

  • Client endpoints communicate with a Horizon Connection Server host through secure connections.
  • The initial client connection begins over HTTPS after you enter the server domain name.
  • After login, the system creates a second connection known as the secure tunnel.
  • This tunnel carries RDP or other protocol traffic over HTTPS.
  • The PCoIP Secure Gateway ensures only authenticated users access desktops and applications.
  • TLS encryption protects all client connections to Horizon Connection Server hosts.


What Information Do You Need Before Adding a Server to Horizon Client?

IT onboarding checklist showing required VMware Horizon connection details including server address, credentials, and MFA verification.

Before you attempt to connect, a small but important step comes first. You need the correct server information from your organization. Without that information, the Horizon Client simply does not know where to send your connection request.

Most companies provide these details through internal documentation, onboarding instructions, or directly from an IT administrator. Taking a moment to confirm the correct details saves time later and prevents connection errors during login.

Required Information Before Adding a Server

  • Connection Server FQDN or IP address
  • Example format: view.company.com
  • Username and password credentials for login
  • Domain name if the organization requires domain authentication
  • Multi-factor authentication code if security policies require it
  • VPN access when connecting from off-campus or external networks

In some testing environments, the client may also request certificate verification. Accepting the certificate allows the connection to proceed.


How to Add a Server to VMware Horizon Client

Now that you have the required server details, the actual setup inside VMware Horizon Client is fairly straightforward. The client interface is simple by design, which helps users connect to remote desktops without navigating complicated settings. You just provide the correct server address, authenticate, and the system takes care of the rest.

Still, following the correct steps matters. A small mistake in the server address or login credentials can prevent the connection from being established.

Steps to Add a Server in VMware Horizon Client

  1. Open the VMware Horizon Client application on your computer.
  2. In the client window, locate the option to Add Server and click it.
  3. Enter the server domain name or IP address provided by your organization.
  4. If the server uses a custom port, type it using the format servername:port.
  5. Click Connect to begin the client connection.
  6. When prompted, enter your username and password credentials.
  7. If the system requires additional verification, enter the multi-factor authentication code.
  8. After successful login, select the desktop or application you want to open.

Depending on company policy, Horizon Client may allow you to save your credentials. This option can simplify future logins and reduce the need to enter credentials each time you connect.


What Happens After You Add the Server? Understanding the Secure Tunnel Connection?

Cybersecurity-style graphic depicting encrypted Horizon desktop session traffic passing through a secure gateway.

Once the server is added and your login succeeds, the process continues quietly in the background. The Horizon Client first establishes an HTTPS connection with the Horizon Connection Server, which acts as the central point that verifies your identity and determines which desktops or applications you are allowed to access.

After authentication, the system creates a secure tunnel connection. This tunnel is important because it carries the actual desktop display traffic and application data between your device and the remote environment. Everything moves through an encrypted channel.

The PCoIP Secure Gateway checks that the user has been authenticated before allowing access to the desktop session. In some configurations, once a direct session is established, the desktop can remain active even if the connection server stops running.


How Can You Manage Servers in VMware Horizon Client?

After adding a server, the VMware Horizon Client also allows you to manage multiple connections from the same interface. Many organizations operate more than one connection server, especially in large environments. Because of that, the client includes simple tools for organizing and updating server entries.

Server Management Options

  • Add multiple servers if your organization provides access to different environments
  • Open connections to several servers simultaneously from the client window
  • Remove a server by right click on the server entry and selecting Delete
  • Change or update server addresses if the connection server information changes

This flexibility allows you to move between desktop environments quickly without reopening or reinstalling the Horizon Client.


What Are the Most Common Issues When Adding a Server?

IT administrator analyzing Horizon connection logs and error messages while diagnosing remote desktop login issues.

Even though the setup process is straightforward, connection problems can still appear from time to time. In most cases, the issue does not come from the Horizon Client itself. Instead, it usually comes from incorrect server information, network restrictions, or authentication problems during login.

Small details matter here. A missing character in the server address or an inactive VPN can prevent the connection from working properly.

Common VMware Horizon Connection Issues

  • Incorrect server domain name or IP address entered in the client
  • VPN not enabled when connecting from off-campus networks
  • Certificate verification warnings in test or development environments
  • Incorrect login credentials during authentication
  • Firewall rules blocking secure connections

When a connection problem appears, carefully verify the server information, login details, and network requirements provided by your administrators.


Final Thoughts

Adding a server in VMware Horizon Client may seem like a small step, but it plays a central role in gaining reliable desktop access. The basic process is straightforward. You open the Horizon Client, add the connection server, authenticate your credentials, and then launch the remote desktop or application assigned to you.

Understanding how the connection works behind the scenes helps avoid common setup problems. Correct server addresses, proper login credentials, and secure network access all contribute to a smooth connection experience.

When configuring the client, always follow the instructions and documentation provided by your organization or administrator. Accurate information ensures that Horizon Client connects successfully every time.


Frequently Asked Questions (FAQs)


1. What server address should you enter in VMware Horizon Client?

You typically enter the Fully Qualified Domain Name (FQDN) provided by your organization, such as view.company.com. If a custom port is required, the format should be servername:port.

2. How do you add a server to VMware Horizon Client?

Open VMware Horizon Client, click Add Server, enter the connection server address, then click Connect. After login, you can select the desktop or application you want to open.

3. Can you connect to multiple servers in Horizon Client?

Yes. VMware Horizon Client allows users to add multiple connection servers. Each server appears in the client window, and you can open connections to different desktops and applications.

4. Why can’t Horizon Client connect to the server?

Connection problems usually happen because of incorrect server addresses, VPN restrictions, firewall rules, or authentication issues during login.

5. How do you remove a server from VMware Horizon Client?

Right-click the server inside the client window and select Delete to remove the server connection.

VMware Horizon Configuration: Here’s How to Set it Up

Modern organizations rely on VMware Horizon to deliver centralized access to virtual desktops and published applications across multiple devices. Instead of installing software and managing desktops on every physical machine, you can provide secure remote desktops and application access from a centralized infrastructure that employees can reach from almost anywhere.

However, the success of any deployment depends heavily on proper VMware Horizon configuration. Poor configuration can lead to slow connections, unstable virtual desktop sessions, authentication errors, and even security vulnerabilities.

A typical Horizon environment includes several core components such as the Horizon Connection Server, Horizon Client, Horizon Agent, vCenter Server, and Unified Access Gateway working together to deliver desktop access.

In this blog, you will learn how VMware Horizon configuration works, including architecture planning, installation steps, authentication settings, desktop pools, security controls, and performance optimization.


What Is VMware Horizon and How Does Its Architecture Work?

VMware Horizon might look like just another remote desktop solution. It is not. The platform is built as a full virtual desktop infrastructure system, designed to deliver desktops and applications from centralized servers instead of individual machines scattered across offices and homes.

When configured correctly, users can open a desktop session from a laptop, tablet, or even a web browser, and the experience feels surprisingly close to working on a local computer.

The connection process itself is fairly straightforward. Users connect through the Horizon Client, through HTML Access, or directly from a browser session.

Once the login credentials are verified, the system routes the request through the infrastructure and assigns the appropriate desktop or application. The heavy lifting happens behind the scenes, inside the data center or cloud environment where virtual machines actually run.

A typical Horizon deployment relies on several core components working together.

Core Components of a VMware Horizon Deployment

  • Horizon Connection Server
  • Horizon Client
  • Horizon Agent
  • vCenter Server
  • Unified Access Gateway (UAG)

Together, these components allow Horizon to deliver centralized desktop management while maintaining secure user access across devices and networks.


What Infrastructure Must Be Prepared Before VMware Horizon Configuration?

Modern enterprise data center with VMware hosts and networking hardware optimized for virtual desktop workloads and Horizon infrastructure.

Before installing any Horizon component, a few foundational pieces must already exist. Think of it like preparing the ground before building a house. VMware Horizon configuration relies heavily on underlying services such as identity systems, virtualization platforms, and reliable networking. Without these elements in place, the Horizon environment may start, but it rarely runs well for long.

At a minimum, the infrastructure must support user authentication, virtual machine management, and stable network connectivity. Each part plays a specific role in ensuring that users can log in, access their virtual desktops, and maintain consistent performance during daily work.

Required Infrastructure Components

  • Active Directory environment
  • DNS configuration
  • vCenter Server deployment
  • Windows Server hosts
  • Network infrastructure with sufficient bandwidth and low latency

VMware Horizon must connect directly to vCenter Server in order to manage key components of the environment, including:

  • virtual machines
  • instant clones
  • desktop pools

Performance also depends on the underlying hardware. Adjusting BIOS settings, such as enabling Hyper-threading and Turbo Boost, can improve VMware host performance and help the infrastructure handle larger desktop workloads efficiently.


How Do You Install and Configure the Horizon Connection Server?

At the center of every Horizon deployment sits the Horizon Connection Server. It is the component that quietly manages authentication, directs user connections, and assigns desktops or published applications. Without it, the environment simply cannot function.

In many ways, it behaves like a traffic controller. When a Horizon Client attempts to connect, the Connection Server checks login credentials, verifies permissions, then routes the user to the correct virtual desktop.

Because of that role, the Horizon Connection Server configuration must be done carefully. A misconfigured server can cause login errors, unstable sessions, or connection failures. Fortunately, the installation process itself is fairly straightforward when the required infrastructure has already been prepared.

Horizon Connection Server Installation Steps

  • Download the Horizon installer from VMware or Omnissa documentation and verify the installation files.
  • Run the installation package from the Program Files directory on the Windows Server where the Connection Server will be installed.
  • During setup, select Connection Server as the installation type.
  • Configure the server address and domain settings, ensuring the server is properly joined to the Active Directory domain.
  • Enter product licensing information to activate the Horizon environment.
  • Configure secure tunnel settings and the Blast Secure Gateway, which help protect user connections and optimize remote display performance.
  • Review the configuration summary and click Finish to complete the installation.

Once installation is complete, administrators manage the environment through the Horizon Administrator Console, also called the Horizon Console. This interface allows you to configure desktop pools, authentication settings, policies, and user access.

For larger environments, high availability becomes important. A recommended practice is to deploy at least two Connection Servers behind a load balancer. This ensures that if one server becomes unavailable, the remaining server can continue brokering user connections without interrupting desktop access.


How Do Desktop Pools and Instant Clones Work in VMware Horizon?

IT administrator managing VMware Horizon desktop pools from a control dashboard showing instant clone deployment and user assignments.
Once the Horizon Connection Server is installed and running, the next step in a typical VMware Horizon configuration involves creating desktop pools. Desktop pools are essentially groups of virtual desktops that administrators manage and assign to users. Instead of configuring every virtual desktop individually, you organize them into pools and apply policies to the entire group. It simplifies management quite a bit.

Desktop pools also help the infrastructure scale. When new users need access, additional desktops can be added to the pool without rebuilding the environment from scratch. This approach improves centralized management, strengthens security controls, and makes the overall end-user experience more consistent.

Different types of desktop pools serve different purposes depending on how desktops are assigned and maintained.

Types of Horizon Desktop Pools 

Pool Type Description
Instant Clone Pools Rapid deployment of desktops using snapshots of a master image
Dedicated Pools Virtual desktops permanently assigned to individual users
Floating Pools Desktops dynamically assigned to users during login sessions


Instant clones are particularly useful in large environments because they allow Horizon to create desktops quickly from a master image. When these desktops are created, the system automatically generates computer objects in Active Directory, ensuring that authentication and domain policies work correctly.

Administrators configure desktop pools inside the Horizon Console under the desktop pool settings. From there, you can control user assignments, policies, and resource allocation.

Desktop pools can also deliver published applications and remote desktops, giving organizations flexibility in how they provide access to their computing resources.


How Do You Configure Authentication and Login Security in VMware Horizon?

Access control sits at the heart of any VMware Horizon configuration. Before a user reaches a virtual desktop, the system must verify identity and confirm permissions.

This verification happens through authentication policies configured inside the Horizon Console. When set correctly, these policies protect remote desktops while still allowing users to log in smoothly from approved devices.

Authentication settings determine how users provide their credentials and how the platform validates them. In most environments, Horizon integrates directly with Active Directory, allowing organizations to use existing Windows accounts for login.

Administrators manage these settings through the Authentication tab within the Horizon Console, where different authentication methods can be enabled or combined.

Authentication Methods in VMware Horizon

  • Windows authentication using Active Directory users, the most common method, where users log in with their domain credentials.
  • RADIUS authentication, which connects Horizon to external authentication servers to support one-time passcodes and other verification methods.
  • Smart card authentication, commonly used in regulated environments where physical security tokens verify user identity.
  • True SSO authentication, allowing users to authenticate once and gain seamless access to desktops without repeated credential prompts.

Many organizations strengthen login security by enabling Multi-Factor Authentication. With MFA enabled, users must provide an additional verification factor, often a temporary code from a mobile device or authentication application. This extra step helps prevent unauthorized access to remote desktops.

When Windows user name matching and two-factor authentication are both enabled, the username entered in Horizon must match the user’s Active Directory username exactly. Any mismatch can prevent authentication from completing.

Administrators can also fine-tune authentication behavior through configuration settings such as:

  • Realm prefix, used to specify domain formatting during login.
  • Realm suffix, which helps identify the correct authentication domain.
  • Accounting port for RADIUS servers, required when Horizon communicates with external RADIUS authentication systems.

Properly configured authentication ensures that Horizon delivers secure access while maintaining a consistent login experience for users across the environment.


How Does Unified Access Gateway Enable Secure Remote Access?

Enterprise IT infrastructure with load-balanced Unified Access Gateways handling secure remote connections to virtual desktops.

As soon as remote access enters the conversation, security becomes the first concern. A VMware Horizon configuration often includes external users connecting from home networks, mobile devices, or branch offices.

Directly exposing internal Horizon servers to the internet would create unnecessary risk. This is where the Unified Access Gateway, often called UAG, plays a critical role.

The Unified Access Gateway acts as a secure entry point positioned between external users and the internal Horizon infrastructure. When a user attempts to connect, the request first passes through the gateway.

Only verified and authorized connections are then forwarded to the Horizon Connection Server. This layered approach protects internal servers while still allowing users to reach their virtual desktops.

Unified Access Gateway Capabilities

  • Secure remote desktop access without VPN, allowing users to connect safely from outside the corporate network.
  • HTML Access connections through web browsers, enabling desktop access even when the full Horizon Client is not installed.
  • Secure HTTPS tunnels for Horizon sessions, ensuring that remote display traffic is encrypted during transmission.

Administrators can further control external access through the Users and Groups → Remote Access tab in the Horizon Console. This allows specific user groups to connect through the gateway while restricting others.

For larger environments, deploying multiple Unified Access Gateways behind a load balancer improves both scalability and reliability, ensuring remote connections remain stable even during heavy usage.


How Do You Optimize VMware Horizon Performance for Virtual Desktops?

Performance can make or break a virtual desktop environment. Even a well-designed VMware Horizon configuration may feel slow to users if the infrastructure is not tuned correctly. When desktops respond slowly, applications lag, or login times stretch longer than expected, productivity suffers. The good news is that most performance issues can be improved with a few practical adjustments.

Optimization typically begins with the virtual desktop image itself. The operating system image used to create desktops often contains services and background processes that are unnecessary in a VDI environment.

Removing these extras reduces resource usage and improves responsiveness. Hardware configuration also plays a role, since virtual desktops depend on the underlying host resources provided by VMware infrastructure.

Horizon Performance Optimization Techniques

  • Optimize the Golden Image using VMware OS Optimization Tool, which removes unnecessary Windows services and scheduled tasks that consume CPU and memory.
  • Disable unnecessary Windows services and scheduled tasks, ensuring the desktop image runs only essential components required for applications.
  • Enable Hyper-threading and Turbo Boost in BIOS, allowing VMware hosts to handle higher workloads more efficiently.
  • Avoid over-provisioning virtual CPUs, because assigning too many virtual processors can actually reduce performance across shared infrastructure.
  • Select Blast Extreme protocol, which adapts to varying network conditions and provides improved display performance for remote desktops.

Beyond configuration changes, ongoing monitoring is equally important. Tracking resource usage across vCenter Server and Horizon infrastructure helps identify CPU, memory, or storage bottlenecks before they affect users. Proactive monitoring allows administrators to adjust resources and maintain a consistent desktop experience.


What Security Best Practices Should Be Used in VMware Horizon Configuration?

Enterprise IT administrator configuring VMware Horizon security policies including MFA, client version restrictions, and secure authentication settings.

Security sits at the center of any well-designed VMware Horizon configuration. Because Horizon environments deliver remote desktops and applications over networks, they naturally become attractive targets for unauthorized access.

A secure setup protects both the infrastructure and the user sessions running inside it. The goal is simple in theory, though sometimes tricky in practice, ensure that only verified users can access desktops while all communication remains encrypted and monitored.

Authentication policies, connection settings, and user profile management all contribute to a secure deployment. When these areas are configured carefully, organizations can reduce the risk of credential theft, unauthorized access, and session hijacking.

Horizon also provides several built-in tools that strengthen security without making the login process overly complicated for legitimate users.

VMware Horizon Security Best Practices

User profile management also plays a role in both security and performance. Dynamic Environment Manager (DEM) allows administrators to centrally manage user settings and profiles, helping reduce login times while maintaining consistent configurations.

In load balanced deployments, origin checking settings must be configured correctly. If these settings do not match the load balanced hostname used by clients, legitimate connections may be rejected during authentication.


How Do Licensing and Horizon Versions Affect Configuration?

Licensing plays a surprisingly important role in VMware Horizon configuration. Before desktops, applications, or authentication policies are fully operational, the platform must be activated with valid product licensing.

Without proper licensing, many Horizon features remain unavailable or restricted. Administrators typically configure licensing shortly after installing the Horizon Connection Server and accessing the Horizon Console.

VMware Horizon environments support two primary licensing models. The first uses traditional product keys, which are entered directly into the Horizon Console. The second option uses cloud subscription licenses, commonly associated with Horizon Cloud environments and subscription-based deployments. Both models provide access to Horizon capabilities, but they are activated differently depending on the deployment type.

Version changes can also affect licensing behavior. For example, Horizon 2406 and newer versions can activate cloud subscription licenses without requiring an Edge Gateway.

This simplifies deployment and removes an additional infrastructure dependency. In contrast, older environments often required extra configuration steps during activation.

Another important update involves platform branding and license keys. After upgrading to Horizon 2412 or newer, existing VMware Horizon 8 license keys must be replaced with Omnissa Horizon 8 license keys within a limited timeframe to maintain functionality.
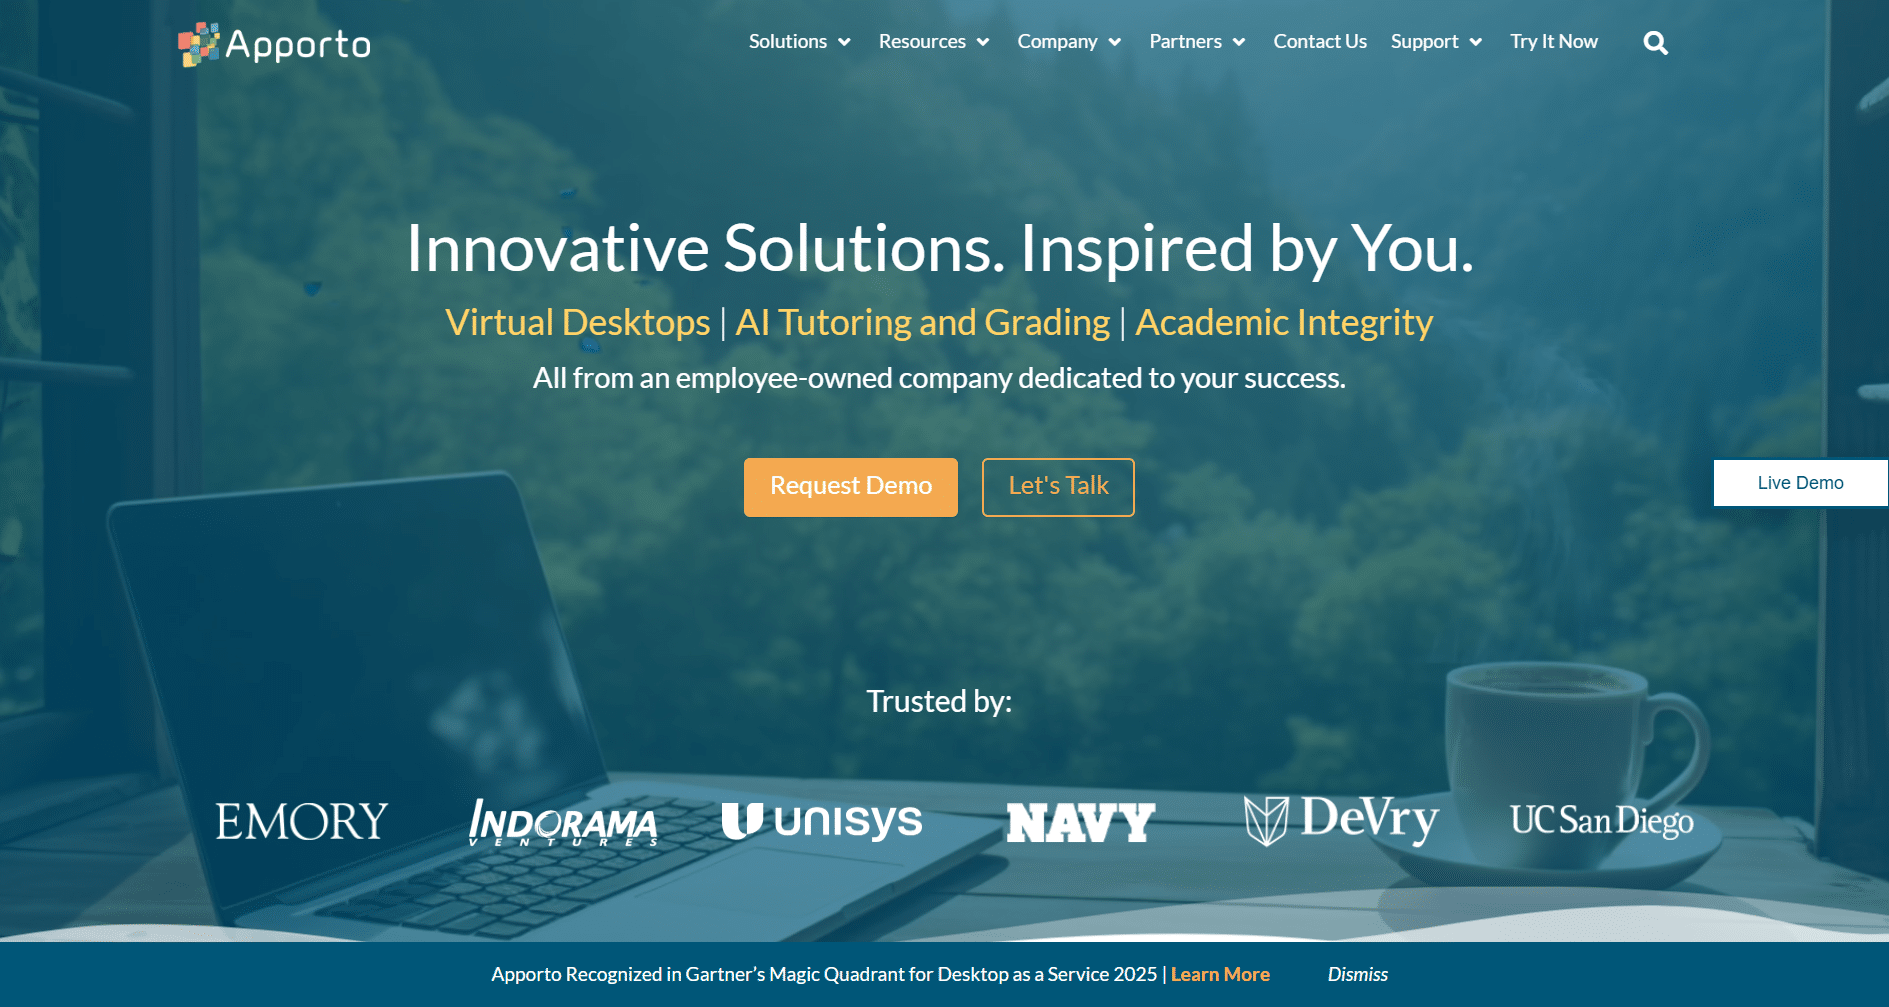
Administrators configure and manage product licensing information directly in the Horizon Console under licensing settings, where activation status and license details can be reviewed or updated as needed.


What Are the Most Common VMware Horizon Configuration Issues?

Enterprise IT dashboard highlighting Horizon configuration errors including authentication failures, server connectivity issues, and client connection problems.

Even a carefully planned VMware Horizon configuration can encounter problems during deployment or daily operation. Virtual desktop environments involve several moving parts, including authentication services, virtualization infrastructure, and network connectivity. If one component is configured incorrectly, the result can be slow connections, login failures, or unstable user sessions.

These issues often appear gradually. Users might first notice longer login times or unexpected disconnects. In other cases, administrators may see error messages in the Horizon Console or event logs indicating authentication failures or server communication problems. Identifying the source of the issue requires examining configuration settings across the Horizon platform and its supporting infrastructure.

Common Horizon Configuration Issues

  • Incorrect server address configuration, preventing Horizon Clients from reaching the correct Connection Server.
  • Load balancer hostname mismatch caused by origin checking, where the name used by the client does not match the actual server name behind the load balancer.
  • Authentication configuration errors, such as incorrect settings in the authentication tab or conflicts with external authentication providers.
  • Active Directory permission problems, which may prevent users from accessing assigned desktop pools or published applications.

When issues appear, a structured troubleshooting process is essential. Reviewing logs, verifying configuration settings, and checking infrastructure services usually helps restore service quickly and ensures stable desktop access for users.


Why Apporto Is an Alternative to VMware Horizon Deployments?

Apporto homepage showcasing virtual desktop and AI education solutions with request demo and live demo options.

A fully featured VMware Horizon configuration can deliver powerful virtual desktop infrastructure. Yet that capability often comes with complexity. Deploying Horizon usually requires multiple infrastructure components working together, including Connection Servers, Unified Access Gateway, desktop pools, authentication services, and vCenter Server integration. Each layer must be installed, configured, secured, and monitored. Over time, maintaining these systems can demand significant administrative effort and specialized infrastructure management.

For many organizations, especially those seeking faster deployment and simpler operations, platforms like Apporto offer a different approach. Instead of building and managing a full VDI stack, Apporto delivers remote desktops and applications through a browser-based platform. Users simply open a browser, authenticate, and access their workspace without installing a dedicated client.

This approach reduces the infrastructure burden dramatically. Organizations benefit from browser-based desktop access, simplified deployment compared to traditional VDI, and secure remote access across devices including laptops, tablets, and thin clients. With fewer components to manage, teams can focus more on productivity rather than infrastructure maintenance.


Final Thoughts

A successful VMware Horizon configuration depends on careful planning and consistent management across several technical layers. When each component is configured correctly, the platform can deliver reliable virtual desktops and applications to users across many types of devices.

But stability does not happen by accident. It begins with proper infrastructure preparation, ensuring that services such as Active Directory, networking, and vCenter Server are ready before Horizon components are installed.

From there, administrators must focus on the Connection Server setup, since it brokers every user session and controls access to desktop pools and published applications. Authentication configuration also plays a major role in protecting remote desktops, especially when Multi-Factor Authentication or other advanced login policies are used.

Finally, performance optimization ensures that virtual desktops remain responsive even during heavy usage. After installation, organizations should carefully test and secure the deployment, verify authentication settings, and monitor system performance. These steps help ensure stable access to desktops and applications for users across the entire Horizon environment.


Frequently Asked Questions (FAQs)


1. What is VMware Horizon configuration?

VMware Horizon configuration refers to the process of setting up and managing the components required to deliver virtual desktops and applications. This includes configuring the Horizon Connection Server, desktop pools, authentication settings, and integration with vCenter Server to provide secure desktop access for users.

2. What does the Horizon Connection Server do?

The Horizon Connection Server acts as the central broker in a VMware Horizon environment. It authenticates login credentials, manages user connections, and directs Horizon Clients to the correct virtual desktop or published application based on user permissions and desktop pool assignments.

3. How do desktop pools work in VMware Horizon?

Desktop pools group multiple virtual desktops together so administrators can assign them to users efficiently. Pools allow centralized management of desktop images and resources, while technologies such as instant clones enable fast deployment of large numbers of virtual desktops.

4. Why is Unified Access Gateway important in Horizon?

The Unified Access Gateway (UAG) provides secure external access to Horizon environments. It acts as a gateway between the internet and internal Horizon servers, allowing remote users to connect to virtual desktops without exposing internal infrastructure directly to external networks.

5. How can VMware Horizon performance be optimized?

Performance optimization usually begins with tuning the desktop image and infrastructure. Administrators often optimize the golden image, disable unnecessary Windows services, monitor vCenter resources, and use the Blast Extreme protocol to improve display performance during varying network conditions.

6. What authentication methods does VMware Horizon support?

VMware Horizon supports several authentication methods, including Windows authentication through Active Directory, RADIUS authentication, smart card authentication, and True SSO. Organizations often combine these methods with Multi-Factor Authentication to strengthen login security for remote desktop access.

VDI vs VDA: All Differences Explained

Quick Answer

What Is the Difference Between VDI and VDA?

VDI (Virtual Desktop Infrastructure) is the technology that hosts and delivers virtual desktops from centralized servers, while VDA (Virtual Desktop Access) is the Microsoft licensing model that allows devices to legally access those environments. Organizations often combine VDI platforms, licensing strategies, and browser-based solutions like Apporto to simplify secure remote desktop access and infrastructure management.

Organizations are increasingly relying on virtual desktops to deliver applications and desktop operating systems without depending on individual machines. Instead of running software directly on local laptops or PCs, many businesses now use Virtual Desktop Infrastructure (VDI) to host desktops on centralized servers located in a data center or cloud environment.

However, infrastructure is only part of the story. This is where confusion often begins. VDI describes the technology used to deliver virtual desktops, while Virtual Desktop Access (VDA) refers to the licensing model that allows devices to legally connect to those environments.

In this Blog, you will Understand the difference between VDI and VDA and how it helps organizations plan infrastructure correctly, maintain licensing compliance, and deliver secure remote access to desktop operating systems.


What Is Virtual Desktop Infrastructure (VDI) & How It Works?

The computer in front of you is not really doing the heavy lifting. Instead, the real work happens somewhere else, quietly, inside racks of servers humming in a data center or running inside a cloud platform. That is essentially what Virtual Desktop Infrastructure (VDI) is about.

In a VDI environment, desktop operating systems are hosted on centralized servers rather than on local machines. The desktop itself exists as a virtual machine inside that server environment.

You connect to it remotely, usually through remote desktop services, and interact with it through a graphical interface that looks exactly like a normal Windows desktop.

The device in your hands, a laptop, tablet, or thin client, mainly displays the session and sends keyboard or mouse input back to the server. Processing, storage, and application workloads all happen remotely. A bit strange at first, but surprisingly efficient once you see it in action.

Characteristics of Virtual Desktop Infrastructure

• Desktop operating systems run on centralized servers rather than local machines
• Users access virtual desktops remotely from multiple devices
• IT teams manage desktop images from a central environment
• Sensitive data remains inside secure data centers instead of endpoint devices
• Organizations can support multiple users with scalable virtual environments

Because everything lives inside centralized infrastructure, organizations can maintain consistent virtual environments and deploy standardized desktops much faster.


What Is Virtual Desktop Access (VDA) & Why It Exist?

Cloud desktop environment where VDI servers host desktops and VDA licenses grant legal access for user devices.

Infrastructure alone does not grant permission. That detail trips up a surprising number of IT teams. You might have a perfectly configured VDI environment humming along in a data center, virtual machines ready, connection brokers working, remote desktop services running smoothly. Yet users still cannot legally log in. Why? Licensing.

Virtual Desktop Access (VDA) is Microsoft’s licensing framework that allows a device to connect to Windows desktop operating systems hosted inside a virtual environment.

The technology might already be in place, but VDA provides the legal rights to access those virtual desktops. Think of it this way. VDI delivers the desktop. VDA authorizes the device attempting to reach it.

Without the correct VDA license, organizations may technically deploy a working virtual desktop infrastructure but still remain out of compliance if devices connect without proper licensing coverage.

Facts About Windows Virtual Desktop Access (VDA)

• Windows VDA is a device-based subscription license
• It typically costs around $100 per device per year through Microsoft Volume Licensing
• A VDA license allows a device to connect to up to four virtual machines simultaneously
• VDA is required when devices are not covered by Windows Client Software Assurance
• The primary user of a VDA-licensed device can access the virtual desktop from personal devices


VDI vs VDA: What Are the Key Differences?

The two terms look similar. Only one letter separates them. Yet VDI and VDA describe completely different parts of the same virtual desktop ecosystem, and confusing them can lead to planning mistakes or licensing surprises later.

Virtual Desktop Infrastructure (VDI) refers to the technology stack that hosts and delivers virtual desktops from centralized servers. It includes the servers, virtual machines, storage systems, networking layers, and connection brokers that allow users to access desktop operating systems remotely.

Virtual Desktop Access (VDA), on the other hand, has nothing to do with infrastructure. It is a licensing model created by Microsoft that grants devices permission to connect to those virtual desktops.

In other words, VDI builds the environment. VDA authorizes access to it. One handles the technology. The other governs the rules.

Differences Between VDI and VDA 

Feature VDI (Virtual Desktop Infrastructure) VDA (Virtual Desktop Access)
Purpose Provides infrastructure for hosting virtual desktops Provides licensing rights for accessing virtual desktops
Function Runs desktop operating systems on centralized servers Grants access permissions for devices
Focus Infrastructure and desktop delivery Licensing and access control
Deployment Requires servers, connection brokers, and virtual machines Requires subscription license per access device
Managed By IT infrastructure teams Licensing and compliance teams


Why Microsoft Requires VDA Licensing for Virtual Desktop Access?

IT administrator managing device compliance and VDA licensing policies for secure access to corporate virtual desktops.

Licensing rules in the Windows ecosystem can feel oddly strict at first glance. Still, there is a reason behind them. When organizations host a Windows desktop OS inside virtual machines, Microsoft requires that any device connecting to those desktops is properly licensed. That is where the VDA license enters the picture.

Some devices already carry those access rights. If a machine is covered under Windows Client Software Assurance (SA), it typically includes the permissions needed to access virtual desktops running in a VDI environment. No additional license is required in that case.

But things change when devices fall outside that coverage. Devices without Software Assurance must obtain a Windows VDA license to legally connect to those virtual desktop environments.

This becomes especially relevant in modern workplaces where multiple device types appear:

• Third party devices used by partners or consultants
• Contractor laptops connecting to company systems
• Thin clients deployed for centralized desktop environments
• Personally owned devices in bring your own device policies

VDA licensing ensures every licensed device accessing a Windows desktop OS remains compliant and properly authorized.


How VDI Improves Security and Data Protection?

Security concerns usually sit near the top of every IT discussion. And honestly, for good reason. Traditional desktops scatter company data across dozens or hundreds of machines, laptops, home devices, maybe even the occasional forgotten workstation. That model creates risk. A lost laptop or compromised device can expose far more information than anyone expected.

A Virtual Desktop Infrastructure (VDI) environment changes that arrangement entirely. Instead of storing files and applications on local machines, desktop operating systems run inside centralized servers located in secure data centers.

Users simply connect to those environments remotely, while the actual data stays protected within controlled infrastructure.

Security Benefits of Virtual Desktop Infrastructure

  • Sensitive data remains inside secure data centers
  • Reduced risk of data loss from stolen or compromised laptops
  • Centralized patch management and security updates
  • Controlled access to applications and operating systems
  • Simplified compliance monitoring

By keeping sensitive information inside centralized servers, organizations can strengthen data security while still giving employees convenient remote access to their desktop environments.


How VDI Supports Remote Work and Business Continuity?

Cloud-hosted virtual desktop environment enabling remote workers to securely access their workspaces from different locations.

Work is no longer tied to a single desk. In many organizations, employees move between offices, homes, airports, and shared workspaces. That flexibility only works if the desktop environment follows the user instead of staying locked to one physical computer. This is where Virtual Desktop Infrastructure (VDI) becomes valuable.

VDI allows users to connect to their desktop environment from almost any device with a network connection. A laptop, tablet, thin client, or even a borrowed computer can act as the gateway. The desktop itself remains hosted on centralized infrastructure, which means the actual work environment stays consistent regardless of the device accessing it.

This setup also supports bring your own device policies, allowing employees to use personal end user devices while company data remains secured inside the data center.

If a laptop fails or an office becomes inaccessible, employees simply reconnect to their virtual desktop from another device, maintaining productivity and supporting business continuity.


What Infrastructure Components Are Required for a VDI Environment?

Building a functioning Virtual Desktop Infrastructure (VDI) environment involves more than spinning up a few virtual machines. Several systems must work together behind the scenes to host desktop operating systems, manage user sessions, and deliver reliable remote access. Each component plays a specific role in keeping the environment stable and scalable.

At the core, VDI relies on centralized infrastructure inside a data center. Desktop operating systems run on virtual machines instead of individual laptops or PCs.

Users connect remotely, while processing and storage remain within the server environment. That separation allows IT teams to manage resources more efficiently and support large numbers of users without relying on local hardware.

Core Components of a Virtual Desktop Infrastructure

• Virtual machines running desktop operating systems
• Centralized physical servers located in a data center
• Connection broker systems that route users to available desktops
• Storage infrastructure for desktop images and user data
• Network infrastructure enabling remote desktop access


Why VDI and VDA Are Often Confused in IT Planning?

The confusion often starts with the names. VDI vs VDA looks like a small difference on paper, just one letter apart, yet the meanings sit in completely different categories. One describes technology. The other describes licensing.

During IT planning, many organizations concentrate heavily on building the VDI environment, selecting servers, configuring virtual machines, deploying connection brokers, and preparing centralized storage. From a technical perspective, everything appears ready. Desktops can be delivered from the data center and users can theoretically connect.

Then licensing enters the conversation. Accessing Windows desktop operating systems in a virtual environment requires the correct permissions, and this is where the Windows VDA subscription becomes important.

Without the proper license, devices may technically reach the infrastructure but still lack the legal authorization to access it.

Understanding the distinction between VDI infrastructure and VDA licensing helps organizations avoid compliance problems and unexpected costs.


Why Apporto Simplifies Virtual Desktop Infrastructure?

Apporto homepage showcasing virtual desktop solutions, AI tutoring and grading services, and academic integrity tools with demo request options.

Traditional virtual desktop infrastructure deployments can become surprisingly complicated. Servers must be configured, networking layers carefully managed, connection brokers maintained, and licensing rules tracked across multiple devices.

Even after the infrastructure is running, users often need separate remote desktop clients just to access their virtual environments. Over time, the operational overhead can grow larger than expected.

Apporto takes a different approach. The platform delivers virtual desktops directly through a web browser, removing the need for specialized client installations or complex endpoint configuration. Users simply log in and access their environment from almost any device.

Because the infrastructure is centrally managed, organizations can deliver consistent desktop experiences across laptops, thin clients, and tablets while maintaining strong security and reliable performance.


Final Thoughts

The distinction between VDI vs VDA is easier to understand once the roles become clear. Virtual Desktop Infrastructure (VDI) delivers the technical foundation, hosting desktop operating systems on centralized servers and allowing users to access virtual desktops remotely. Virtual Desktop Access (VDA), meanwhile, focuses on licensing, granting devices the rights required to connect to those virtual environments.

Both elements matter. A well-designed infrastructure without the proper licensing can create compliance risks, while correct licensing alone cannot deliver the desktop environment users expect. Successful deployments require attention to both technology and policy.

When organizations evaluate their infrastructure, device coverage, and licensing strategy together, they create virtual desktop environments that are secure, scalable, and easier to manage over time.


Frequently Asked Questions (FAQs)


1. What is the difference between VDI and VDA?

VDI and VDA serve two different roles in virtual desktop environments. Virtual Desktop Infrastructure (VDI) refers to the technology that hosts desktop operating systems on centralized servers. Virtual Desktop Access (VDA) refers to the licensing that allows devices to connect to those virtual desktops.

2. Do you need VDA to access virtual desktops?

In many cases, yes. Devices that are not covered under Windows Client Software Assurance typically require a Windows VDA license to access Windows desktop operating systems hosted in a virtual environment. Without it, the infrastructure may exist, but access would not be properly licensed.

3. How much does Windows VDA licensing cost?

Windows VDA licensing is usually offered as a device-based subscription through Microsoft Volume Licensing programs. The cost is commonly around $100 per device per year, though pricing can vary depending on agreements and licensing bundles.

4. Can multiple users access the same virtual desktop infrastructure?

Yes. One advantage of Virtual Desktop Infrastructure is that centralized servers can host multiple virtual machines simultaneously. This allows organizations to support many users accessing their own desktops while sharing underlying infrastructure resources efficiently.

5. Does VDI improve security for organizations?

VDI can significantly improve data security because sensitive information stays within centralized servers rather than being stored on local devices. This reduces the risk of data loss from stolen laptops and allows IT teams to apply centralized security updates and controls.

How to Use VDI File in VirtualBox? Detailed Guide

Quick Answer

How to Use VDI File in VirtualBox?

To use a VDI file in VirtualBox, attach it as a virtual hard disk when creating or editing a virtual machine. The system inside the file then boots like a normal computer. For a simpler setup, platforms like Apporto provide browser-based environments without manual configuration.

Virtualization has changed the way you interact with operating systems. Instead of relying on one installed system, tools like Oracle VM VirtualBox allow you to run multiple operating systems on a single host computer. Each operating system runs inside a virtual machine, functioning almost like a separate computer within your existing environment.

At the center of this setup sits the VDI file, short for Virtual Disk Image. This file acts as the virtual hard disk for the machine. It stores the operating system, installed software, system files, and all the data the guest operating system needs to function normally.

Many users encounter VDI files when downloading disk images or migrating existing virtual machines. Understanding how to use a VDI file in VirtualBox becomes essential.

In this guide, you will learn what a VDI file is, how VirtualBox manages disk images, how to create or attach virtual disks, how disk allocation works, and how to resolve common VDI file problems.


What Is a VDI File and Why Does VirtualBox Use It?

A VDI file, short for Virtual Disk Image, sits quietly at the center of every VirtualBox virtual machine. Think of it as the machine’s storage brain. Not a physical drive, of course, but something that behaves almost exactly like one. Oracle VM VirtualBox uses this format as its native container for storing virtual disks.

Inside that single file lives an entire environment. The operating system, installed applications, configuration data, temporary files, everything the virtual machine relies on to function. From the perspective of the guest operating system, the VDI behaves like a normal hard disk installed in a physical computer. You install software. You save documents. Files appear, disappear, move around.

Meanwhile, something subtle is happening underneath.

Although these disk image files reside on the host system, VirtualBox quietly translates every disk operation. When the guest system reads or writes a disk sector, the virtualization layer redirects that request to the virtual hard disk file stored on the host computer. The guest OS never notices the difference.

Characteristics of VDI Files

• Stores the operating system and installed applications of the virtual machine
• Acts as the boot disk for the guest operating system
• Supports fixed size disks and dynamically allocated images
• Allows disk capacity expansion after creation
• Redirects disk sector operations from the guest OS to host storage

Dynamically allocated images start small. Over time, as data accumulates, the disk grows gradually, using only the storage actually required.


What Types of Disk Image Formats Does VirtualBox Support?

Developer workstation screen displaying VirtualBox Virtual Media Manager organizing multiple virtual disk image formats.

VirtualBox relies on VDI files by default, yet the software was designed with flexibility in mind. Virtual environments rarely stay inside one ecosystem forever. Teams migrate systems.

Developers move test machines between tools. Sometimes you download an image created somewhere else entirely. Because of that reality, Oracle VM VirtualBox supports several disk image container formats, allowing different virtualization platforms to work together.

In practice, this means a virtual machine originally built on VMware or Microsoft Hyper-V can often be imported and run inside VirtualBox with minimal effort.

The virtualization layer simply reads the structure of the disk image and presents it to the guest operating system as a usable virtual hard disk. Several common formats appear regularly when working with virtual machines.

Disk Image Formats Supported by Oracle VM VirtualBox  

Disk Format Description Typical Source
VDI Native VirtualBox disk image format Oracle VirtualBox
VMDK VMware virtual disk format VMware Workstation / ESXi
VHD Microsoft virtual hard disk format Microsoft Hyper-V
HDD Parallels disk format Parallels Desktop


All of these disk images can be managed through the Virtual Media Manager window in VirtualBox. From there you can register existing disks, attach them to virtual machines, remove unused images, or inspect their properties. It is a small tool, easily overlooked, yet extremely useful when organizing virtual disk files.


How Does VirtualBox Store and Manage Virtual Disk Images?

Once a virtual machine is created, VirtualBox needs a reliable way to organize its storage. This is where disk image management becomes important.

Instead of spreading data across multiple hidden system components, VirtualBox stores disk image files directly inside the host system’s file structure, usually within the VirtualBox VM folder. You can open that directory and actually see the files sitting there.

Each of those files represents a virtual disk container. Inside it are data blocks that correspond to disk sectors used by the guest system.

When the guest operating system reads or writes information, VirtualBox maps those requests to the correct locations inside the disk image file stored on the host computer. To the guest system, it behaves like a real hard drive.

Keeping track of all those disks could become messy, so VirtualBox includes a built-in management tool called the Virtual Media Manager. This interface acts as the control center for disk images.

Functions of the Virtual Media Manager

• Register existing disk image files
• Create new virtual hard disk images
• Remove unused virtual disks
• Expand disk capacity when needed
• Clone disk images for backup or duplication
• Track disk file size and storage usage

Through the Virtual Media Manager window, administrators gain flexible storage management. It becomes much easier to organize disk image files, maintain virtual machines, and keep storage resources under control.


How to Use a VDI File in VirtualBox When Creating a New Virtual Machine?

Developer creating a virtual machine in VirtualBox while selecting an existing VDI disk image from a file browser.

So here’s where things become practical. You have a VDI file, maybe downloaded from a developer site, maybe exported from another system, and now the goal is simple, make that disk image actually run. In most cases the cleanest path is to create a new virtual machine and attach the VDI file as its primary boot disk.

Think of the process like assembling a computer, except everything happens inside software. The virtual machine provides the CPU, memory, and system configuration. The VDI file supplies the storage and operating system environment. Put the two together and the system can boot normally.

VirtualBox makes this process fairly straightforward, although the option to use an existing disk is easy to overlook the first time you encounter the setup screen.


Steps to Create a New Virtual Machine Using a VDI File

  1. Launch Oracle VM VirtualBox on your host system.
  2. Click New to begin creating a new virtual machine.
  3. Enter a machine name and choose the correct operating system type.
  4. Allocate system memory and any additional computing resources required.
  5. When the storage configuration screen appears, choose Use an existing virtual hard disk file.
  6. Click the folder icon beside the disk selection field.
  7. Browse through the available disk images and locate your existing VDI file.
  8. Select the disk image and confirm the selection.
  9. Click Create to finish configuring the virtual machine.

Once the setup is complete, the virtual machine recognizes the existing VDI as its storage device. When you start the VM, VirtualBox loads the operating system stored inside that disk image, treating it exactly like a physical boot disk.


How Do You Attach a VDI File to an Existing Virtual Machine?

Sometimes a VDI file already contains useful data or even an entire operating system, yet the virtual machine you plan to use already exists. In that situation you do not need to create a new VM at all. VirtualBox allows you to attach a VDI file as an additional virtual hard disk to an existing system.

This approach is common when adding extra storage to a VM, restoring a disk from backup, or migrating data from another virtual machine.

The process takes place inside the storage configuration panel, where VirtualBox lets you connect new disk images to a controller such as SATA or IDE.

Once attached, the virtual machine treats the disk image just like another hard drive installed in a physical computer.

Steps to Attach a VDI File

  1. Launch VirtualBox and select the existing virtual machine.
  2. Click Settings to open the machine configuration window.
  3. Navigate to the Storage section.
  4. Locate and select the SATA controller.
  5. Click Add Hard Disk to create a new storage attachment.
  6. Choose the option labeled Existing Disk.
  7. Browse the storage list and select the desired VDI file.
  8. Apply the configuration changes and close the settings window.

When the VM starts again, the system detects the existing virtual hard disk automatically. Inside the guest operating system it appears as a normal virtual drive, ready for file access or additional configuration.


What Is the Difference Between Dynamically Allocated and Fixed Size VDI Files?

Developer selecting a VDI file from a file browser while configuring a new virtual machine in VirtualBox.

When creating a virtual disk image in VirtualBox, one decision quietly shapes how that disk behaves over time. The platform asks you to choose between two allocation methods, dynamically allocated images or fixed size images. At first glance the difference appears small. In practice it affects storage usage and performance.

A dynamically allocated VDI file begins modestly. The disk image occupies only a small amount of space on the host system at the start. As data is written inside the virtual machine, the file gradually expands. Each write operation increases the disk file size until it eventually reaches the maximum capacity defined during creation.

A fixed size image behaves differently. When the disk is created, VirtualBox immediately allocates the full storage capacity on the host system. The disk file size roughly matches the virtual disk capacity from the beginning. This approach consumes more space initially but can provide faster disk performance because the storage layout remains stable.

VDI Disk Allocation Comparison 

Feature Dynamically Allocated Image Fixed Size Image
Initial disk file size Small Full capacity allocated
Disk growth Expands as data is written Fixed at creation
Host storage usage Uses less space initially Roughly same size as capacity
Write performance Slightly slower Faster write operations


In many environments dynamically allocated disks help conserve storage. Fixed disks, on the other hand, may deliver better write performance, especially during heavy disk activity.


How Can You Resize or Expand a VDI File After Creation?

Virtual machines evolve. Software grows, data accumulates, and eventually the original disk size you selected begins to feel cramped. The good news is that VirtualBox allows you to expand a VDI file even after it already contains data. The process does not require rebuilding the virtual machine or reinstalling the operating system.

Resizing typically happens outside the graphical interface. VirtualBox provides a small but powerful utility called VBoxManage, a command line tool that allows you to modify virtual disk properties. With a single command, you can increase the maximum capacity of the virtual disk image, giving the guest system additional room to work with.

It is important to remember something, though. Expanding the VDI file only increases the available storage at the virtual disk level. The operating system inside the virtual machine must still expand its partition before it can use that new space.

Steps to Resize a VDI File

• Open the command line interface on the host system
• Navigate to the VirtualBox installation directory
• Run the VBoxManage modifyhd command with the path to the VDI file
• Specify the new disk capacity you want to assign

After the operation completes, start the virtual machine and extend the partition within the guest operating system to use the additional disk space.


What Common Problems Occur When Opening VDI Files in VirtualBox?

VirtualBox virtual machine error screen showing a VDI disk failing to load with warning icons and troubleshooting indicators.

Working with virtual machines usually feels smooth, at least most of the time. Still, VDI files occasionally refuse to cooperate. You try to start the VM, and something goes wrong. The disk fails to load. The system complains about compatibility. Sometimes the file simply refuses to open.

These situations rarely mean the entire virtual machine is lost. In many cases the issue comes down to configuration details or version mismatches between the disk image VDI file and the VirtualBox installation.

Common VDI File Issues are:

• VirtualBox not recognizing the disk image
• Corrupted VDI files caused by interrupted writes or storage errors
• Disk image version incompatibility between VirtualBox releases
• Incorrect storage controller configuration inside the VM settings
• Damaged virtual disk sectors that prevent proper disk reads

When a VDI file fails to open, the first step is usually simple. Open the Virtual Media Manager and check whether the disk image is properly registered. If the file appears missing or detached, re-registering the disk often restores access.

Sometimes converting the disk format or updating VirtualBox resolves the issue as well. Most problems look serious at first glance, yet they tend to have practical fixes once you identify the root cause.


How Can You Recover or Repair Corrupted VDI Files?

Every now and then a virtual disk runs into trouble. Maybe the host computer shut down unexpectedly. Maybe a storage device failed halfway through a write operation.

Sometimes the issue is less dramatic, just a corrupted block inside the VDI file that prevents VirtualBox from opening it normally. When this happens, the virtual machine may refuse to start or the disk image may appear unreadable.

A virtual disk image is still a file stored on the host system, which means it can suffer from the same kinds of corruption that affect any other file. Incomplete writes, sudden system crashes, or disk hardware errors can damage the internal structure of the image.

Recovery Methods to Use Are:

• Using professional VDI recovery software designed to repair corrupted VDI files
• Repairing the virtual disk with specialized disk repair utilities
• Restoring disk image files from backup copies

Some tools go further and allow direct data recovery. For example, Aryson VDI Recovery Software can scan damaged disk images, repair corrupted VDI structures, and recover deleted files stored inside the virtual disk.

Of course, prevention remains the safer path. Regular backups of important virtual machines help ensure you can recover quickly if disk image corruption occurs.


Why Apporto Is a Simpler Alternative to Complex Virtual Machine Environments?

Apporto homepage showcasing virtual desktop solutions, AI tutoring and grading services, and academic integrity tools with demo request options.

VirtualBox gives you remarkable control over virtualization, yet that flexibility comes with responsibility. You configure the virtual machine, attach disk images, install the operating system, adjust storage controllers, and manage resources manually. For developers or system administrators that level of control makes sense. For many teams, though, it quickly becomes time consuming.

This is where Apporto takes a different path. Instead of requiring users to manage virtual disk images or configure local virtualization software, Apporto delivers browser based virtual desktops that run entirely in the cloud. You open a browser, sign in, and your desktop environment appears ready to use.


Final Thoughts

Working with virtual machines becomes far less intimidating once you understand how VDI files function inside VirtualBox. In most situations the process follows a clear path.

You create a virtual machine, attach the VDI file as the virtual hard disk, configure system resources such as memory and CPU allocation, then launch the guest operating system. From there the virtual machine behaves much like a normal computer.

Learning how VirtualBox handles disk images also makes everyday management easier. You begin to understand where disk image files reside, how storage grows, and how virtual disks interact with the host system.

With that knowledge, maintaining virtual machines becomes more predictable. Storage can be expanded, disk images organized, and virtual environments managed with far greater confidence and efficiency.


Frequently Asked Questions (FAQs)


1. What is a VDI file in VirtualBox?

A VDI file is a virtual hard disk format used by Oracle VM VirtualBox to store an operating system, applications, and data. It functions like a physical drive inside a virtual machine, enabling the system to run independently within your computer

2. Can you open a VDI file directly in VirtualBox?

You cannot open a VDI file like a normal document. Instead, VirtualBox uses it as the virtual hard disk for a virtual machine. You must attach the VDI file to a new or existing VM before the operating system inside it can run.

3. How to view a .VDI file? 

You cannot open a .VDI file directly like a regular file. Instead, load it into Oracle VM VirtualBox as a virtual disk to access its contents. Alternatively, specialized tools or mounting methods can help extract or browse files stored inside the disk image.

4. What is the difference between VDI and VMDK?

VDI is the native disk image format created for VirtualBox environments, while VMDK is commonly used by VMware virtualization products. Both formats store virtual disk data, and VirtualBox supports opening VMDK files for compatibility between virtualization platforms.

5. Can you convert a VDI file to another disk format?

Yes. VirtualBox provides tools such as the VBoxManage command line utility that allow you to convert a VDI file into formats like VMDK or VHD. This is useful when migrating virtual machines between different virtualization platforms.

6. Why is my VDI file not opening in VirtualBox?

A VDI file may fail to load due to disk corruption, incorrect VM storage settings, or compatibility issues with the VirtualBox version installed. Re-registering the disk image in the Virtual Media Manager often resolves the problem.

Azure Virtual Desktop SSO Not Working? Here’s How to Fix

Quick Answer

Why Is Azure Virtual Desktop SSO Not Working?

Azure Virtual Desktop SSO issues usually occur because of misconfigured Microsoft Entra authentication, missing Kerberos settings, restrictive Conditional Access policies, or incorrect host pool configuration. These problems can cause repeated credential prompts and login loops. Browser-based platforms like Apporto simplify remote access by reducing authentication complexity.

At first glance, Azure Virtual Desktop seems straightforward. You connect, your desktop appears, and work begins. Behind that simplicity sits a layered authentication system running on Microsoft Azure, where identity services, policies, and virtual machines must align for everything to function smoothly.

Single Sign-On (SSO) is designed to simplify access. After signing in once with Microsoft Entra ID, you should be able to open virtual desktops and applications without entering credentials again.

When Azure Virtual Desktop SSO is not working, the experience changes quickly. Users may see repeated credential prompts, endless login loops, standard authentication dialogs, or failed remote desktop client sessions.

Most issues stem from misconfigured Microsoft Entra authentication, missing Kerberos objects, restrictive Conditional Access policies, missing user permissions, or improperly configured session hosts. This guide explains how SSO works and how to troubleshoot failures.


What Is Single Sign-On in Azure Virtual Desktop and How Does It Work?

Authentication usually fades into the background when systems behave the way they should. You sign in once, open a desktop, and everything simply continues. That quiet convenience is exactly what Single Sign-On (SSO) aims to deliver inside an Azure Virtual Desktop environment.

SSO allows you to authenticate using your Microsoft Entra credentials, then reuse that identity across the entire session. After the initial login, Azure generates a Windows cloud login token tied to your account.

The Remote Desktop client receives that token and passes it along during the connection process. Once the request reaches the session host, the system recognizes the token and signs you in automatically. No additional prompts. No second password entry.

The result is that SSO delivers the desired experience for users by providing a seamless experience where users connect once and move between desktops and apps without interruption.

Core Components Behind Azure Virtual Desktop SSO

  1. Microsoft Entra ID authentication
  2. Session hosts
  3. Host pools
  4. Remote Desktop client / Windows App
  5. Microsoft Entra ID app (Azure Windows VM Sign-In)


What Must Be Configured Before Azure Virtual Desktop SSO Can Work?

"IT administrator enabling Microsoft Entra authentication for Azure Virtual Desktop Single Sign-On setup.

Before Single Sign-On works in Azure Virtual Desktop, a few pieces have to line up properly. Authentication, device identity, and remote desktop configuration all need to cooperate.

Miss one element and the system quietly falls back to standard credential prompts. That’s usually the moment administrators realize something in the configuration chain is incomplete.

Microsoft outlines several steps required to enable Microsoft Entra authentication and activate SSO. These settings allow Azure to issue authentication tokens that session hosts can trust during login. When configured correctly, users authenticate once and connect to their desktops without repeated prompts.

Required Configuration for Azure Virtual Desktop SSO are:

  1. Enable Microsoft Entra authentication
  2. Configure host pool RDP property
  3. Join session hosts correctly
  4. Assign user permissions
  5. Verify licensing

Administrators should also confirm the surrounding infrastructure is ready. That includes creating host pools, configuring session host virtual machines, verifying identity provider settings, and ensuring the Azure subscription has the required permissions for deployment and management.


Which Misconfigurations Cause Azure Virtual Desktop SSO Not Working?

Once Single Sign-On is enabled, the expectation is simple. You authenticate once and connect directly to your virtual desktop. When that process breaks, the cause is usually not a single error but a small configuration problem somewhere along the authentication chain.

Azure Virtual Desktop relies on identity services, device trust, and host configuration working together. If any part of that structure is incomplete, the platform cannot validate authentication tokens correctly.

The result is familiar to many administrators. Users sign in successfully, yet the system continues asking for credentials again and again. Several configuration issues appear repeatedly in environments where Azure Virtual Desktop SSO is not working.

Most Common SSO Failure Causes

  • Kerberos server object missing or incomplete: Hybrid environments require a correctly configured Kerberos object to validate authentication requests.
  • Session hosts not Microsoft Entra hybrid joined: If session hosts are not properly joined, authentication tokens cannot be trusted during login.
  • Host pools missing required RDP properties: Missing properties such as targetisaadjoined:i:1 prevent the system from recognizing Entra-based authentication.
  • Users lacking Virtual Machine User Login permissions: Without the proper role assignment, users cannot access session hosts.
  • Conditional Access policies blocking authentication: Policies enforcing strict login rules may interrupt the SSO handshake.
  • Time differences between session hosts and Azure AD: Even small clock mismatches can break token validation.
  • Unsupported Remote Desktop client versions: Older clients may not support modern authentication features.


How Do Conditional Access Policies Break Azure Virtual Desktop SSO?

Azure Virtual Desktop SSO authentication flow interrupted by Conditional Access policies and MFA requirements.

Security policies exist for good reasons. They protect identities, restrict risky sign-ins, and help organizations control how users access sensitive systems. In an Azure Virtual Desktop environment, those same controls can occasionally interfere with the authentication flow required for Single Sign-On.

SSO depends on a smooth exchange of identity tokens between Microsoft Entra ID, the Remote Desktop client, and the session host. When a Conditional Access policy introduces additional authentication steps during that process, the handshake may fail or restart.

The user signs in, authentication begins, then another security rule interrupts the process. Sometimes the result is a simple prompt for credentials. Other times the system repeats the login cycle.

Conditional Access Issues That Commonly Break SSO

  • Policies requiring Microsoft Entra multifactor authentication: MFA can interrupt the token exchange used during remote desktop login.
  • Sign-in frequency rules: Strict sign in frequency policies may force users to authenticate repeatedly during reconnect attempts.
  • Policies targeting the Azure Windows VM Sign-In application: Restrictions applied to this identity endpoint can block automatic authentication.
  • Device compliance requirements: Devices that fail compliance checks may be blocked before the session begins.

Conditional Access policies can also rely on device groups, dynamic groups, and trusted devices to determine who can sign in. Because these rules are reevaluated each time a session reconnects, SSO may fail even after an earlier login succeeded.


How Kerberos and Hybrid Join Issues Break Azure Virtual Desktop SSO?

Many Azure Virtual Desktop environments still rely on on-premises infrastructure. File shares, internal applications, legacy systems, all of them often live inside a traditional Active Directory environment. Session hosts in these environments frequently run on Windows Server and require connectivity to a domain controller for authentication. To access those resources from a virtual desktop, the authentication chain usually depends on Kerberos, and Windows integrated authentication is used to provide seamless sign-on between Azure Virtual Desktop and on-premises resources.

In hybrid deployments, Microsoft Entra hybrid join allows session hosts to trust both Azure identity services and the on-premises domain. That bridge only works when Kerberos is configured correctly.

If the Kerberos configuration is incomplete, or if the session host cannot reach a domain controller, Azure Virtual Desktop cannot complete the authentication handshake required for Single Sign-On.

What happens then? The login technically succeeds, yet the system cannot validate the session when the user connects to the desktop. The result often looks confusing, repeated credential prompts, failed authentication attempts, or remote sessions that refuse to fully start.

Kerberos Troubleshooting Checks

  • Verify the Kerberos server object exists: Hybrid environments require this object for secure authentication between Microsoft Entra ID and the domain.
  • Confirm required attributes are present: Missing attributes often cause authentication loops.
  • Ensure session hosts are Microsoft Entra hybrid joined: Devices must participate in hybrid join for Kerberos authentication to function.
  • Verify the local device is correctly joined to Microsoft Entra ID or hybrid joined: Device identity of the local device is critical for Kerberos authentication and SSO to work properly.
  • Verify Active Directory domain controllers are reachable: Session hosts must communicate with domain controllers to validate Kerberos tickets.


How to Diagnose Azure Virtual Desktop SSO Failures Using Entra Sign-In Logs?

IT administrator analyzing Microsoft Entra sign-in logs to diagnose Azure Virtual Desktop SSO authentication failures.

When Azure Virtual Desktop SSO is not working, guessing rarely solves the problem. Authentication failures usually leave clear evidence inside Microsoft Entra sign-in logs.

These logs record every attempt to authenticate, including policy decisions, token failures, and permission errors. Reading them carefully often reveals exactly where the login chain breaks.

When a user attempts to sign in to a session host, the authentication request travels through several identity checkpoints.

Microsoft Entra ID evaluates the request, verifies policies, and generates authentication tokens for the Azure Windows VM Sign-In application. If any part of this sequence fails, the logs capture the error.

What to Look For in Sign-In Logs

  • AADSTS error codes: These codes identify the exact authentication failure and often point directly to the misconfigured component.
  • Conditional Access policy failures: Logs may show policies that blocked or interrupted the sign-in attempt.
  • Unexpected MFA prompts: If multifactor authentication triggers during remote desktop login, the SSO flow may break.
  • Errors tied to the Azure Windows VM Sign-In app: Failures here often indicate permission or token issues.

Administrators can review these records through the Azure Portal, query them using Microsoft Graph modules, or investigate events from a PowerShell session for deeper troubleshooting.


How to Troubleshoot Azure Virtual Desktop SSO Step by Step

When Azure Virtual Desktop SSO is not working, the most effective approach is a structured check of the authentication chain. Each connection depends on device identity, user permissions, session host configuration, and the client software initiating the login. If any of those pieces fail validation, the platform quietly falls back to standard authentication prompts.

Troubleshooting usually starts on the session host virtual machine, then moves outward to identity services and client configuration. Administrators should verify that the device is properly joined to Microsoft Entra ID, confirm the session host is healthy, and ensure the user is connecting with a supported client. Small configuration gaps often reveal themselves during these checks.

Major Troubleshooting Commands

Run the following commands to troubleshoot Azure Virtual Desktop SSO issues:

  • Run dsregcmd /status in Command Prompt
  • Verify a Primary Refresh Token exists
  • Ensure session hosts show “Available” in the host pool
  • Confirm users connect with a supported Windows Desktop Client version
  • Review Conditional Access policies targeting the Azure Windows VM Sign-In app

Administrators can also run Microsoft Graph commands in the same PowerShell session to verify permissions and confirm identity configuration.


Can ADFS Cause Azure Virtual Desktop SSO Problems?

Enterprise IT engineer reviewing AD FS configuration and identity synchronization with Microsoft Entra Connect.

In some enterprise environments, Active Directory Federation Services (AD FS) is still used to provide Single Sign-On for Azure services.

Instead of relying entirely on Microsoft Entra authentication, organizations may federate their on-premises identity infrastructure with Microsoft Azure. This approach allows existing domain credentials to authenticate users across cloud services, including Azure Virtual Desktop.

When configured correctly, AD FS can provide a smooth SSO experience. However, federation introduces additional components into the authentication chain.

Certificates, identity synchronization, and federation trust relationships must all function correctly. If any of these pieces fail, users may experience repeated authentication prompts or failed virtual desktop logins.

ADFS SSO Requirements

  • Session hosts running supported Windows versions
  • Active Directory Certificate Services deployed
  • Microsoft Entra Connect configured in federation mode
  • Relying-party trust established between ADFS and Azure Virtual Desktop

It is also important to note that AD FS-based SSO cannot be used with Microsoft Entra Domain Services.


Why Some Organizations Look for Alternatives to Azure Virtual Desktop Authentication Complexity?

Azure Virtual Desktop is powerful, but the authentication chain behind it can grow complicated very quickly. Identity providers must be configured correctly. Kerberos objects, hybrid join settings, and Conditional Access policies all need to align.

Add licensing requirements and session host configuration, and the environment can become difficult to maintain. A small misconfiguration often leads to repeated credential prompts or failed login attempts.

Because of this complexity, some organizations begin exploring platforms that deliver virtual desktops without heavy identity configuration. Organizations may also seek solutions that better align with their own values and priorities regarding security, simplicity, and user experience.

Apporto is one example. It provides cloud desktops through a browser, removing the need for traditional Remote Desktop clients and complex authentication chains.

The platform includes built-in authentication, simplified deployment, and secure remote access across devices. Instead of maintaining layered infrastructure, you connect directly through the browser and start working. Try Now.


Final Thoughts

When Azure Virtual Desktop SSO is not working, the issue rarely comes from a single failure. Most problems appear when several authentication components fall slightly out of alignment. Identity services, host configuration, security policies, and client software must all cooperate for the login process to succeed.

Fixing the issue usually requires tracing the authentication chain from start to finish. Administrators should review Microsoft Entra ID sign-in logs, confirm host pool configuration, verify Kerberos settings, and examine Conditional Access policies that may interrupt authentication.

Once these elements are aligned, the system typically returns to what SSO was meant to provide, a smooth and uninterrupted sign-in experience. Microsoft Entra remembers user credentials and session information, which streamlines repeated connections and reduces login friction.


Frequently Asked Questions (FAQs)


1. Why does Azure Virtual Desktop keep asking for credentials?

Repeated credential prompts usually appear when Single Sign-On fails to complete the authentication chain. This can happen if session hosts are not Microsoft Entra joined, permissions are missing, Conditional Access policies interrupt authentication, or Kerberos configuration is incomplete.

2. How do you enable single sign-on in Azure Virtual Desktop?

To enable SSO, administrators must allow Microsoft Entra authentication for Windows, configure the host pool RDP property targetisaadjoined:i:1, ensure session hosts are Entra joined or hybrid joined, and assign proper user roles such as Virtual Machine User Login.

3. What causes endless login loops in Azure Virtual Desktop?

Login loops usually occur when authentication tokens cannot be validated by the session host. Common causes include missing Kerberos server object attributes, restrictive Conditional Access rules, incorrect host pool configuration, or unsupported Remote Desktop client versions.

4. How do Conditional Access policies affect Azure Virtual Desktop SSO?

Conditional Access policies may enforce multifactor authentication, device compliance checks, or sign-in frequency rules. These policies are reevaluated during remote desktop connections and can interrupt the SSO handshake between Microsoft Entra ID and session hosts.

5. How do you verify session hosts are Microsoft Entra joined?

Administrators can run the command dsregcmd /status from the session host using Command Prompt. The output confirms whether the device is Microsoft Entra joined or hybrid joined and verifies that a valid Primary Refresh Token exists.

6. Does Azure Virtual Desktop require Microsoft Entra ID licenses?

Users typically need Microsoft Entra ID P1 licensing or equivalent Microsoft 365 subscriptions to enable advanced authentication features such as Conditional Access and Single Sign-On when connecting to Azure Virtual Desktop environments.