Quick Answer
What Is Zero Trust Security?
Zero Trust security is a cybersecurity framework based on the principle of “Never Trust, Always Verify.” It continuously validates users, devices, and access requests before granting access to applications or data. Technologies such as MFA, ZTNA, and browser-based platforms like Apporto help organizations reduce risk and strengthen security.
For years, cybersecurity strategies focused on defending the network perimeter and trusting users once they were inside. That approach was designed for a time when applications, data, and employees operated within clearly defined boundaries. Today, cloud environments, remote work, and connected devices have made those boundaries far less reliable.
As cyber threats continue to evolve, organizations are adopting Zero Trust security to strengthen their security posture. Rather than assuming trust, the Zero Trust security model requires continuous verification of every user and device requesting access.
In this guide, you’ll learn what is Zero Trust security, how Zero Trust architecture works, its core principles, implementation steps, the role of ZTNA, and the benefits it offers as a modern security strategy.
What Is Zero Trust Security?
Cybersecurity has long relied on a simple assumption: once someone is inside the network, they can generally be trusted. That assumption made sense when employees worked primarily from offices and applications lived inside company data centers. Today, data moves across cloud platforms, employees connect from different locations, and attackers routinely exploit trusted accounts.
This reality gave rise to a different way of thinking. Instead of granting trust first and validating later, organizations are increasingly adopting Zero Trust security, a framework built around continuous verification and controlled access.
What Is the Simplest Definition of Zero Trust Security?
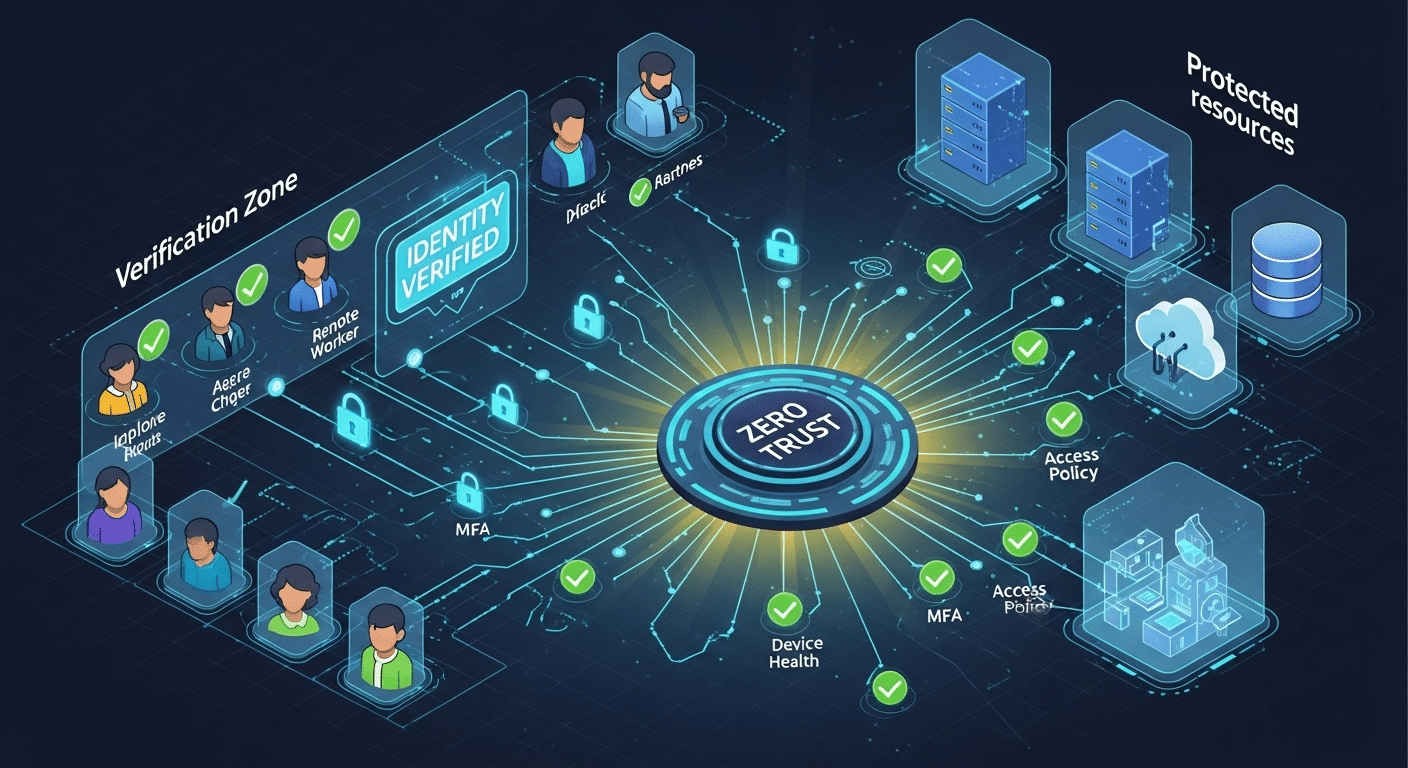
Zero Trust security is a cybersecurity framework based on the principle of “Never Trust, Always Verify.” Every user, device, application, and connection must be continuously authenticated and authorized before access is granted, regardless of whether the request originates inside or outside the network.
At its core, what is Zero Trust security really asking? It’s asking whether trust should ever be automatic.
The Zero Trust security model assumes that threats may already exist inside the environment. A compromised account, an infected device, or an insider threat could be present at any time. Because of this, every access request is treated as potentially risky until proven otherwise.
A modern Zero Trust architecture requires strict identity verification for every connection attempt. It applies equally to employees, contractors, third-party vendors, applications, and devices. No user is trusted simply because they have successfully connected before.
This approach transforms the traditional trust model. Instead of granting broad access after login, Zero Trust continuously evaluates identity, device health, behavior, and permissions before allowing access to resources.
The result is a security framework designed for modern organizations where users, applications, and data are no longer confined to a single network boundary.
Why Was the Zero Trust Model Created?
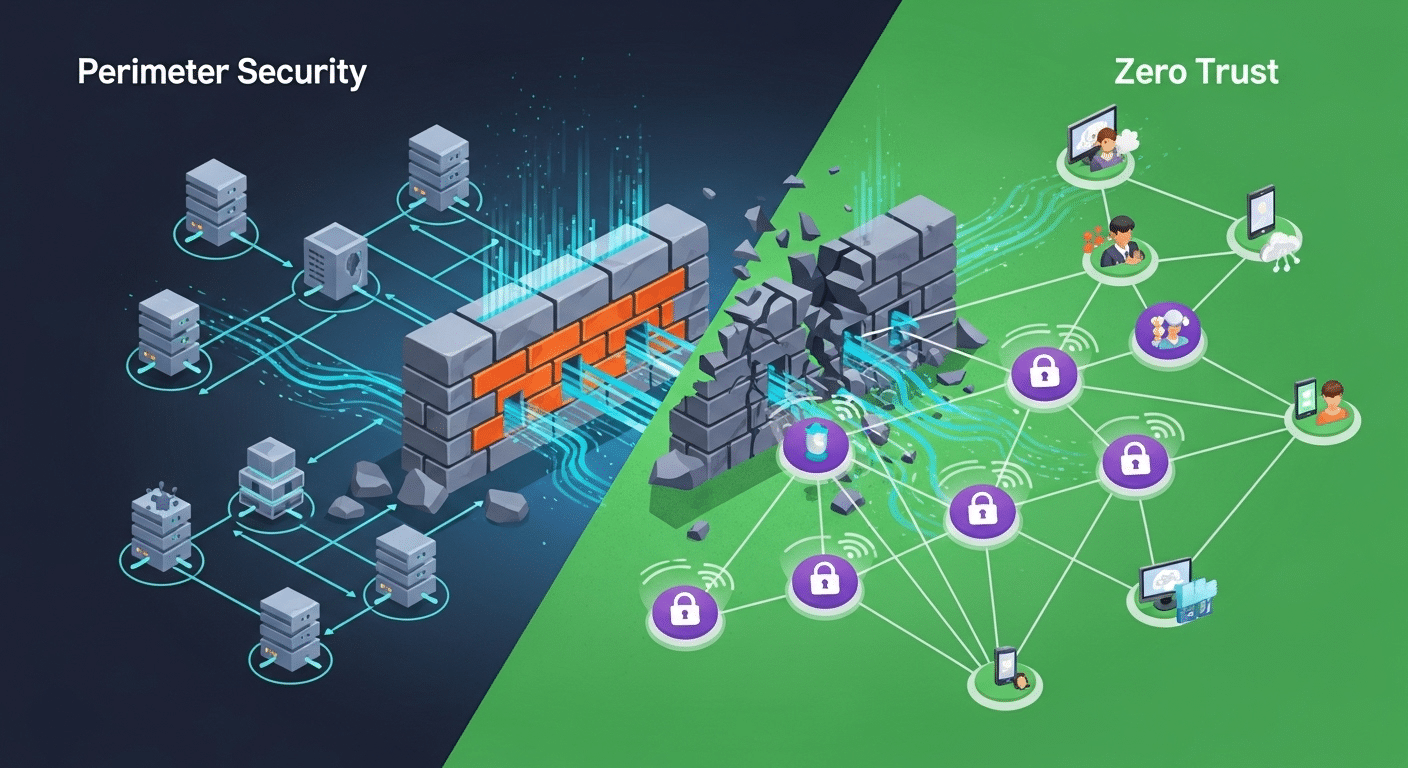
For many years, organizations followed what security professionals often call the “castle-and-moat” approach. The network perimeter acted as a protective wall, and anyone who successfully crossed that boundary was often granted broad access to internal systems.
That model worked reasonably well when most employees sat inside the same office and applications remained within company-controlled infrastructure. The problem is that those conditions no longer exist.
Cloud applications changed how businesses operate. Employees now connect from homes, airports, shared workspaces, and personal devices. Vendors, partners, and contractors frequently require access to business systems. As a result, the traditional boundary around the network has become increasingly difficult to define.
At the same time, cybercriminals adapted. Rather than attacking infrastructure directly, they often target credentials, compromised devices, and trusted users.
This exposed weaknesses in many traditional network security models. Once attackers gained access, they could often move through systems with limited resistance.
Another challenge came from insider threats. Not every security incident originates outside the organization. Authorized users can accidentally expose data, misuse privileges, or become victims of compromised accounts.
To address these realities, organizations needed a more adaptive approach to network security. Zero Trust emerged as a framework that continuously validates users and devices, regardless of location, while supporting modern cloud services and remote access environments.
How Is Zero Trust Different From Traditional Security?
The easiest way to understand Zero Trust is to compare it directly with older security approaches.
| Security Area |
Traditional Security Models |
Zero Trust Security |
| Network Perimeter |
Primary line of defense |
Assumes perimeter alone is insufficient |
| Trust Assumptions |
Trust after initial authentication |
Never trust automatically |
| Access Decisions |
Broad access after login |
Resource-specific access decisions |
| Authentication |
Often performed once |
Continuous verification and validation |
| Monitoring |
Focused on perimeter activity |
Continuous monitoring of all activity |
| Remote Workforce Support |
Often VPN-dependent |
Designed for distributed users and devices |
The fundamental difference lies in trust itself. Traditional security models often assume that authenticated users can be trusted until proven otherwise. Zero Trust reverses that assumption. Every access request must earn trust repeatedly through validation.
This approach strengthens trust security by limiting unnecessary access, reducing the attack surface, and making lateral movement significantly more difficult for attackers. It also provides deeper visibility into user behavior and system activity, allowing organizations to apply security measures with far greater precision.
Understanding this foundation is important because the real power of Zero Trust comes from the principles that support it. Next, we’ll explore the core concepts that make Zero Trust architecture work in practice.
What Are the Core Principles of Zero Trust Architecture?
Now that you’ve seen what Zero Trust is and why it emerged, the next question becomes more practical: what actually makes a Zero Trust environment work?
The answer lies in a handful of foundational principles. These principles guide every decision within a Zero Trust architecture, from how users authenticate to how applications, devices, and data are protected. While technologies may vary between organizations, the underlying philosophy remains remarkably consistent.
At its heart, Zero Trust is built on the idea that trust should never be permanent, automatic, or assumed. Access must be earned, validated, and continuously reassessed.
Why Does Zero Trust Follow the “Never Trust, Always Verify” Principle?
The phrase “Never Trust, Always Verify” has become synonymous with Zero Trust, and for good reason. It captures the central belief behind the entire framework.
Traditional security often grants trust after a successful login. Once users enter the network, they may receive broad access to systems and resources. Zero Trust takes a different path. Every request is evaluated individually, regardless of where it originates.
This approach is built around continuous verification. User identities, device health, location, behavior patterns, and access requests are continually assessed before permissions are granted. Verification doesn’t happen once at the beginning of a session. It happens repeatedly.
A core component of this process is strict identity verification. Users must prove who they are whenever they attempt to access sensitive resources. Devices may also need to demonstrate compliance with organizational security policies before connections are approved.
Behind this principle sits an important assumption: compromise is always possible. Credentials can be stolen. Devices can become infected. Accounts can be abused.
For that reason, many Zero Trust principles are designed around skepticism. Not paranoia exactly, but healthy skepticism. Every request must earn trust through validation rather than receiving it automatically.
What Does “Assume Breach” Mean in Zero Trust?
One of the most distinctive concepts in Zero Trust is the assumption that attackers may already be inside the environment.
That idea can sound unsettling at first. Yet it reflects how modern cyberattacks often unfold. Threat actors increasingly gain access through stolen credentials, compromised devices, supply chain vulnerabilities, or unsuspecting users. By the time an intrusion is detected, the attacker may already have a foothold within the network.
This is where the “assume breach” mindset becomes valuable.
Instead of focusing exclusively on preventing intrusions, organizations build security systems that limit what attackers can do after gaining access. Access controls, segmentation policies, monitoring tools, and behavioral analytics all work together to contain potential damage.
The goal is simple: reduce opportunity.
If an attacker compromises one account, they should not automatically gain access to the entire environment. If one system is breached, the attack should remain isolated rather than spreading unchecked.
This philosophy also improves threat detection. Because Zero Trust continuously validates activity, unusual behavior becomes easier to identify. Security teams gain deeper visibility into network activity and can respond more quickly when suspicious actions occur.
In a world where security breaches remain a constant possibility, assuming compromise often creates stronger defenses than assuming safety.
How Does Least Privilege Access Protect Sensitive Data?
One of the most important controls within Zero Trust is least privilege access.
The concept is straightforward: users, applications, and devices should receive access only to the resources required to perform their tasks. Nothing more.
When implemented correctly, least privilege reduces risk while limiting exposure of sensitive data.
Main components include:
- Minimal Permissions: Users receive the minimum level of access necessary for their responsibilities. This reduces unnecessary exposure to systems, applications, and information.
- Role-Based Access: Permissions are assigned according to job functions rather than individual preferences. A finance employee, for example, does not automatically require access to engineering systems.
- Temporary Access: Elevated permissions can be granted for specific tasks and automatically removed when no longer needed. This limits long-term risk.
- Regular Access Reviews: Organizations periodically review permissions to ensure users still require the access they have been given. Roles change, projects end, and access requirements evolve.
Why does this matter?
If an account becomes compromised, attackers can only access a limited set of resources. They cannot freely move across the environment because granting access is tightly controlled.
In a mature Zero Trust environment, users receive access to only the resources required for their role. This application of least privilege significantly reduces the damage that compromised credentials can cause.
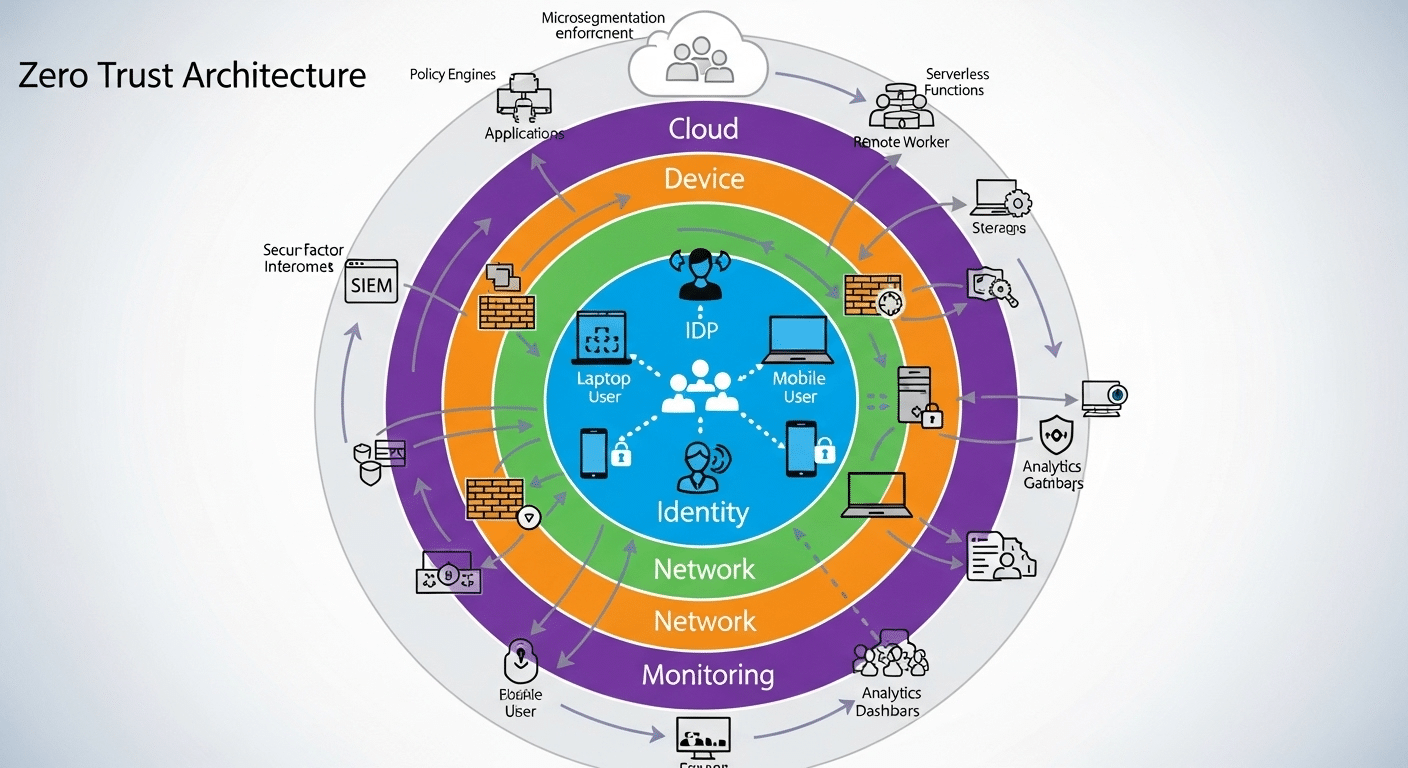
What Are the Five Pillars of Zero Trust?
Zero Trust extends far beyond user authentication. Modern frameworks typically organize protections around five interconnected pillars.
| Zero Trust Pillar |
Purpose |
Example Controls |
| Identity |
Verifies who is requesting access |
MFA, identity and access management, behavioral analytics |
| Devices |
Evaluates device security before granting access |
Device compliance checks, endpoint security, health validation |
| Networks |
Controls and monitors network access |
Segmentation, encryption, Zero Trust Network Access |
| Applications |
Protects applications and services |
Application-level authentication, policy enforcement |
| Data |
Safeguards sensitive information |
Data classification, encryption, access restrictions |
These pillars work together continuously. The identity and access management layer verifies users. Device controls evaluate endpoints. Network protections regulate network access. Application security enforces policies. Data protections safeguard valuable information.
Importantly, Zero Trust applies beyond users alone. Every pillar participates in security decisions. Continuous monitoring spans identities, devices, applications, networks, and data simultaneously.
This holistic approach strengthens access management while ensuring that both user and device access remain subject to ongoing validation. Together, these five pillars form the operational foundation of modern Zero Trust architecture.
How Does Zero Trust Security Actually Work?

The principles behind Zero Trust are relatively straightforward. The real question is how those principles operate in practice.
A Zero Trust environment doesn’t rely on a single security product or appliance. Instead, it combines identity verification, access controls, device validation, monitoring systems, and policy enforcement into a coordinated framework. Every access request is evaluated before permission is granted, and that evaluation continues even after a connection is established.
Think of it less as a security tool and more as a decision-making process. Every user, device, and application interaction must continuously prove that it deserves access.
What Happens When a User Requests Access?
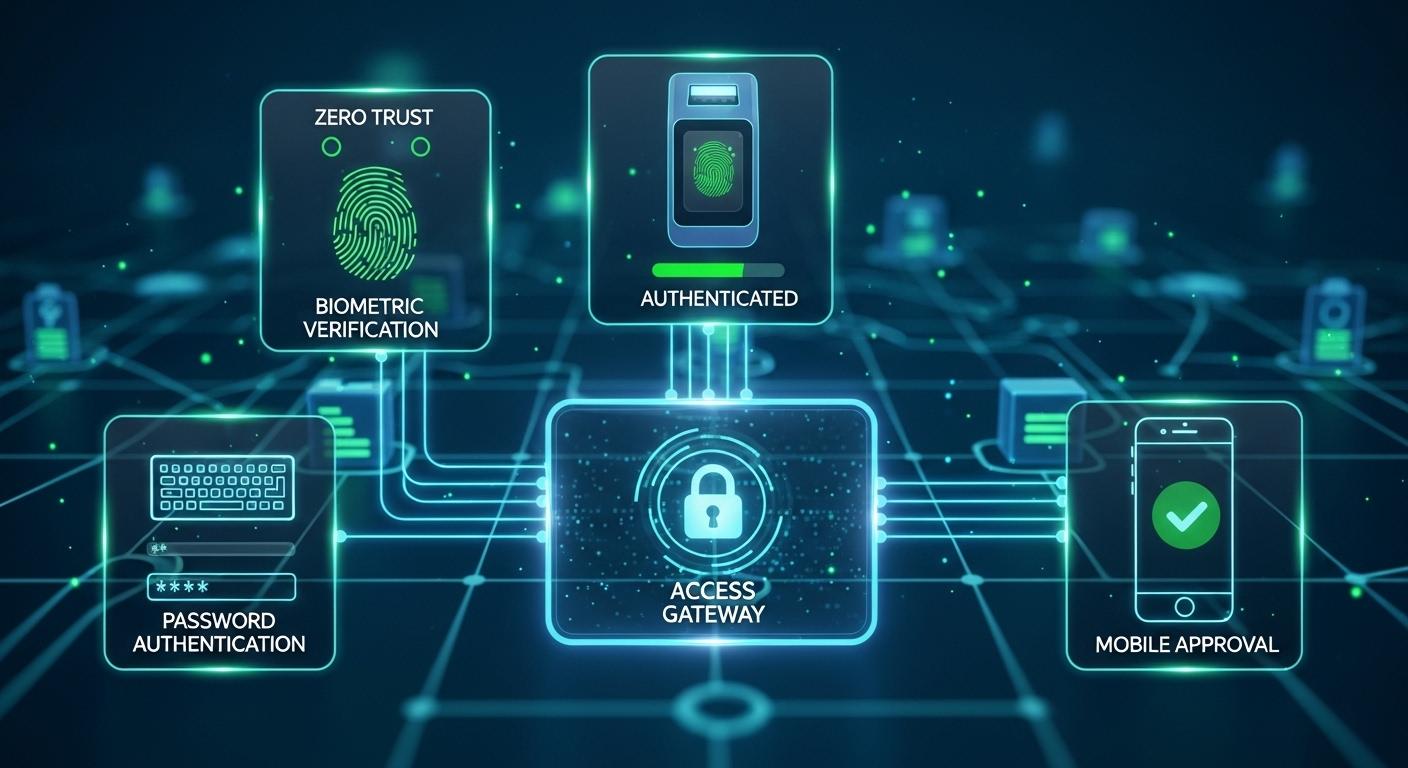
When a user attempts to connect to an application, system, or dataset, Zero Trust follows a series of verification steps before allowing access.
Step 1: Identity Verification
The system first verifies who the user claims to be. Credentials are checked against approved identity systems to establish a trusted digital identity.
Step 2: MFA Challenge
Many organizations require a multi factor authentication challenge. This typically involves a password plus an additional verification method such as a mobile code, authentication app, or hardware security key.
Step 3: Device Validation
Next, the device itself is evaluated. Security systems may check operating system status, patch levels, endpoint protection, encryption settings, and device compliance requirements.
Step 4: Risk Analysis
The access request is then analyzed for potential risks. Factors such as geographic location, unusual login patterns, time of access, and behavioral anomalies may influence the decision.
Step 5: Policy Evaluation
Security policies determine whether the request aligns with organizational requirements. Access permissions, user roles, and resource sensitivity are all considered.
Step 6: Resource Access
If all conditions are satisfied, the user can gain access to approved systems or applications. Importantly, access is typically limited to specific resources rather than the entire network.
Step 7: Continuous Monitoring
Even after approval, activity remains under observation. Changes in risk levels or suspicious behavior can trigger additional verification requirements or access restrictions.
This process ensures that users and devices receive only the permissions necessary to access resources, helping strengthen overall user access controls throughout the organization.
Why Is Continuous Monitoring Essential in Zero Trust?
Verification alone is not enough. A user may authenticate successfully at the beginning of a session and still become a security risk later. Credentials can be stolen. Devices can become compromised. Insider threats can emerge unexpectedly. Because of this, Zero Trust extends security beyond login events.
Continuous monitoring allows organizations to observe activity throughout the entire user session. Rather than relying on a single authentication decision, systems evaluate behavior continuously and look for indicators that something has changed.
This ongoing visibility improves threat detection significantly. Security teams can identify unusual login locations, abnormal application usage, unexpected file access patterns, or suspicious data transfers before they develop into larger incidents.
Continuous monitoring also strengthens threat intelligence programs by providing richer information about user activity, device behavior, and network interactions. Patterns that might otherwise go unnoticed become easier to identify and investigate.
Perhaps most importantly, continuous validation helps reduce insider threat risks. Authorized users can make mistakes, misuse privileges, or operate compromised accounts. Ongoing monitoring creates opportunities to detect and respond to those situations more quickly.
In a Zero Trust environment, trust is never permanent. Monitoring ensures that security decisions remain informed long after the initial login.
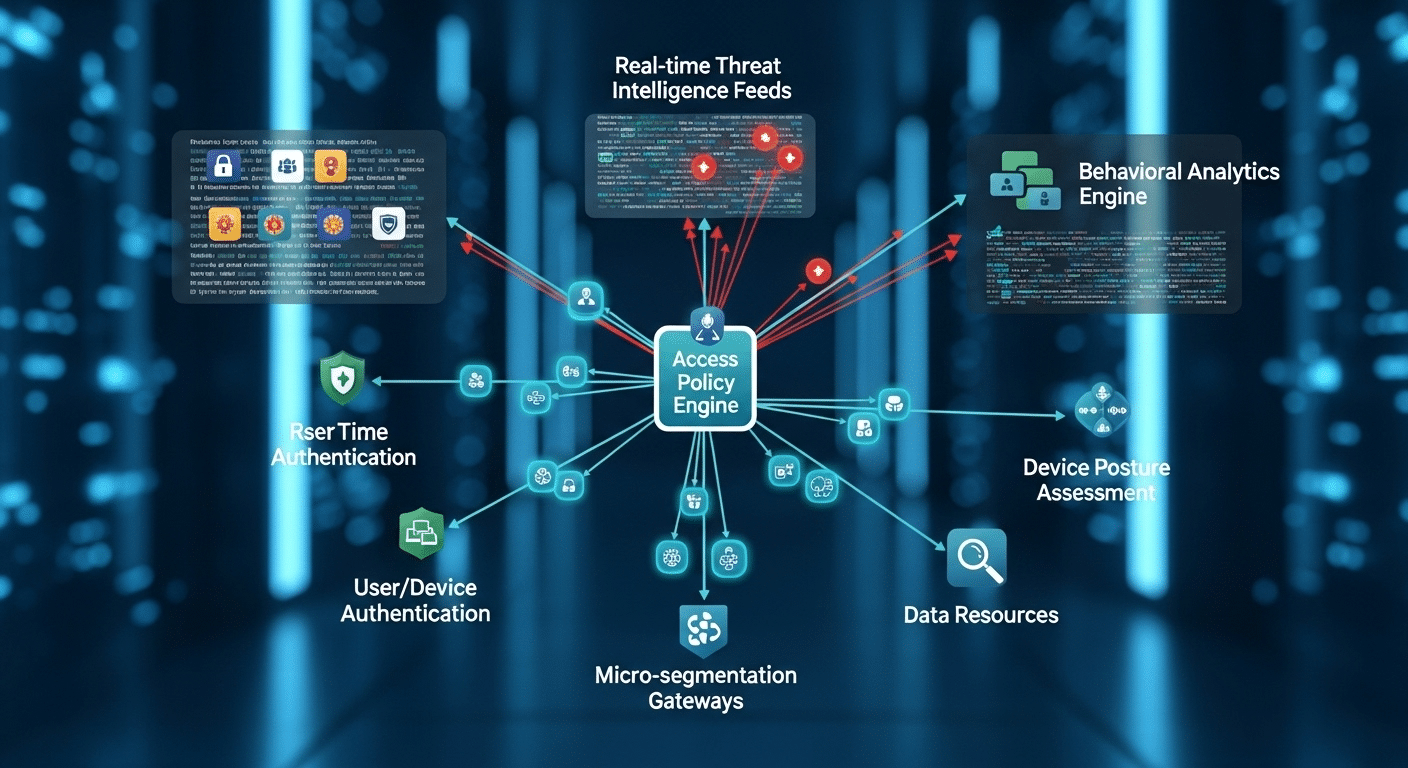
How Do Security Policies Enforce Zero Trust Decisions?
Security policies act as the decision engine behind Zero Trust.
Every access request is evaluated against predefined rules that determine what actions are allowed, restricted, or denied. These policies create consistency while reducing the need for manual intervention.
A well-designed Zero Trust security policy evaluates multiple factors simultaneously before granting access.
| Policy Factor |
Example Evaluation |
| User Identity |
Is the user authenticated and authorized? |
| Device Status |
Does the device meet security requirements? |
| Resource Sensitivity |
How critical is the requested system or data? |
| Location |
Is the request coming from an approved region? |
| Risk Level |
Does the activity appear suspicious? |
These security processes help organizations automate access control decisions while ensuring security requirements are applied consistently across users, devices, applications, and environments.
What Technologies Support Zero Trust Architecture?
Several technologies work together to support modern Zero Trust deployments:
- Multi Factor Authentication (MFA): Verifies identities using multiple authentication factors, making unauthorized access significantly more difficult.
- Identity and Access Management (IAM): Centralizes authentication, authorization, user provisioning, and permission management across systems.
- Zero Trust Network Access (ZTNA): Connects users only to approved applications and resources rather than exposing the broader network.
- Endpoint Management: Evaluates device health, compliance status, and security configurations before granting access.
- Security Analytics: Analyzes user behavior, network activity, and risk indicators to identify suspicious patterns.
- Threat Intelligence Platforms: Provide contextual information about emerging threats, compromised credentials, malicious IP addresses, and attack techniques.
Together, these technologies create the foundation for continuous verification. By combining identity and access management, multi factor authentication, device validation, analytics, and threat intelligence, organizations can implement Zero Trust architecture in a practical, scalable way while maintaining strong security controls across modern environments.
Why Is Multi-Factor Authentication (MFA) Critical to Zero Trust?
If Zero Trust is built on the idea of continuous verification, then Multi-Factor Authentication (MFA) is one of the most important tools that makes that verification possible. Identity sits at the center of every Zero Trust decision. Before users can access applications, data, or services, organizations need confidence that they are who they claim to be.
The challenge is that passwords alone are no longer enough. Credentials are frequently stolen through phishing attacks, malware infections, credential stuffing campaigns, and data breaches. A single password can become a weak link in an otherwise strong security strategy.
MFA addresses this problem by adding additional layers of verification. Instead of relying on one credential, users must provide multiple pieces of evidence before access is granted. This significantly reduces the likelihood of unauthorized access and strengthens the overall security foundation of a Zero Trust environment.
What Is Multi-Factor Authentication?
Multi-Factor Authentication (MFA) is a security process that requires users to verify their identity using at least two different authentication factors before gaining access to a system, application, or resource. Multi-Factor Authentication generally fall into three categories:
- Something you know, such as a password or PIN
- Something you have, such as a mobile device or security key
- Something you are, such as a fingerprint or facial recognition scan
For example, a user may enter a password and then approve a login request through a mobile authentication app. Another common approach combines a password with a physical security key.
The strength of multi factor authentication comes from requiring multiple authentication factors simultaneously. Even if one factor is compromised, attackers still need additional credentials to complete the login process.
In a Zero Trust environment, MFA serves as a foundational control that supports identity verification before access decisions are made.
How Does MFA Improve Security?
MFA strengthens security in several important ways:
- Makes Stolen Passwords Less Valuable: Attackers frequently obtain passwords through phishing, malware, and data breaches. MFA ensures that a password alone is not enough to gain access.
- Reduces Unauthorized Access Risks: Additional authentication layers make it significantly harder for threat actors to impersonate legitimate users.
- Strengthens Identity Verification: Organizations gain greater confidence that access requests originate from authorized individuals rather than compromised accounts.
- Improves Overall Security Posture: MFA adds a powerful defensive layer that complements other Zero Trust controls such as device validation and continuous monitoring.
- Supports Remote and Hybrid Work: As users connect from different locations and devices, MFA helps verify identities regardless of where access requests originate.
- Protects Sensitive Resources: Critical systems, applications, and data remain better protected because attackers must bypass multiple security controls.
- Helps With Preventing Unauthorized Access: Multiple verification requirements dramatically reduce the success rate of common credential-based attacks.
In short, MFA transforms identity verification from a single checkpoint into a layered security process.
MFA vs Password-Only Security
| Security Factor |
Password-Only Security |
MFA Security |
| Authentication Method |
Single credential |
Multiple verification factors |
| Resistance to Stolen Passwords |
Low |
High |
| Protection Against Phishing |
Limited |
Much stronger |
| Account Takeover Risk |
Higher |
Significantly reduced |
| Identity Verification Strength |
Basic |
Advanced |
| Zero Trust Compatibility |
Limited |
Essential |
| Security Posture Impact |
Minimal improvement |
Major improvement |
| Unauthorized Access Prevention |
Relatively weak |
Strong defense |
Within a Zero Trust architecture, MFA is not simply an added feature. It is a core identity control that helps ensure every access request begins with strong, reliable verification. Without it, the principle of “Never Trust, Always Verify” becomes far more difficult to enforce consistently.
What Is Microsegmentation and Why Does It Matter?

As Zero Trust security matures, organizations quickly discover that identity verification alone is not enough. Even if an attacker gains access to a user account or device, security controls should prevent them from moving freely across the environment. This is where microsegmentation becomes important.
Traditional networks often allow broad connectivity once access is granted. A compromised account may be able to interact with multiple systems, applications, and resources. Microsegmentation changes that dynamic by creating smaller, tightly controlled areas within the network. Instead of one large trusted environment, organizations establish multiple protected zones with their own access requirements.
The result is greater control, stronger containment, and significantly reduced opportunities for attackers to expand their reach.
What Is Microsegmentation?
Microsegmentation is a security strategy that divides a network into smaller, isolated secure zones, each protected by its own policies and access controls.
In a traditional network, users and applications may have visibility into large portions of the environment once authenticated. In a Zero Trust network, access is far more granular. Every connection is evaluated based on identity, device status, role, and authorization requirements.
Think of it like a modern office building. Instead of giving every employee a master key that opens every room, each person receives access only to specific areas required for their job. The same concept applies to applications, workloads, and systems.
This approach plays a critical role in protecting modern network infrastructure. If an attacker compromises one system, they encounter barriers at every stage rather than moving freely between resources.
One of the primary goals of microsegmentation is limiting lateral movement. Lateral movement occurs when attackers use an initial compromise to access additional systems and expand their control. By creating isolated zones and enforcing separate policies, organizations significantly reduce this risk.
In practical terms, microsegmentation transforms a network from a large, interconnected environment into a collection of tightly managed security boundaries.
How Does Microsegmentation Reduce Security Risks?
Microsegmentation strengthens security in several ways:
- Containment of Security Incidents: If an attacker gains access to one segment, the compromise is largely confined to that area. This containment helps prevent broader damage across the environment.
- Separate Access Controls for Every Zone: Different applications, systems, and workloads can have their own authorization requirements. These strict access controls ensure users receive permissions appropriate to their roles.
- Reduced Attack Surface: Fewer connections between systems mean fewer opportunities for attackers to exploit weaknesses or move through the environment.
- Protection for Critical Assets: Sensitive systems can be isolated behind additional controls, making them harder to reach even if other resources are compromised.
- Improved Visibility: Security teams gain better insight into how traffic moves between segments, making suspicious behavior easier to detect.
- Stronger Security for Vulnerable Network Systems: Legacy applications and older systems can be isolated from broader environments while still remaining operational.
Together, these controls help organizations contain threats faster and reduce the overall impact of security incidents.
Network Segmentation vs Microsegmentation
| Category |
Network Segmentation |
Microsegmentation |
| Scope |
Divides network into larger sections |
Divides environment into smaller secure zones |
| Access Controls |
Often applied broadly |
Applied at highly granular levels |
| Lateral Movement Protection |
Moderate |
Strong |
| Visibility |
Network-level visibility |
Workload and application-level visibility |
| Zero Trust Alignment |
Partial |
Core Zero Trust capability |
| Security Flexibility |
Limited |
Highly adaptable |
| Attack Surface Reduction |
Moderate |
Significant |
Microsegmentation is one of the most effective ways to operationalize Zero Trust principles. By creating smaller trust boundaries and enforcing granular controls, organizations reduce risk while making their environments far more resilient against modern cyber threats.
What Is Zero Trust Network Access (ZTNA)?
As organizations embrace cloud applications, remote work, and distributed infrastructure, one challenge continues to surface: how do you give users secure access without exposing the entire network?
For years, many organizations relied on VPNs to solve this problem. While effective in certain situations, VPNs were designed for a very different era of computing. They often grant broad network access after authentication, creating opportunities for attackers to move through systems if an account becomes compromised.
Zero Trust Network Access, commonly called ZTNA, was developed to address this challenge. Instead of connecting users to the network itself, ZTNA connects them only to specific applications and resources they are authorized to use.
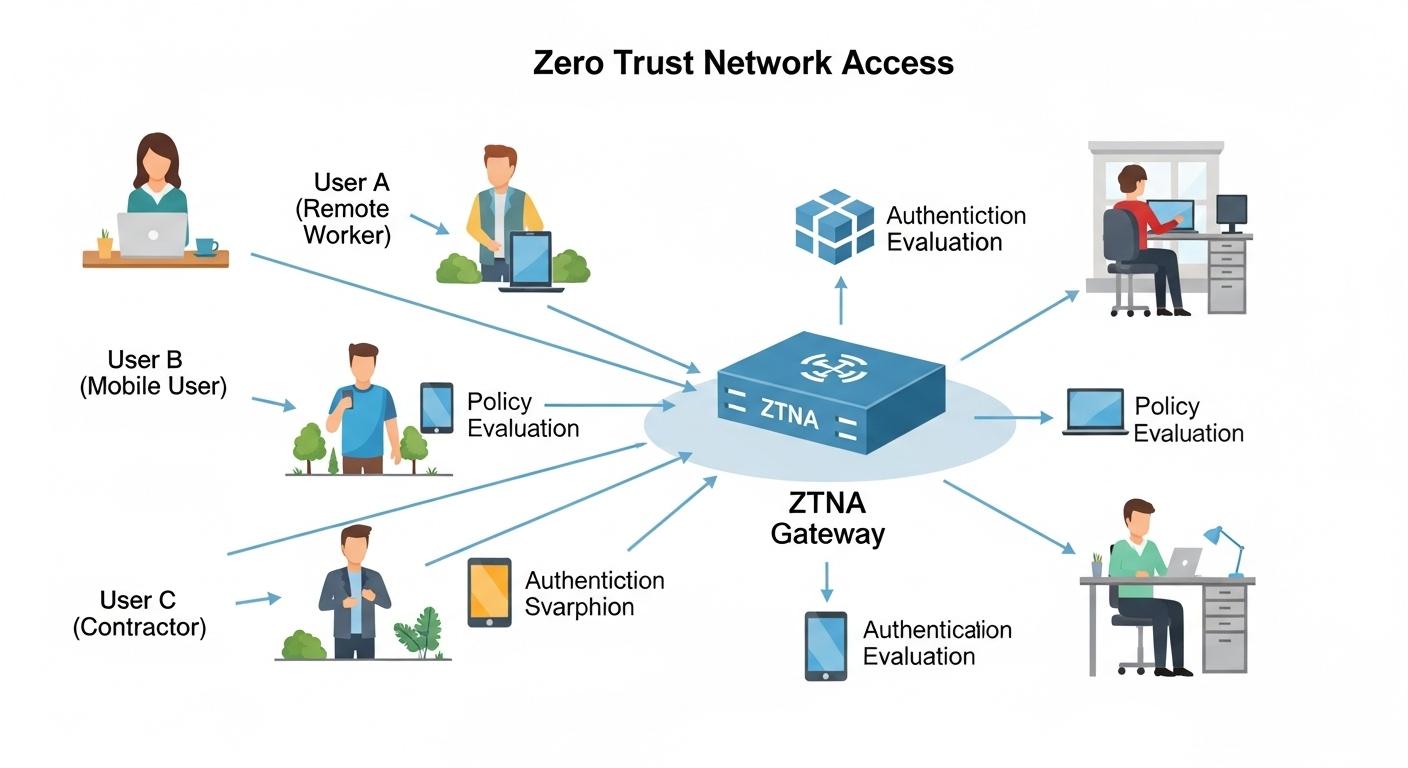
What Is Zero Trust Network Access?
Zero Trust Network Access (ZTNA) is a security framework that connects users directly to specific applications or resources after identity and device verification, rather than granting access to the broader network.
At its core, Zero Trust Network Access applies Zero Trust principles to connectivity. Every request is authenticated, authorized, and continuously evaluated before access is granted.
Unlike traditional network security approaches, trust network access does not assume that authenticated users should automatically see or interact with other systems on the network. Instead, access decisions are made on a resource-by-resource basis.
This approach significantly reduces risk because users receive only the permissions required for their role. Applications remain hidden from unauthorized users, and internal infrastructure is not broadly exposed.
Modern trust network access ZTNA solutions often combine identity verification, device posture assessment, policy enforcement, and continuous monitoring to create secure connections between users and resources.
In practical terms, ZTNA helps organizations replace broad network access with precise, application-level access controls.
How Does ZTNA Work?
ZTNA follows a straightforward but highly controlled workflow:
Step 1: User Initiates Access Request
- A user attempts to access an application or resource.
Step 2: Identity Verification
- Authentication systems verify the user’s identity through credentials and security policies.
Step 3: Device Validation
- The device is evaluated to ensure it meets organizational security requirements.
Step 4: Policy Evaluation
- Access policies determine whether the user is permitted to reach the requested application.
Step 5: Secure Connection Established
- The system creates a secure, one-to-one encrypted connection between the user and the approved resource.
Step 6: Resource-Specific Access Granted
- Users receive zero trust access only to the application or service they are authorized to use.
Step 7: Continuous Validation
- User activity, device status, and risk levels continue to be monitored throughout the session.
The core difference is simple: only authorized users gain access, and only to approved resources. The broader network remains hidden and inaccessible.
ZTNA vs Traditional VPNs: What’s the Difference?
While both technologies support secure connectivity, they operate in fundamentally different ways.
| Category |
Traditional VPNs |
ZTNA |
| Network Exposure |
Users often gain access to large portions of the network |
Users connect only to approved applications |
| Access Model |
Network-centric |
Application-centric |
| Security Approach |
Trust after authentication |
Continuous verification |
| User Experience |
Can require manual connections and complex routing |
Often provides seamless application access |
| Performance |
May create bottlenecks through centralized gateways |
Direct resource connections improve efficiency |
| Infrastructure Visibility |
Internal systems may become visible to authenticated users |
Infrastructure remains hidden from users |
| Lateral Movement Risk |
Higher if credentials are compromised |
Significantly reduced |
| Scalability |
Can become difficult to manage at scale |
Designed for cloud and distributed environments |
For many organizations, the most significant distinction is scope. Virtual private networks frequently grant broad network access once authentication succeeds. ZTNA takes a narrower approach, connecting users only to approved resources.
This makes ZTNA particularly attractive for organizations that need to connect remote employees without exposing sensitive internal infrastructure.
Why Is ZTNA Better for Remote Work?
Remote work has fundamentally changed how users interact with business systems. Employees access applications from homes, airports, client locations, and personal devices, often across multiple cloud environments.
ZTNA is well suited to this reality because it focuses on users and applications rather than network boundaries. Instead of forcing remote workers through broad network connections, organizations can provide secure, direct access to specific resources.
This approach improves security while simplifying the user experience. Employees receive the applications they need without unnecessary exposure to internal systems. Security teams gain greater visibility and control over access decisions. At the same time, organizations can support secure remote access across distributed workforces without relying entirely on traditional VPN architectures.
As Zero Trust adoption grows, ZTNA is increasingly becoming one of the most important technologies for securing modern work environments.
What Are the Biggest Benefits of Zero Trust Security?
Understanding how Zero Trust works is important. Understanding why organizations continue investing in it is even more valuable.
Cyber threats have become more sophisticated, users work from more locations, and business data is distributed across applications, devices, and cloud platforms. In this environment, security teams need more than a strong perimeter.
They need visibility, control, and the ability to verify every access request. That is precisely where Zero Trust delivers value.
By continuously validating identities, restricting unnecessary permissions, and monitoring activity across the environment, Zero Trust helps organizations reduce risk while supporting modern business operations. The benefits extend beyond cybersecurity alone. Many organizations also see improvements in compliance, governance, operational visibility, and risk management.
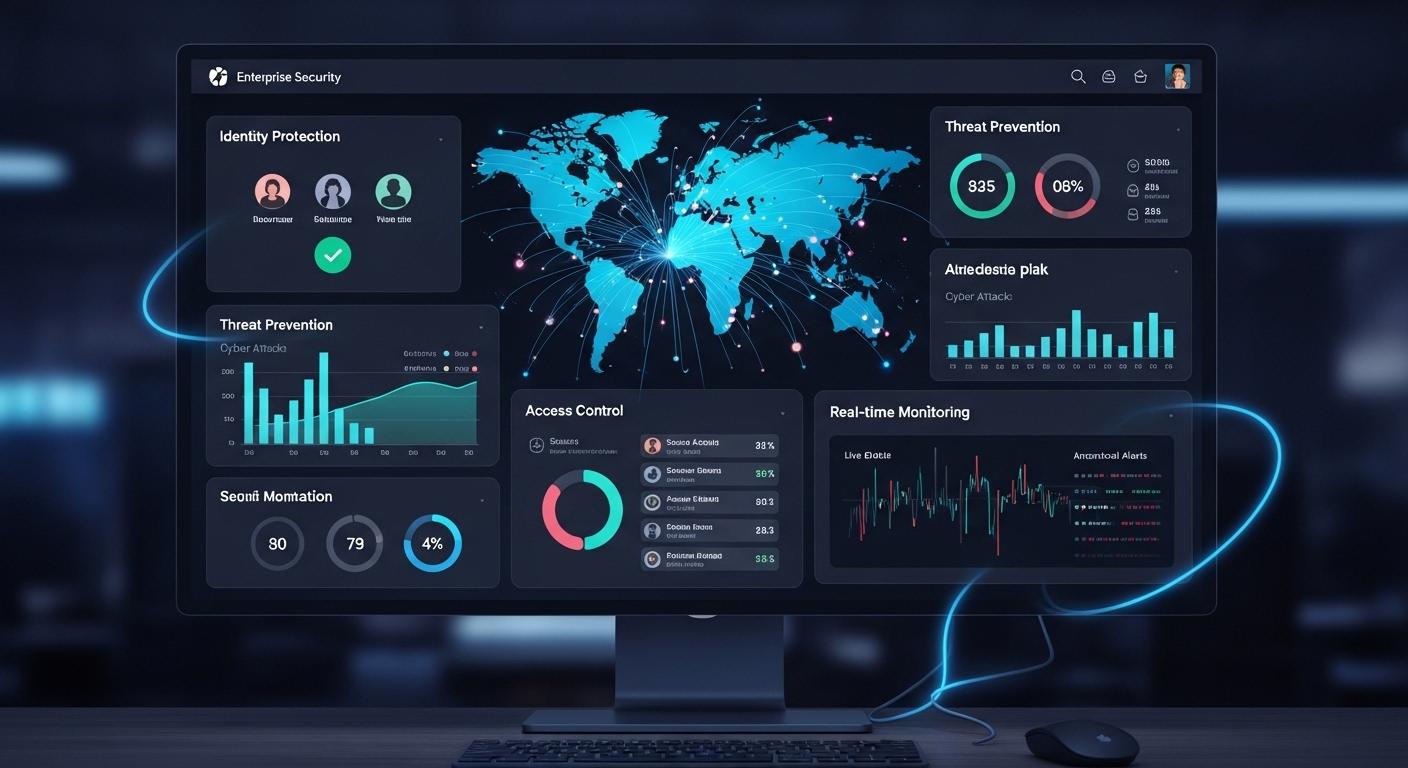
How Does Zero Trust Improve Security Posture?
A strong security program depends on visibility and control. Traditional security approaches often focus heavily on defending the perimeter, but attackers increasingly bypass those defenses through stolen credentials, compromised devices, and insider threats.
Zero Trust addresses this challenge by assuming that no user or device should automatically be trusted. Every access request must be verified, evaluated, and approved before access is granted.
This approach creates enhanced security across the organization. Security teams gain greater visibility into user behavior, application usage, device health, and network activity. Instead of relying on a single authentication event, access decisions remain dynamic and responsive to changing conditions.
Another important advantage is reduced lateral movement. If an account becomes compromised, strict access controls and microsegmentation help limit the attacker’s ability to move through the environment.
Over time, these controls strengthen the overall trust security posture of the organization. Risks become easier to identify, suspicious activity becomes more visible, and security teams can respond more quickly when potential threats emerge.
The result is a security framework designed to reduce exposure rather than simply react to incidents after they occur.
How Does Zero Trust Protect Sensitive Data?
One of the primary goals of Zero Trust is protecting sensitive data wherever it resides.
Several ways it accomplishes this include:
- Strict Identity Verification: Users must continuously verify their identity before accessing protected resources.
- Least Privilege Access: Individuals receive access only to the systems, applications, and information required for their role.
- Granular Access Controls: Permissions can be applied at highly specific levels, reducing unnecessary exposure.
- Continuous Monitoring: User activity is monitored throughout sessions, helping identify unusual behavior quickly.
- Device Validation: Access can be restricted to compliant and approved devices.
- Microsegmentation: Sensitive resources can be isolated within secure zones to limit unauthorized movement.
- Data-Centric Security Policies: Organizations can apply controls directly to critical information rather than relying solely on network protections.
- Improved Visibility: Detailed access records help organizations understand who accessed sensitive data, when they accessed it, and what actions were performed.
Together, these controls create multiple layers of protection around an organization’s most valuable information assets.
Why Does Zero Trust Help Prevent Unauthorized Access?
One of the biggest weaknesses in many security environments is excessive trust. Users often accumulate permissions over time, applications gain broad access to systems, and devices remain trusted long after their security status changes.
Zero Trust removes those assumptions.
Every request must pass through verification and policy evaluation before access is granted. User identity, device health, location, behavior, and permissions are all considered as part of the decision-making process.
This continuous validation dramatically improves preventing unauthorized access. Even if attackers obtain credentials, they may still face MFA requirements, device compliance checks, risk-based policies, and application-level restrictions.
Strong access control mechanisms also limit what authenticated users can do. Access becomes more precise, reducing opportunities for attackers to exploit compromised accounts or excessive permissions.
Instead of assuming trust, Zero Trust requires trust to be earned continuously.
How Does Zero Trust Support Compliance Requirements?
Many regulatory frameworks require organizations to demonstrate strong security controls, controlled access to data, and detailed auditing capabilities. Zero Trust aligns naturally with these goals.
| Compliance Capability |
Zero Trust Benefit |
| Audit Logging |
Detailed records of user activity and access requests |
| Access Governance |
Fine-grained permission management |
| Data Protection |
Strong controls around sensitive information |
| User Accountability |
Improved visibility into user actions |
| Risk Management |
Continuous monitoring and policy enforcement |
| Regulatory Reporting |
Easier evidence collection for audits |
These capabilities help organizations strengthen compliance efforts while simplifying many security processes associated with governance and reporting.
For industries handling sensitive information, detailed audit trails provide clear evidence of who accessed resources and when those actions occurred. Fine-grained controls also help ensure that users only receive permissions appropriate to their responsibilities.
This is one reason why large enterprises and even federal agencies continue investing in Zero Trust initiatives. The model not only improves security, it also supports accountability, transparency, and regulatory compliance in an increasingly complex technology environment.
Benefits of Zero Trust
| Benefit |
Business Impact |
| Stronger Security Posture |
Reduced attack surface and better visibility |
| Data Protection |
Better control over sensitive information |
| Reduced Insider Risk |
Continuous monitoring and least privilege access |
| Improved Access Control |
More precise authorization decisions |
| Enhanced Compliance |
Strong audit trails and governance capabilities |
| Better Threat Detection |
Faster identification of suspicious activity |
| Remote Work Security |
Secure access across distributed environments |
| Reduced Lateral Movement |
Limits attacker mobility after compromise |
As organizations continue expanding into cloud environments and distributed work models, these advantages are making Zero Trust one of the most influential cybersecurity frameworks in modern security strategy.
What Challenges Can Organizations Face During Zero Trust Implementation?

The benefits of Zero Trust are compelling, but implementation is rarely a flip-the-switch exercise. Most organizations have years, sometimes decades, of existing infrastructure, applications, permissions, and security processes built around older security assumptions. Replacing implicit trust with continuous verification requires more than deploying a few new tools.
It requires changes in technology, policy, and operational thinking. The good news is that most organizations do not implement Zero Trust all at once.
Successful initiatives typically begin with identity security, access controls, and visibility improvements before expanding into broader architectural changes. Understanding the most common obstacles can help organizations create a more practical and sustainable roadmap.
Why Can Implementing Zero Trust Be Complex?
One of the biggest misconceptions about Zero Trust is that it is a product. It isn’t. It’s a security framework that affects multiple areas of the business simultaneously.
When implementing Zero Trust, organizations often discover that existing systems were designed around broad access privileges. Users may have accumulated permissions over many years. Legacy applications may not support modern authentication methods. Some systems simply lack the visibility needed for continuous monitoring.
Then there is the human side of the equation. Employees are accustomed to accessing applications in certain ways, and changes to authentication workflows or access requirements can generate resistance if not managed carefully. Security improvements that disrupt productivity tend to face challenges, even when they are necessary.
Another factor is scale. Large enterprises may have thousands of users, devices, applications, and data repositories spread across multiple environments. Applying consistent policies across all of them requires planning and coordination.
For this reason, Zero Trust implementation is usually most successful when approached as a gradual modernization effort rather than a large-scale replacement project.
What Technology Changes Are Often Required?
Most organizations need to modernize several areas of their technology stack before fully adopting Zero Trust.
- IAM Modernization: Strong identity and access management platforms become the foundation of Zero Trust. Organizations often upgrade authentication systems, identity governance tools, and access management capabilities.
- MFA Rollou: Multi-factor authentication must be deployed consistently across users, applications, and critical systems to strengthen identity verification.
- Improved Device Visibility: Organizations need accurate insight into endpoint health, ownership, compliance status, and risk levels before granting access.
- Network and Application Segmentation: Segmentation helps isolate workloads and reduce opportunities for lateral movement within the environment.
- Policy Automation: Security policies must be applied consistently across users, applications, and devices to support continuous verification.
- Monitoring and Analytics Enhancements: Greater visibility into user behavior and system activity is necessary for effective risk-based decision-making.
Many of these improvements directly affect an organization’s IT infrastructure and may require adjustments across the broader organization’s network before Zero Trust can operate effectively.
Common Zero Trust Adoption Challenges
| Challenge |
Why It Occurs |
Potential Solution |
| Legacy Systems |
Older applications may not support modern authentication methods |
Use identity gateways or phased modernization |
| Excessive Permissions |
Users often accumulate access over time |
Conduct access reviews and implement least privilege |
| Limited Visibility |
Organizations may lack insight into devices and applications |
Deploy monitoring and asset discovery tools |
| MFA Resistance |
Users may view additional authentication as inconvenient |
Provide user education and streamlined MFA options |
| Complex Environments |
Multiple clouds, applications, and networks increase complexity |
Prioritize high-risk systems first |
| Policy Inconsistencies |
Different departments may follow different access practices |
Establish centralized governance standards |
| Resource Constraints |
Security teams often have limited time and personnel |
Implement Zero Trust in phases |
| Change Management Challenges |
Employees may resist new security requirements |
Communicate benefits and provide training |
| Segmentation Complexity |
Dividing systems into secure zones requires planning |
Begin with critical applications and sensitive data |
| Skills Gaps |
Teams may lack Zero Trust expertise |
Invest in training and external guidance |
The reality is that Zero Trust adoption involves both technical and organizational challenges. However, most obstacles become manageable when approached incrementally.
Rather than attempting to secure everything at once, successful security teams typically focus on strengthening identity controls, improving visibility, and reducing unnecessary access before expanding their Zero Trust initiatives across the organization.
Why Are Governments and Enterprises Accelerating Zero Trust Adoption?

A decade ago, Zero Trust was often viewed as an emerging security concept. Today, it has become a strategic priority for governments, enterprises, and critical infrastructure operators around the world.
The reason is fairly straightforward. Modern organizations no longer operate within clearly defined boundaries. Employees work remotely, applications run across multiple cloud providers, and sensitive data moves between environments constantly. At the same time, cyber threats have become more sophisticated, targeting identities, devices, software supply chains, and cloud resources rather than simply attacking network perimeters.
Zero Trust addresses these realities by focusing on continuous verification, least-privilege access, and granular security controls. It gives organizations a practical framework for securing users, devices, applications, and data regardless of location. As a result, adoption is accelerating across both public and private sectors.
Why Are Federal Agencies Embracing Zero Trust?
Government organizations manage enormous volumes of sensitive information and operate some of the world’s most critical systems. Traditional perimeter-focused security approaches have become increasingly difficult to maintain as agencies modernize infrastructure and expand digital services.
In response, many federal agencies have adopted Zero Trust as a core cybersecurity strategy. Executive directives and government cybersecurity initiatives have encouraged agencies to strengthen identity verification, improve access controls, and increase visibility into user activity.
Another important factor is compliance. Government organizations must meet strict regulatory and security standards while demonstrating accountability through detailed auditing and reporting. Zero Trust helps support these requirements by providing stronger authentication, granular access management, and continuous monitoring.
Organizations such as the Cybersecurity and Infrastructure Security Agency (CISA) have also promoted Zero Trust frameworks as a way to improve resilience against modern threats.
Perhaps most importantly, Zero Trust provides improved visibility. Agencies gain deeper insight into who is accessing resources, what actions are being performed, and whether activity aligns with security policies. That visibility is increasingly valuable in an environment where threats can originate from both external attackers and compromised internal accounts.
Why Is Zero Trust Important for Cloud and Hybrid Environments?
As organizations expand into cloud environments, traditional security boundaries become less relevant. Zero Trust provides a security model designed specifically for this reality.
Few reasons it supports modern environments include:
- Protects Resources Across Multiple Locations: Applications, users, and data can be secured consistently regardless of where they reside.
- Supports Hybrid Infrastructure: Organizations can apply the same security principles across on-premises systems and cloud platforms.
- Improves Access Control: Users receive access only to approved applications and resources rather than broad network connectivity.
- Strengthens Remote Work Security: Employees can securely connect from virtually any location while maintaining consistent security policies.
- Enhances Visibility: Security teams gain better insight into user behavior, device activity, and resource usage across distributed environments.
- Reduces Risk From Excessive Permissions: Least-privilege access limits unnecessary exposure to critical systems and data.
- Scales With Business Growth: A Zero Trust enterprise can extend security controls across new applications, cloud services, and user populations without relying solely on network boundaries.
- Supports Multi-Cloud Strategies: Organizations can apply consistent security policies across multiple cloud providers and platforms.
As cloud adoption continues to grow, Zero Trust is becoming one of the most practical frameworks for securing modern, distributed environments while maintaining flexibility and operational efficiency.
Why Apporto Represents a Modern Approach to Zero Trust Security?

As Zero Trust adoption grows, organizations face an important question: how can they apply Zero Trust principles without creating unnecessary complexity for users and IT teams?
The answer increasingly points toward browser-native infrastructure. Traditional access models often rely on VPNs, multiple client installations, network exposure, and complicated access workflows. Modern platforms are taking a different approach, focusing on identity, controlled access, and simplified user experiences.
This is where Apporto fits naturally into the conversation. By delivering secure applications and workspaces through a browser-native architecture, Apporto aligns closely with many of the goals that drive Zero Trust initiatives today.
How Does Apporto Align With Zero Trust Principles?
Zero Trust is ultimately about reducing implicit trust and making access decisions based on identity, context, and continuous validation. Apporto supports these objectives through an architecture designed around secure, controlled access rather than broad network connectivity.
Rather than exposing users to large portions of internal infrastructure, the platform focuses on delivering only the resources required to perform specific tasks. This approach closely mirrors the core principles of modern Zero Trust architecture.
Main areas of alignment include:
- Browser-Native Access: Users access applications and digital workspaces through a browser, reducing dependency on traditional client software and simplifying secure connectivity.
- Secure Remote Access: Employees, students, and external users can connect from virtually any location while maintaining consistent security controls.
- Identity-Based Access: Access decisions are tied to authenticated identities rather than assumed trust based on network location.
- Reduced Attack Surface: By limiting unnecessary exposure of internal systems, organizations can reduce opportunities for attackers to discover and exploit resources.
- Simplified Access Management: Centralized policies help administrators manage permissions more efficiently while supporting least-privilege principles.
- Centralized Control: Security teams gain a unified view of users, applications, and access activity, making governance and oversight easier.
- Application-Focused Connectivity: Users connect to the resources they need rather than receiving broad access to underlying network infrastructure.
- Support for Modern Security Strategies: The platform complements identity verification, conditional access policies, and other technologies commonly associated with Zero Trust security initiatives.
The result is an approach that balances strong security with usability. Organizations can improve secure access controls without forcing users through overly complicated workflows, while administrators benefit from more streamlined access management and policy enforcement.
Why Does Browser-Based Infrastructure Support Zero Trust Goals?
Many Zero Trust initiatives focus on reducing assumptions about trust. Browser-based infrastructure naturally supports that objective because access decisions can be evaluated at the application level rather than the network level.
Instead of granting broad connectivity, organizations can provide targeted access to specific resources. This aligns closely with continuous verification, where every interaction is evaluated according to identity, device posture, and organizational policies.
Browser-native delivery also supports modern cloud environments, where applications, users, and data may reside in multiple locations. Security controls can follow the user rather than relying on traditional network boundaries.
From an operational perspective, browser-based access simplifies onboarding and reduces client management overhead. At the same time, organizations gain greater visibility into user access patterns and can apply security policies more consistently across distributed environments.
How Does Apporto Compare to Traditional Access Models?
| Category |
Traditional Access Models |
Apporto |
| VPN Dependency |
Often requires VPN connectivity |
Browser-native access reduces VPN reliance |
| Access Granularity |
Frequently network-focused |
Resource and application-focused |
| User Experience |
Multiple clients and connection steps |
Simplified browser-based experience |
| Security Visibility |
Limited visibility across sessions |
Centralized visibility and control |
| Infrastructure Exposure |
Internal systems may be broadly reachable |
Reduced exposure through controlled access |
As organizations continue modernizing their security strategies, platforms that combine browser-native delivery, identity-centric access, and simplified administration are becoming increasingly relevant. Apporto represents this evolution, helping organizations align operational efficiency with the principles that define modern Zero Trust security.
Final Thoughts
A curious thing has happened in cybersecurity over the last several years. The network perimeter, once considered the primary line of defense, has become less reliable as applications, users, and data spread across cloud platforms and remote work environments. Trust, at least the automatic kind, has become harder to justify.
That reality explains why what is Zero Trust security has become one of the most important questions facing modern organizations.
At its core, the Zero Trust security model recognizes that threats can exist anywhere. A user inside the network is not automatically safe. A device with valid credentials is not automatically trustworthy. Every access request must be verified, evaluated, and monitored. Again and again. That’s the essence of continuous verification.
Throughout this guide, you’ve seen how Zero Trust architecture combines identity validation, least-privilege access, microsegmentation, MFA, and ZTNA to reduce risk while improving visibility. Together, these controls create a more resilient security framework that is designed for today’s distributed environments rather than yesterday’s office-centric networks.
Remote work continues growing. Cloud adoption continues accelerating. And attackers continue finding new ways to exploit trust assumptions. Against that backdrop, perimeter security alone is no longer enough.
Zero Trust is not a passing trend or a single technology purchase. It is a long-term security strategy that helps organizations strengthen their security posture, protect sensitive data, and make smarter access decisions in an increasingly connected world.
Frequently Asked Questions (FAQs)
1. What is Zero Trust security in simple terms?
Zero Trust security is a cybersecurity approach based on the principle of “Never Trust, Always Verify.” Instead of automatically trusting users or devices inside a network, every access request is continuously validated before access to systems, applications, or data is granted.
2. What are the core principles of Zero Trust?
The core principles of Zero Trust include continuous verification, least privilege access, assume breach, microsegmentation, and ongoing monitoring. Together, these principles help organizations reduce risk by limiting access and validating every user, device, and connection request.
3. Why is Zero Trust called “Never Trust, Always Verify”?
Zero Trust is called “Never Trust, Always Verify” because no user or device receives automatic trust. Every access request requires identity verification, authorization checks, and policy evaluation, regardless of whether the request originates inside or outside the organization’s network.
4. What is the difference between Zero Trust and traditional security?
Traditional security focuses heavily on protecting the network perimeter and often trusts users after login. Zero Trust assumes threats may exist anywhere and continuously verifies identities, devices, and access requests before granting access to resources.
5. What is Zero Trust Network Access (ZTNA)?
Zero Trust Network Access, or ZTNA, is a security model that connects users only to the applications and resources they are authorized to use. Unlike traditional network access, ZTNA does not expose the broader network to authenticated users.
6. Is ZTNA replacing VPNs?
Many organizations are adopting ZTNA as an alternative to traditional VPNs. While VPNs often provide broad network access, ZTNA creates secure, direct connections to specific applications, improving security, visibility, and access control for remote users.
7. Why is MFA important in Zero Trust?
Multi-Factor Authentication (MFA) strengthens identity verification by requiring multiple authentication factors. Even if a password is stolen, attackers still need additional credentials, making unauthorized access significantly more difficult and improving overall security posture.
8. What is least privilege access?
Least privilege access means users receive only the permissions necessary to perform their specific responsibilities. This approach limits exposure to sensitive systems and data while reducing the potential impact of compromised accounts or insider threats.
9. What is microsegmentation in Zero Trust?
Microsegmentation divides a network into smaller secure zones with separate access controls. This limits lateral movement by attackers and helps contain security incidents, ensuring that a compromise in one area does not automatically affect others.
10. How does Zero Trust protect sensitive data?
Zero Trust protects sensitive data through strict identity verification, least privilege access, continuous monitoring, device validation, and granular access controls. These layers ensure that only authorized users can access information and that activity remains visible.
11. Does Zero Trust prevent insider threats?
While no security framework can eliminate insider threats entirely, Zero Trust significantly reduces risk. Continuous monitoring, behavior analysis, least privilege policies, and strict access controls help detect suspicious activity and limit potential damage.
12. Is Zero Trust required for compliance?
Many regulations do not explicitly require Zero Trust, but its controls support compliance objectives. Detailed audit logs, strong authentication, access management, and data protection measures help organizations meet security and regulatory requirements more effectively.
13. Why are federal agencies adopting Zero Trust?
Federal agencies are adopting Zero Trust to improve visibility, strengthen security controls, and address evolving cyber threats. Government initiatives and cybersecurity mandates have accelerated adoption as agencies modernize infrastructure and protect sensitive information.
14. How difficult is Zero Trust implementation?
Zero Trust implementation can be challenging because it often requires updates to identity systems, access controls, device management, and security policies. Most organizations succeed by adopting Zero Trust gradually through phased modernization efforts.
15. Can small businesses implement Zero Trust?
Yes. Small businesses can implement Zero Trust by starting with foundational controls such as MFA, identity management, least privilege access, and device security. Many cloud-based solutions make Zero Trust more accessible without requiring large security teams.
16. Is Zero Trust the future of cybersecurity?
Zero Trust is increasingly viewed as the future of cybersecurity because it addresses the realities of cloud computing, remote work, and evolving cyber threats. Continuous verification and identity-based security provide stronger protection than perimeter-focused security models alone.