Virtual Classroom Setup: A Complete Guide to Creating a Focused Online Learning Environment

A virtual classroom is more than just a Zoom link and a PowerPoint. It’s a structured online learning environment designed to replicate—and often improve on—the core functions of a physical classroom.

It’s where students, instructors, and learning materials come together in real time or asynchronously, using digital tools to exchange ideas, build knowledge, and complete coursework.

The shift from traditional classrooms to virtual learning spaces was already in motion. Remote learning, once a fringe idea, has now become a mainstream educational model—not only in schools and universities but also in corporate training, continuing education, and certification programs.

But here’s the catch: a virtual classroom is only as effective as the setup behind it. From the platform you choose to the way materials are presented, everything shapes the learning experience.

In this guide, you’ll explore what makes a strong virtual classroom setup and how to build one that actually works.


What Do You Need to Set Up an Effective Virtual Classroom?

Creating an effective virtual classroom setup starts with getting the fundamentals right. Whether you’re teaching a group of students, onboarding new employees, or running professional training, the right foundation ensures the experience is smooth, engaging, and productive.

Here’s what you need:

Stable Internet Connection

A fast, consistent connection is non-negotiable. Lag and dropouts break focus and disrupt the learning flow.

Reliable Virtual Classroom Platform

Choose a platform that fits your class size and format—Zoom, Microsoft Teams, or browser-based solutions like Apporto that require no downloads.

Interactive Tools

Features like breakout rooms, chat, reactions, and screen sharing allow for real-time collaboration and engagement.

Video Conferencing with Live Instruction Support

Look for systems that support live sessions with minimal latency and strong audio/video performance.

Multimedia Resources

You’ll need to prepare materials like video lectures, PDFs, and presentation slides to keep learners visually engaged.

Quiet, Organized Digital Space

The physical setup still matters. Encourage participants to find a distraction-free space, ideally with a headset and neutral background.

When these elements work together, your virtual classroom becomes more than just a digital placeholder—it becomes a true learning environment.


How Do You Choose the Right Virtual Classroom Platform?

Educator assessing platform features on a laptop checklist to plan a virtual classroom setup.

Not all virtual classroom platforms are created equal. The right one should align with your teaching style, class size, and learning goals. Whether you’re hosting a Zoom class, running a live session on Microsoft Teams, or managing an all-in-one environment like Apporto, platform selection matters.

Here’s what to evaluate:

  • Core Features
    Prioritize tools like screen sharing, breakout rooms, waiting room control, and real-time chat. These features make sessions dynamic and manageable.
  • LMS Compatibility
    Your platform should integrate seamlessly with your Learning Management System—whether it’s Canvas, Moodle, or another. This ensures smooth access to materials and assessments.
  • Scalability
    Can the platform handle 10 users? 100? More? Look for systems that support both small groups and large-scale hybrid classes without performance dips.
  • Support for Asynchronous Learning
    It’s not just about going live. Choose a tool that also enables self-paced learning—recorded sessions, downloadable resources, and message boards.

Popular choices include:

  • Zoom – Widely used, flexible, but may need added security layers
  • Microsoft Teams – Great for integrated office environments
  • Apporto – Purpose-built for education and training, with built-in labs and real-time collaboration


What Are the Must-Have Features of a High-Quality Virtual Classroom Solution?

Instructor delivering a lesson with digital displays, demonstrating a hybrid virtual classroom setup.

A well-designed virtual classroom doesn’t just stream a lecture—it enables meaningful learning. The platform you choose should offer more than just video—it should actively support participation, organization, and progress tracking.

Here are the must-have features to look for:

  • Live Instruction Capabilities
    Real-time video and audio streaming are essential for teaching, presentations, and immediate feedback.
  • Breakout Rooms
    Enable small-group collaboration for projects, discussions, or tutoring sessions. Great for maintaining focus and engagement.
  • Screen Sharing & Real-Time Collaboration
    Instructors should be able to walk through lessons, demos, or documents while students follow along live.
  • Interactive Tools
    Features like polls, digital whiteboards, and file sharing turn passive sessions into two-way interactions.
  • Attendance Tracking & Analytics
    Built-in tools that monitor attendance and participation help instructors adapt their approach—and offer data for reporting.
  • Easy Access for Guests or New Learners
    The platform should allow simple joining—no clunky downloads, no long registration forms.

If your classroom platform covers these, you’re not just checking boxes—you’re building a system designed to scale and succeed.


How Do You Create a Focused and Engaging Online Learning Environment?

A virtual classroom needs more than tools—it needs intention. A scattered session can leave learners disengaged, no matter how advanced the platform. To create a focused and engaging online learning environment, you’ll want to combine structure, interaction, and visual clarity.

Here’s how:

  • Establish a Clear Structure
    Begin each session with an overview, transition into teaching, allow time for Q&A, and close with a recap. Predictability helps learners stay oriented.
  • Use Online Tools to Encourage Participation
    Utilize chat, reactions (thumbs-up, emojis), or polls to check in and collect feedback mid-session.
  • Visual Support for Core Concepts
    Supplement verbal instruction with slides, annotated documents, or screen-shared demonstrations to reinforce ideas.
  • Keep Sessions Concise
    Aim for sessions under 60 minutes. Fatigue sets in faster online. If the topic requires more time, break it into segments.
  • Encourage Cameras On
    Seeing faces fosters accountability. If not possible, ask for typed check-ins to keep attention alive.
  • Incorporate Group Work
    Use breakout rooms or collaborative docs to let students apply what they’ve learned through peer interaction.

When structure meets interaction, engagement naturally follows.


What Should You Do to Support Teachers and Instructors in Virtual Classes?

Team reviewing digital tools on a computer as part of an effective virtual classroom setup.

Even the best virtual classroom setup falls flat without confident, well-equipped instructors. Teachers are no longer just delivering lectures—they’re managing digital spaces, troubleshooting tech, and redesigning content for a new medium. Supporting them isn’t optional—it’s foundational.

Here’s how to do it effectively:

  • Training on Tools
    Provide hands-on training for both the Learning Management System (LMS) and the virtual classroom platform. Confidence with the tools improves delivery and reduces downtime.
  • Course Material Support
    Help educators create compelling slides, interactive videos, and digital documents. Even simple formatting makes a difference in learner comprehension.
  • Templates and Planning Resources
    Offer pre-built templates for lesson plans, breakout activities, and assessments to reduce planning fatigue.
  • Reliable Technical Support
    Ensure instructors know where to go when something breaks. Fast, human help matters in high-stress moments.
  • Foster Peer Collaboration
    Encourage instructors to share strategies, swap materials, and co-teach where appropriate.

Teaching virtually requires a different skill set. With the right support, instructors become more than capable—they become innovators in digital education.


What Are the Best Practices for Delivering Live and Asynchronous Instruction?

Effective virtual classrooms blend live interaction with asynchronous flexibility. Each mode has strengths—knowing when and how to use them is secret to delivering a complete learning experience.

Use live video sessions when:

  • Hosting Q&As, discussions, or feedback loops
  • Introducing complex or nuanced material
  • Building rapport and classroom presence

Use asynchronous content for:

  • Pre-recorded lectures or walkthroughs
  • Readings, quizzes, and reflections
  • Learners in different time zones or with schedule constraints

To create community in both modes:

  • Use discussion boards or chat threads that stay active
  • Schedule optional live office hours
  • Encourage peer review and group projects

Flexibility isn’t just convenient—it’s pedagogically sound. Students retain more when they can revisit materials, pace themselves, and interact meaningfully.

Tools like a well-integrated LMS + virtual classroom platform allow seamless switching between synchronous and asynchronous content. The goal is balance—where structure meets autonomy and learning happens both in real-time and on demand.


How Can Cloud-Based Platforms Like Apporto Simplify Your Virtual Classroom Setup?

Apporto logo representing a cloud-based virtual desktop solution compatible with the azure virtual desktop client.

Managing a virtual classroom shouldn’t feel like managing a tech support hotline. That’s where cloud-based platforms like Apporto stand out—offering simplicity, flexibility, and scalability without the complexity of traditional virtual learning setups.

Apporto is fully browser-based, meaning there’s no need for software downloads or system compatibility headaches. Learners and instructors can access the virtual classroom with just a link—from any device, anywhere.

The platform includes:

  • Built-in virtual classroom tools
  • LMS integration for seamless course delivery
  • Live collaboration with real-time screen sharing, breakout rooms, and engagement features like polls and hand-raising

Apporto supports hybrid learning for both higher education and corporate training, allowing live participation and asynchronous access on the same platform.

For IT teams, setup is fast, cloud-based, and scalable—no installs, no manual updates. Whether it’s 30 students or 3,000 employees, Apporto ensures a smooth, consistent experience. Try Apporto now


Final Thoughts

A virtual classroom only works when it blends the right tools with thoughtful structure. It’s not about chasing the latest app or adding more features—it’s about creating a space that’s easy to access, consistent in delivery, and genuinely engaging for learners. The technology should serve the experience, not complicate it. When instructors feel supported, students stay connected, and content is delivered clearly, the classroom—virtual or not—becomes effective.

Whether you’re reworking an outdated system or launching from scratch, consider how your platform, training approach, and content flow together. Small improvements in setup can lead to major gains in focus and outcomes. And if your current tools aren’t keeping up, it may be time to explore solutions designed for the realities of online learning. Cloud-native platforms like Apporto offer a more seamless, scalable way forward—without the usual friction.


Frequently Asked Questions (FAQs)


1. Do I need special software to run a virtual classroom?

Not necessarily. Many modern platforms, like Apporto, run entirely in the browser with no installations required. What matters more is that your platform supports features like video conferencing, screen sharing, and engagement tools.

2. Can I use a virtual classroom for hybrid learning?

Yes. Virtual classrooms are ideal for hybrid models, allowing some participants to join in person while others attend remotely. Look for platforms that offer reliable streaming, breakout rooms, and integration with in-person teaching tools.

3. How can I make online classes more interactive?

Use features like polls, chat, breakout sessions, and collaborative whiteboards. Keeping students involved with real-time activities and peer interaction is secret to improving focus and knowledge retention.

4. What’s the difference between LMS and a virtual classroom platform?

An LMS manages content, assignments, and grading, while a virtual classroom platform handles live instruction and interaction. The best setups combine both for a complete learning experience.

Windows 365 vs Azure Virtual Desktop: A Detailed Comparison

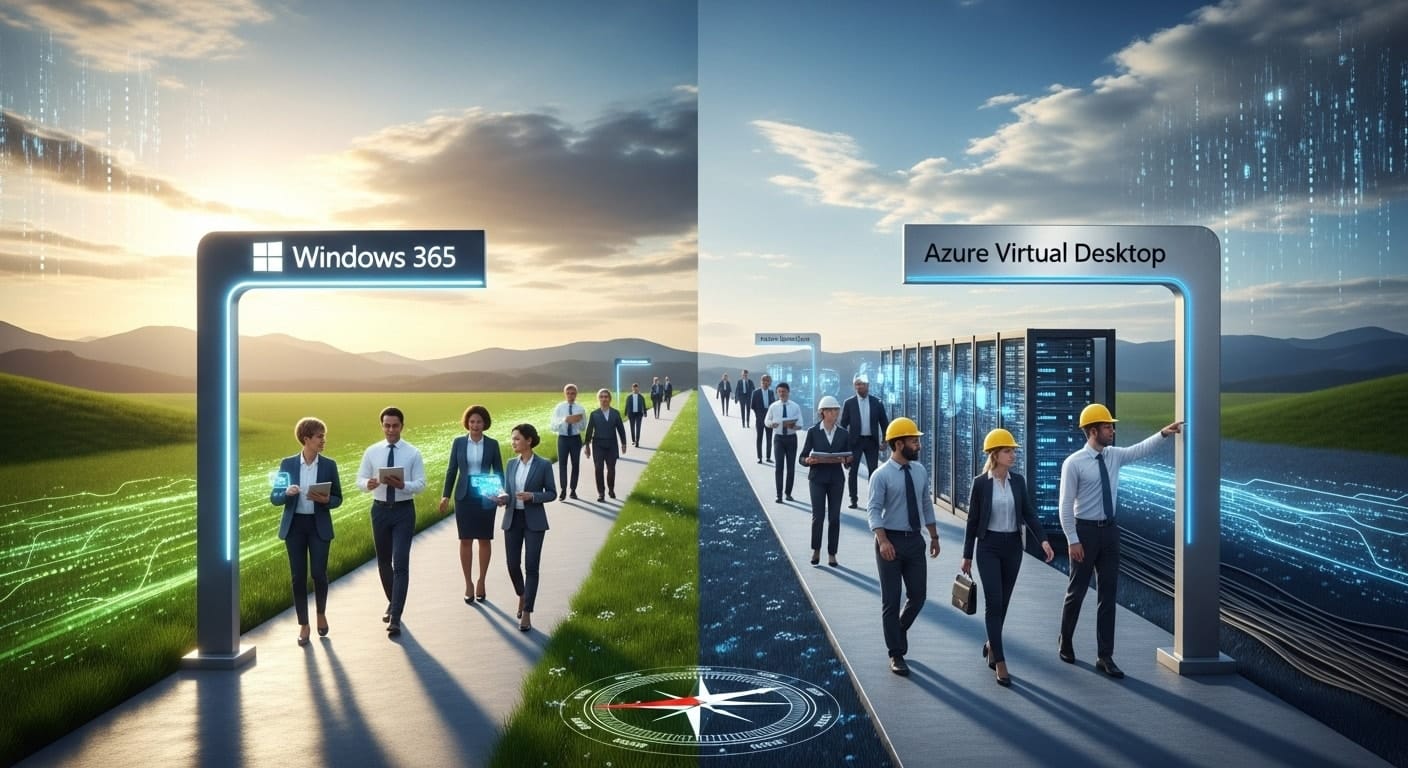
Visual comparison of Windows 365 and Azure Virtual Desktop showing two distinct cloud computing paths symbolizing user choice.
Quick Answer

Which Is Better for Cloud Desktops: Windows 365 or Azure Virtual Desktop?

Windows 365 and Azure Virtual Desktop both deliver cloud-based Windows desktops, but they serve different needs. Windows 365 offers simple, fixed-price Cloud PCs for individual users, while Azure Virtual Desktop provides flexible, scalable virtual desktop infrastructure with multi-user support. Platforms like Apporto simplify deployment with browser-based access and predictable pricing.

The way people work has changed. Remote access is no longer a luxury — it’s a requirement. As businesses adapt to hybrid and distributed teams, the demand for virtual desktop solutions continues to grow.

The question isn’t whether you need one — it’s which one.

Two of Microsoft’s flagship offerings are often compared: Windows 365 (Cloud PC) and Azure Virtual Desktop (AVD). On the surface, they seem similar.

Both let you deliver Windows desktops from the cloud. Both offer flexibility, security, and centralized control. But once you dig deeper, the differences are significant — especially in cost, complexity, and use case.

This guide breaks it all down. You’ll learn how each solution works, how they compare, what they cost, and which one makes the most sense for your organization — whether you’re managing five users or five thousand.

Let’s unpack Windows 365 vs Azure Virtual Desktop and find the best fit for how you work now.


What Is Windows 365 and How Does It Work?

Professional using multiple devices connected to a Windows 365 Cloud PC, demonstrating cloud-based access across desktop, laptop, and mobile

Windows 365 is Microsoft’s simplified Cloud PC offering — a virtual Windows desktop that runs entirely in the cloud and behaves like a personal computer. It’s designed to give users secure, persistent access to a Windows environment without needing physical hardware or complex backend infrastructure.

When you subscribe to Windows 365, you’re essentially renting a dedicated cloud PC on a fixed monthly price. That cloud PC is always on, preconfigured with Windows 10 or 11, and tied to a specific user. Every time they log in — whether from a laptop, tablet, or browser — they return to the same desktop with the same files, settings, and apps.

Standout Features:

  • Fixed Pricing: Monthly billing makes it easier to budget.
  • Simplicity: No need for deep Azure expertise or server configuration.
  • Remote Access: Users can connect from anywhere using the Remote Desktop app or browser.
  • Central Management: IT admins manage devices and settings through Microsoft Intune, Microsoft’s endpoint management solution.

Windows 365 also integrates with Azure Active Directory, giving you control over user access and security policies.

Who Is It For?

  • Task Workers who need consistent, lightweight desktop access
  • Small and Medium Businesses (SMBs) with limited IT staff
  • Non-technical administrators who want to deploy desktops quickly without dealing with Azure infrastructure

If you need a personal desktop in the cloud that just works — with predictable billing and minimal configuration — Windows 365 is built for that.

But if your environment demands more flexibility or multi-user support, another option may be more suitable. Let’s take a look at Azure Virtual Desktop.


What Is Azure Virtual Desktop and How Does It Work?

IT administrator managing Azure Virtual Desktop performance and user sessions through the Microsoft Azure management dashboard

Azure Virtual Desktop (AVD) is Microsoft’s fully flexible virtual desktop infrastructure (VDI) platform. Unlike Windows 365, which delivers one Cloud PC per user, AVD allows you to host many users on shared resources — all built on top of Microsoft Azure.

AVD gives you complete control over the virtual desktop environment — from the operating system to the VM size, storage, and scaling policies. You can deliver full desktops or specific applications, assign access dynamically, and adjust the backend architecture to fit your performance and budget needs.

Main Components:

  • Session Hosts: These are the virtual machines (VMs) where user sessions actually run.
  • Control Plane: Managed by Microsoft, this handles brokering, diagnostics, and load balancing.
  • Custom Images: Build and deploy your own desktop images with pre-installed apps and configurations.
  • FSLogix Profile Storage: Enables fast logins and roaming profiles by separating user data from the VM.

AVD is deployed and managed through the Azure portal, giving you access to a vast ecosystem of services like identity management, storage, monitoring, and backup.

Who Is It For?

  • Organizations with complex IT environments
  • Teams needing high customization and multi-session capabilities
  • Enterprises that already operate within the Microsoft Azure ecosystem
  • IT admins who want granular control over policies, performance, and cost

Azure Virtual Desktop is powerful — but it requires a deeper technical foundation. It’s not a plug-and-play cloud solution. It’s a build-it-your-way platform.

Next, let’s compare Windows 365 and AVD side by side to see where each one fits best.


What Are the Notable Differences Between Windows 365 and Azure Virtual Desktop?

While both Windows 365 and Azure Virtual Desktop (AVD) deliver cloud-hosted desktops, they do so in very different ways. The right choice depends on how much control you need, how many users you’re supporting, and how much flexibility you’re willing to manage.

Here’s a side-by-side breakdown to clarify where these solutions diverge:

Feature Windows 365 Azure Virtual Desktop
Pricing Model Fixed monthly price Pay-as-you-go (based on actual usage)
Use Case Simplicity for knowledge workers Flexibility for advanced IT environments
Setup Quick and simple Requires Azure and AVD deployment knowledge
Cost Predictability High Low (unless actively monitored)
Support for Multiple Users Single user per Cloud PC Multiple concurrent users per session host
OS Options Windows 10/11 Enterprise only Windows 10/11, Windows Server
Scalability Manual Auto-scaling with dynamic host pool configuration
Management Tools Microsoft Intune Azure Portal, Active Directory, CLI tools


Identifies:

  • Windows 365 Cloud PCs are persistent, single-user machines. You set them up once, and each user logs in to the same environment every time.
  • AVD is a shared-resource model. You can host multiple users on a single VM (session host), which increases efficiency for task workers or seasonal teams.
  • AVD is also far more highly customizable. You can deploy custom images, integrate with third-party tools, and tailor the environment for different departments.

The distinction comes down to how much you want to manage. If you want full control over the virtual desktop and Windows environment, AVD gives you that. If you just want desktops that work out of the box, Windows 365 is your answer.

Next, let’s dig deeper into how pricing models affect your decision.


How Do Pricing Models Differ Between Windows 365 and Azure Virtual Desktop?

Business team reviewing Windows 365 vs Azure Virtual Desktop pricing models on a presentation screen during a meeting.

Understanding the pricing models is essential — because while both services offer virtual desktops, how you pay for them can vary wildly depending on your usage and setup.

Windows 365: Predictable Monthly Pricing

With Windows 365, you pay a flat monthly fee per user. This includes the Cloud PC, operating system, storage, and compute resources. Pricing is determined by the specs you choose (e.g., number of vCPUs, RAM, and storage), and it remains fixed regardless of usage.

  • Ideal for organizations that prioritize cost predictability
  • Easy to budget for — no surprises
  • Suitable for knowledge workers who need persistent access

Azure Virtual Desktop: Usage-Based Pricing

In contrast, Azure Virtual Desktop operates on a pay-as-you-go model. You only pay for what you use — but that also means pricing is more dynamic and harder to predict.

Costs can include:

  • Compute Costs: Time your VMs are running
  • Storage Costs: OS disks, FSLogix profile containers, and backups
  • Bandwidth: Outbound data transfers
  • Azure Infrastructure: Virtual networks, Azure Active Directory integration, and other services

To manage costs, you can:

  • Use reserved instances for long-term savings
  • Turn off idle VMs when not in use
  • Implement auto-scaling to match demand
  • Monitor actual usage via the Azure Portal or cost management tools

Wrapup:

  • Windows 365 = simplicity, with a fixed monthly price
  • AVD = flexibility, but requires ongoing monitoring to achieve cost efficiency

Choosing between the two often comes down to how predictable — or how optimized — you need your actual pricing to be.


Which Solution Is Better for Medium-Sized Businesses?

Side-by-side illustration comparing user experiences and workflows between Windows 365 and Azure Virtual Desktop environments.

When evaluating Windows 365 vs Azure Virtual Desktop, medium-sized businesses fall into an interesting space. You likely need scalable infrastructure, but not at the level of a global enterprise. Your IT team may be efficient — but stretched thin. And your users? Probably a mix of both task workers and knowledge workers.


Task Workers vs. Knowledge Workers

  • Task workers — like customer service reps, seasonal employees, or support roles — often don’t need full-time access to high-performance machines. A shared-resource setup using AVD can optimize compute costs while serving this group well.
  • Knowledge workers, on the other hand, benefit from a persistent, consistent desktop. For them, Windows 365 offers simplicity and reliability.

IT Staffing Considerations

Windows 365 is designed for environments with lean IT teams. If your admins aren’t deeply familiar with Azure infrastructure, they can still manage Cloud PCs via Microsoft Intune and have users up and running in minutes.

Azure Virtual Desktop, however, assumes you have technical depth — or the resources to build it. It integrates with Active Directory, uses custom networking, and benefits from DevOps practices.

Control vs. Simplicity

If your business needs fine-grained control, the ability to support custom images, or to deploy desktops by department, AVD offers the flexibility. But if you’re looking for a clean, hands-off cloud solution for end users, Windows 365 is the prime example of ease.

Ultimately, the best choice depends on how much time and expertise you’re willing to invest — and what level of customization your workflows demand.


What Are the Pros and Cons of Each Platform?

Before making your decision, it’s worth mapping out the clear advantages and drawbacks of each solution. Here’s a breakdown to help clarify the trade-offs.

Pros of Windows 365

  • Simple to deploy: Minimal setup. Users can be provisioned in minutes.
  • Fixed monthly pricing: No guesswork. Easy for finance teams to budget.
  • Minimal management required: Managed updates, centralized control via Intune, and no complex backend.

Cons of Windows 365

  • Less customizable: Limited ability to configure virtual machines or operating system behaviors.
  • Single session per user: You’ll need one Cloud PC per user, which can increase costs for larger teams.
  • Less backend control: Microsoft handles most of the infrastructure. Helpful for some — restrictive for others.

Pros of Azure Virtual Desktop

  • Highly flexible and scalable: Configure exactly what you need — from OS to VM size.
  • Multi-session support: Multiple users can share the same virtual machine, improving cost efficiency.
  • Deep Azure integration: Works natively with Azure resources, Active Directory, and other cloud services.

Cons of Azure Virtual Desktop

  • Requires Azure expertise: Setup isn’t intuitive for non-technical teams.
  • Costs can spike: Without monitoring VM uptime and storage usage, actual pricing can climb quickly.
  • More to manage: You’ll need to handle scaling, user profiles, and resource optimization.

Both platforms are strong — but they serve different needs. Coming up next: how do security and management capabilities stack up?


What Are the Security and Management Differences?

Team of developers collaborating in an office, analyzing Windows 365 and Azure Virtual Desktop interfaces on dual monitors.

Security and centralized management are essential considerations for any virtual desktop deployment. Both Windows 365 and Azure Virtual Desktop (AVD) offer robust security capabilities — but they approach them in fundamentally different ways.

Windows 365: Managed Simplicity

Microsoft Intune plays a central role in managing Windows 365 Cloud PCs. Intune allows you to enforce compliance policies, push app installations, and remotely wipe or lock devices. Since the infrastructure is abstracted away, you don’t need to think about the underlying servers, patching cycles, or network configuration. Microsoft handles it all.

Strong benefits include:

  • Preconfigured security features like endpoint protection and threat detection
  • Centralized user and device policies via Microsoft Endpoint Manager
  • Simple role-based access with Azure Active Directory integration

This setup favors organizations seeking secure, low-maintenance desktops.

Azure Virtual Desktop: Granular Control

With AVD, you’re responsible for most of the configuration — which means greater flexibility and more powerful tools, but also more complexity.

Security in AVD is enforced through:

You can also control patching cycles, OS updates, and app deployments via your own schedule, giving you full command over the environment.

If your organization needs detailed oversight of access restrictions, custom security configurations, and audit logs, AVD provides a deep toolkit — assuming you have the Azure expertise to manage it.

Let’s now compare the day-to-day experience of deploying and managing both platforms.


Which Is Easier to Deploy and Manage Day-to-Day?

Ease of deployment and daily management often determine how quickly a solution fits into your environment. On this front, Windows 365 and Azure Virtual Desktop (AVD) differ quite a bit.

Windows 365: Plug-and-Play Simplicity

With Windows 365, there’s no infrastructure to build or tune. You assign a Cloud PC to a user through Microsoft Intune, and they log in. That’s it.

  • No need for advanced knowledge of Azure environments
  • Patching, updates, and infrastructure maintenance are handled by Microsoft
  • Self-service provisioning and centralized policy enforcement make it easy for small IT teams to manage desktops efficiently

This makes Windows 365 especially attractive for companies without a dedicated Azure admin.

Azure Virtual Desktop: Custom, But Complex

AVD offers deeper control but requires more configuration.

  • You manage the control plane, session hosts, and scaling policies
  • It relies on Microsoft’s Azure subscription and services like virtual networks, NSGs, and identity tools
  • You’ll likely need third-party tools or scripting (e.g., PowerShell, Azure CLI) for automation at scale

While AVD can be tailored to exact business needs, it comes with a steeper learning curve. It’s a better fit for organizations with skilled IT teams already comfortable with the Azure portal and related tools.


Looking for a Simpler, More Predictable Alternative?

Apporto company logo representing cloud-based virtual desktop and digital workspace solutions.

If the trade-off between control and complexity still feels like too much, there’s another option. Apporto delivers a fully managed, browser-based virtual desktop experience without the infrastructure burden of AVD or the per-user licensing model of Windows 365.

Built specifically for education and mid-sized organizations, Apporto offers:

  • Instant access to Cloud PCs via your browser
  • No Azure subscription or backend setup
  • Built-in cost efficiency and simplified pricing
  • Support for multi-user environments and role-based access
  • White-glove support and zero maintenance on your part

If you need desktops that scale without surprises — and you’d rather skip infrastructure costs entirely — try Apporto now.


Final Thoughts: Should You Choose Windows 365 or Azure Virtual Desktop?

Choosing between Windows 365 and Azure Virtual Desktop (AVD) comes down to your organization’s unique mix of needs, resources, and scale.

If you value predictable simplicity, have a smaller IT team, and want to get up and running fast, Windows 365 Cloud PCs offer a straightforward path with minimal overhead. The pricing is fixed, the setup is quick, and the management is centralized through tools like Microsoft Intune.

On the other hand, if you need advanced flexibility, support for multiple concurrent users, or a highly customized virtual desktop environment — and have the Azure skill set to support it — Azure Virtual Desktop is a better fit. Just be prepared for more configuration and tighter cost monitoring.

And if both seem like too much to manage, consider a third path: Apporto. It bridges the gap with an all-in-one cloud solution that cuts complexity and keeps costs transparent.

Whichever route you choose, make sure it aligns with how your team works — not just what the tech promises.


Frequently Asked Questions (FAQs)


1. What is the difference between Windows 365 and Azure Virtual Desktop?

Windows 365 provides fixed-price Cloud PCs designed for individual users with simple deployment and centralized management. Azure Virtual Desktop is a flexible virtual desktop infrastructure platform that supports multi-user environments, custom configurations, and usage-based pricing, making it better suited for organizations requiring scalability and advanced infrastructure control.

2. Can multiple users share a Windows 365 Cloud PC?

No. Windows 365 Cloud PCs are built for single users only. Each Cloud PC is assigned to one person, offering a persistent experience. If you need concurrent users or shared resources, Azure Virtual Desktop is the more appropriate choice.

3. Which is cheaper: AVD or Windows 365?

It depends on usage. Windows 365 has a fixed monthly cost, making it more predictable but potentially expensive for light users. AVD can offer cost savings through multi-session support and auto-scaling, but costs can spike without careful monitoring of usage and resources.

4. Do both solutions support custom images?

Only Azure Virtual Desktop supports custom images natively. You can build and deploy fully configured desktops tailored to your organization’s needs. Windows 365 does not currently support custom images in the same way, which limits flexibility for IT administrators.

5. Is Windows 365 more secure than AVD?

Both platforms are secure, but they differ in control. Windows 365 provides built-in security features with minimal configuration. AVD, on the other hand, allows you to customize user profiles, access policies, and integrate with broader Azure virtual security tools — offering more control but requiring more effort.

6. Which one is better for a small IT team?

For small IT teams with limited Azure experience, Windows 365 Cloud PCs are easier to deploy and manage. They don’t require configuring infrastructure or monitoring usage. AVD is better suited for teams with the skills to manage Azure resources and optimize for performance.

How to Configure Azure Virtual Desktop: A Step-by-Step Guide

Quick Answer

How to Configure Azure Virtual Desktop?

Configuring Azure Virtual Desktop involves setting up Azure resources, creating host pools, deploying session host virtual machines, configuring application groups, and assigning user access through Microsoft Entra ID. Azure Virtual Desktop provides scalable remote desktop delivery, while browser-based platforms like Apporto simplify deployment by reducing infrastructure and management complexity.

Azure Virtual Desktop (AVD) is Microsoft’s cloud-based solution that lets users securely access desktops and applications from anywhere, using any device.

Instead of relying on physical machines, you deliver a virtual desktop experience through the Azure cloud—flexible, scalable, and centrally managed.

As hybrid and remote work continue to reshape how organizations operate, Virtual desktop infrastructure (VDI) has become a critical tool for IT teams looking to maintain security, reduce hardware costs, and support distributed users.

It removes the complexity of managing local machines while keeping users productive with familiar Windows environments.

In this guide, you’ll walk through a practical, step-by-step approach to configuring Azure Virtual Desktop—from setup prerequisites to user access. No fluff—just what you need to get it working.


What Do You Need Before You Configure Azure Virtual Desktop?

Before diving into the setup, it’s important to ensure a few foundational pieces are in place. Azure Virtual Desktop depends on having the right infrastructure, permissions, and access controls ready to go. Here’s a quick checklist of what you’ll need:

  • An active Azure subscription – This is where your virtual machines and services will live.
  • Microsoft Entra ID (formerly Azure Active Directory) – You’ll use this to manage user identities and access.
  • A user account with appropriate Role-Based Access Control (RBAC) – This should have permissions to create and manage resources.
  • A virtual network (VNet) – Ensure it’s configured with a Network Security Group (NSG) to manage traffic and protect your environment.
  • Basic knowledge of directory services and operating systems – Familiarity with Active Directory, Windows 10/11, or multi-session Windows Server is helpful.

Depending on your licensing model, you may also need Microsoft 365 or Windows Enterprise licenses to use certain AVD features.

With these essentials in place, you’re ready to move on to configuring your host pool.


How Do You Create a Host Pool in Azure?

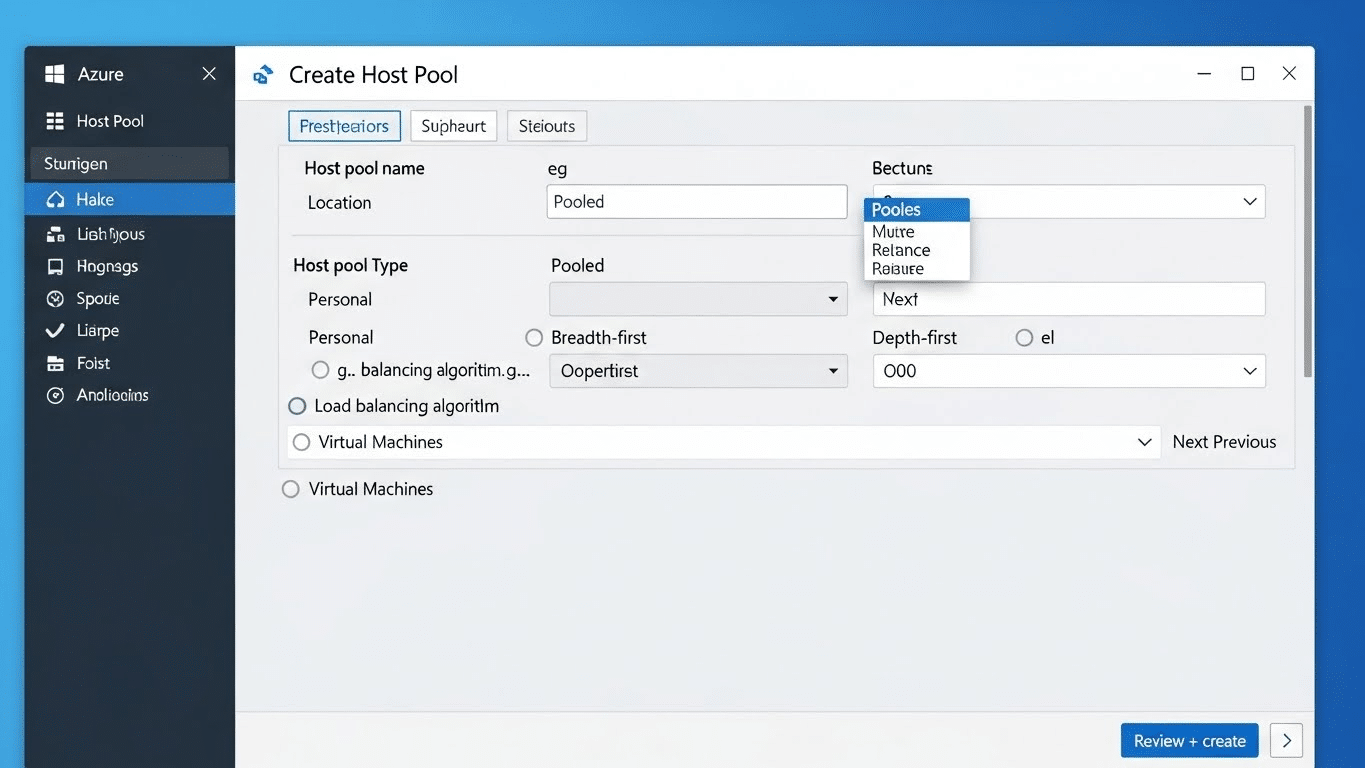
Host pool creation settings in the Azure portal with VM and load balancing options, highlighting how to configure Azure Virtual Desktop host pools.

A host pool in Azure Virtual Desktop is a collection of session hosts—virtual machines that deliver desktops and applications to users. Think of it as the engine that powers the virtual desktop experience. All users assigned to the pool share access to these session hosts, which can be scaled based on usage.

To create a host pool in the Azure portal, start by searching for “Azure Virtual Desktop”, then select “Host pools” and click “+ Create”.

You’ll need to:

  • Enter a name and optional name prefix to identify your pool
  • Select the Azure region where your resources will be hosted
  • Define the number of virtual machines you want to deploy
  • Choose the disk type (e.g., Premium SSD for better performance)
  • Set the session limit (how many users per session host)
  • Choose an operating system, like Windows 10 multi-session, for shared environments

This forms the foundation of your AVD setup—where scalability and user access begin.


How Do You Configure the Virtual Machines for Your Desktop Users?

Once your host pool is created, the next step is configuring the virtual machines (VMs) that users will connect to. Start by selecting the appropriate VM size and image based on the performance needs of your users. Lightweight tasks may require fewer resources, while power users might need higher specs.

During setup, you’ll need to choose the domain to join—either Microsoft Entra ID or a hybrid setup if you’re connecting to an on-premises Active Directory. Then, create a local administrator account by setting a username and password that will allow initial configuration.

Under network settings, make sure your VMs are attached to the correct virtual network and subnet. Review public inbound ports—typically, these should be disabled for better security unless required for your use case.

Finally, choose your storage option—Premium SSD is recommended for better speed and reliability. With these configurations in place, your environment is now ready to support real users.


What’s the Role of Application Groups in Azure Virtual Desktop?

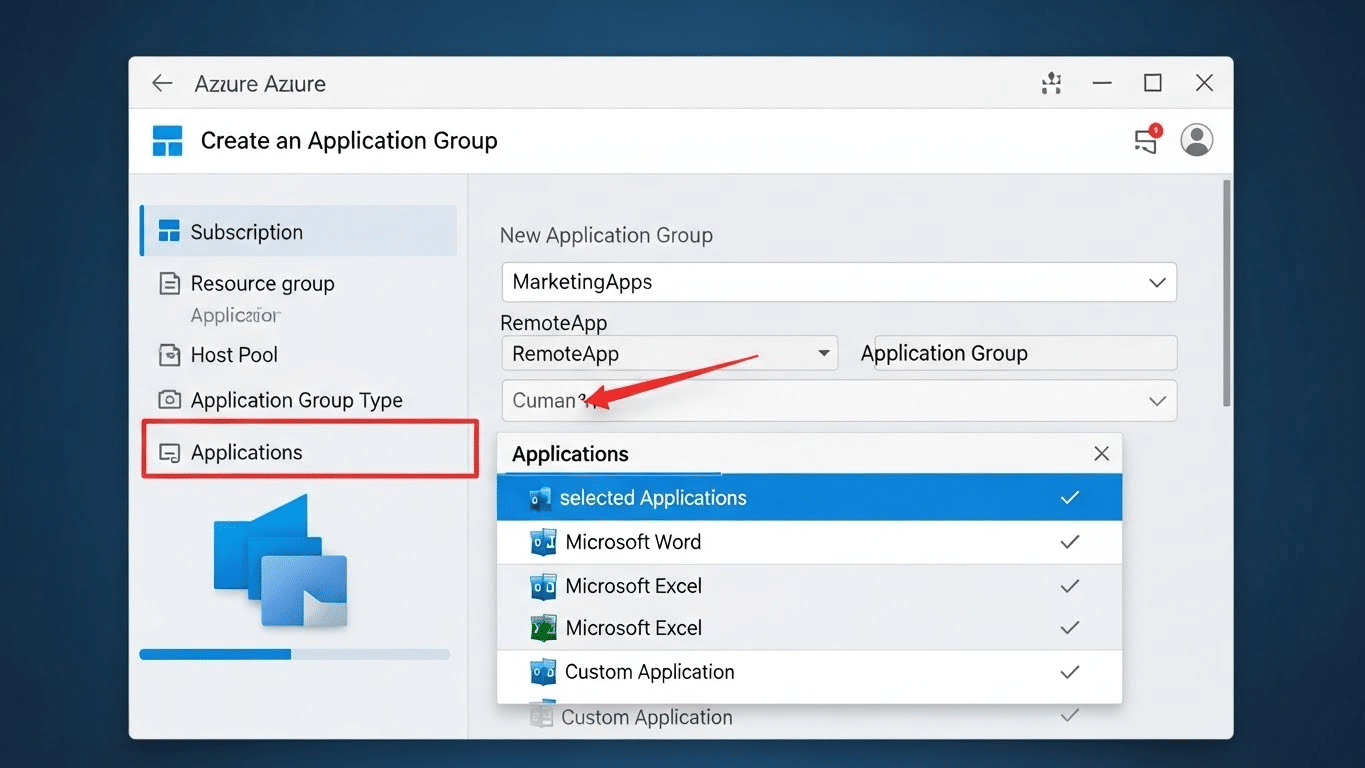
Azure portal interface for creating an Application Group and selecting RemoteApps, demonstrating how to configure Azure Virtual Desktop access.

Application Groups define what users can access within Azure Virtual Desktop. These groups control whether a user receives a full desktop experience or specific RemoteApps—individual applications published through AVD.

There are two types:

  • Desktop Application Group – Grants users access to a full virtual desktop
  • RemoteApp Group – Delivers specific apps without the full desktop interface

When setting up an application group, you choose the desktops and applications you want to deploy, then assign users from Microsoft Entra ID. It’s essential to match the group to the right host pool and ensure user permissions are correctly configured.

The group select process is tied to Role-Based Access Control (RBAC), which allows you to manage who can access what. With proper planning, application groups help ensure that users get exactly what they need—nothing more, nothing less—while keeping administration streamlined.


How Do You Create and Register a Workspace in Azure Virtual Desktop?

A Workspace in Azure Virtual Desktop acts as the user-facing portal for accessing assigned desktops and applications. It’s the layer that ties together application groups and user access, giving your team a clean, centralized place to connect.

To create a Workspace, go to the Azure Portal, search for and select “Azure Virtual Desktop,” then choose Workspaces and click “+ Create.” Enter a name, select the resource group, and link it to the relevant application group from your earlier setup.

After filling in the details, click Review + Create, then deploy the workspace.

Once the workspace is registered, users can connect to their remote desktops and applications through the Remote Desktop client or web portal. The workspace acts as the gateway—giving users what they need, without exposing the infrastructure behind it.


How Do You Connect to Azure Virtual Desktop as a User?

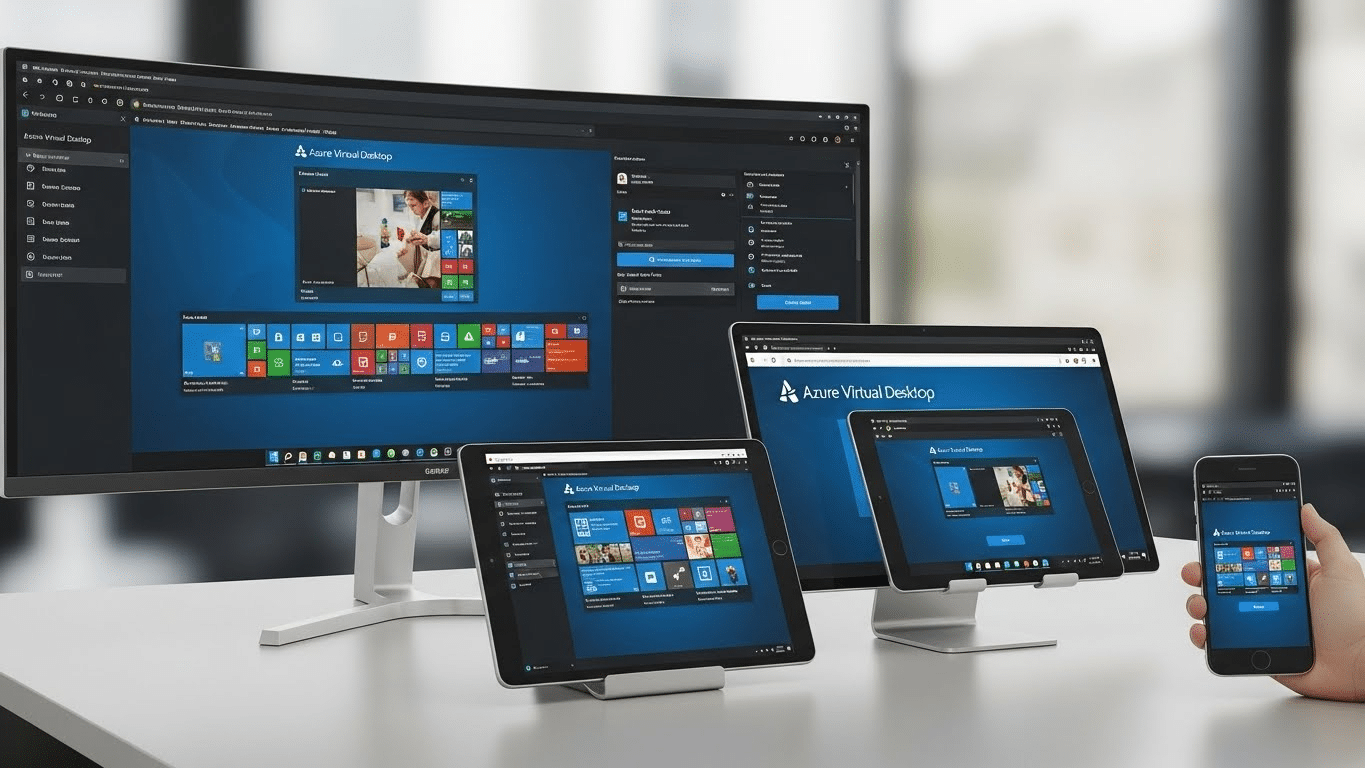
Azure Virtual Desktop running across multiple devices including desktop, tablet, and phone, showing user connectivity after configuring Azure Virtual Desktop

Connecting to Azure Virtual Desktop is straightforward. First, download and install the Remote Desktop client from Microsoft’s official site. It’s available for Windows, macOS, iOS, and Android.

Once installed, users sign in using their Microsoft Entra ID—this grants access to any assigned workspaces, desktops, or RemoteApps.

There are two ways to connect:

  • Through the Remote Desktop app, which provides full functionality
  • Or directly through a web browser, offering a lightweight, no-install option

Single sign-on support simplifies access, especially in managed environments. Once connected, session settings (like resolution or multi-monitor support) are applied automatically based on the user’s device.

Azure Virtual Desktop is device-agnostic, meaning users can connect securely from nearly anywhere—without sacrificing performance or experience.


How Can You Manage and Monitor Azure Virtual Desktop After Setup?

Once your Azure Virtual Desktop environment is live, ongoing management and monitoring become essential. The Azure Portal provides built-in tools to track performance, usage, and session activity.

You can:

  • Monitor session hosts for health and uptime
  • View session limits, user activity, and connection status
  • Adjust scaling policies to align with peak usage periods

Azure’s insights dashboard offers real-time analytics to help you troubleshoot bottlenecks or underutilized resources. If something’s off—slow login times, disconnected sessions—you’ll see it.

Managing updates and configurations becomes easier through centralized controls. You’re also able to enforce policies, collect user feedback, and integrate with external tools for extended insights.

This is where Azure really shines: a consistent, cloud-native environment that gives IT teams the control they need—without endless maintenance overhead.


Why Apporto Is a Simplified Alternative to Azure Virtual Desktop

Apporto logo representing a cloud-based virtual desktop solution compatible with the azure virtual desktop client.

If Azure Virtual Desktop feels complex to configure—or more than your team needs—Apporto offers a streamlined alternative. It’s a fully browser-based virtual desktop solution that eliminates the need to manage infrastructure like host pools, session hosts, or networking layers. For another comparison, see how Citrix stacks up against other virtual desktop solutions.

With zero client installs, built-in LMS integration, and real-time collaboration tools, Apporto is built for speed, scalability, and simplicity. Whether you’re delivering labs for higher education or managing remote desktops for business users, Apporto delivers secure, consistent performance—with less setup and ongoing maintenance.

For organizations that want the benefits of virtual desktops without the heavy lift, Apporto offers a smarter path forward. Try Apporto today


Final Thoughts

Azure Virtual Desktop offers impressive flexibility, control, and enterprise-grade scalability, making it a strong option for teams managing complex environments or large user bases. To better understand how Azure Virtual Desktop compares with other solutions, such as cloud desktops vs. VDI, it’s helpful to look at the benefits, costs, and key differences between the two approaches. It supports a wide range of configurations, integrates with Microsoft services, and enables secure access to desktops and apps from anywhere.

But with great flexibility comes greater complexity. Before committing to a full deployment, consider running a test configuration to better understand how it fits into your infrastructure, user needs, and support capacity.

If you need tight integration with Microsoft’s ecosystem and have the IT resources to manage it, Azure Virtual Desktop is a powerful solution. For others, simpler alternatives may offer better ROI and less operational overhead. The secret is alignment.


Frequently Asked Questions (FAQs)


1. How to setup Azure Virtual Desktop step by step? 

Setting up Azure Virtual Desktop involves creating Azure resources, deploying virtual machines, configuring networking and security settings, creating host pools, assigning application groups, and connecting users through Microsoft Entra ID. Ongoing monitoring and scaling are managed through the Azure Portal and centralized administrative controls.

2. How do I assign users to Azure Virtual Desktop?

Users are assigned to Azure Virtual Desktop through application groups linked to specific host pools. Administrators use Microsoft Entra ID and Role-Based Access Control (RBAC) to grant users access to published desktops, RemoteApps, and workspace resources securely and centrally.

3. What is a host pool in Azure Virtual Desktop?

A host pool is a collection of virtual machines that users connect to. These machines, called session hosts, deliver the desktops and apps assigned to users through application groups.

4. Can I use Azure AD instead of traditional Active Directory?

Yes, Azure Virtual Desktop now supports Microsoft Entra ID (formerly Azure AD) for cloud-only environments. Hybrid options are still available if you need to join on-premises domains.

5. Do I need to create a workspace for each user?

No. A single workspace can serve multiple users by linking it to one or more application groups. Users only see the desktops and apps assigned to them.

6. What’s the difference between application group and workspace?

An application group defines what users can access—full desktops or specific apps. A workspace is the portal where those apps and desktops are delivered and accessed by users.

What Is Azure Virtual Desktop? Full Cloud VDI Overview

Modern office setup with multiple Windows desktops and Azure cloud network visualization, representing what is Azure Virtual Desktop and its cloud-based VDI architecture.
Quick Answer

What Is Azure Virtual Desktop?

Azure Virtual Desktop (AVD) is Microsoft’s cloud-based virtual desktop infrastructure service that delivers Windows desktops and applications securely through Azure. It allows users to access remote desktops from almost any device while organizations centrally manage infrastructure, security, and applications. Solutions like Apporto also provide browser-based virtual desktop alternatives with simplified deployment.

In today’s cloud-first world, the way organizations deliver desktops and applications has changed dramatically. Azure Virtual Desktop (AVD) — a service built on the Microsoft Azure platform — is at the forefront of this transformation.

Whether you’re managing remote teams, scaling IT resources, or navigating tighter security and compliance needs, virtual desktop infrastructure (VDI) is no longer optional. It’s essential.

AVD provides a centralized, cloud-based way to deliver full Windows desktops and apps to users — from any device, anywhere. To learn more about this technology, see what virtual desktop infrastructure (VDI) is.

But what exactly is Azure Virtual Desktop? How does it differ from traditional solutions, and why are more organizations shifting away from on-prem setups toward cloud computing environments like Azure?

This guide breaks down everything you need to know: how AVD works, what it offers, where it fits, and how to evaluate whether it’s right for your organization.

Let’s start with the fundamentals.


What Exactly Is Azure Virtual Desktop and How Does It Work?

IT professional managing Azure Virtual Desktop dashboard and monitoring virtual machine performance, demonstrating what is Azure Virtual Desktop for businesses

Azure Virtual Desktop (AVD) is Microsoft’s modern solution for virtual desktop infrastructure (VDI) — a system that lets users access a complete Windows desktop or specific applications hosted in the cloud, not on local machines.

You connect via the internet, using a remote desktop client or a web browser. The experience looks and feels like using a traditional PC, but everything — apps, data, user settings — is actually running in the cloud.

How It Evolved

AVD was previously known as Windows Virtual Desktop, which caused confusion as it sounded more like a product than a service. The updated name reflects its purpose better: a virtual desktop service built entirely on Microsoft Azure.

Unlike traditional VDI, which often runs on in-house servers and demands a significant infrastructure investment, AVD lives in Microsoft’s data centers. This reduces complexity, lowers costs, and makes scaling much easier.

Main Components of Azure Virtual Desktop

Component Description
Host Pools Collections of virtual machines (VMs) that deliver desktops or apps
Session Hosts The VMs inside a host pool that users actually connect to
App Groups Sets of desktop apps or full desktops assigned to users
Remote Desktop Client The tool users use to connect (available for Windows, macOS, web, mobile)


AVD supports multi-session Windows 10/11, meaning multiple users can share the same virtual machine, reducing costs. It also supports Windows Server for environments that prefer that configuration.

This setup enables centralized management and rapid provisioning, making it a compelling option for organizations moving toward cloud-based remote desktop services.

Now that you understand the basics, let’s look under the hood — specifically, how Azure itself powers this system.


How Does Azure Virtual Desktop Operate on the Microsoft Azure Platform?

Azure Virtual Desktop is only possible because of the foundation it’s built on: the Microsoft Azure platform.

Azure is Microsoft’s global cloud computing infrastructure, offering everything from storage and databases to virtual machines (VMs) and security tools. When you deploy AVD, you’re essentially renting compute power and infrastructure in Azure’s cloud — instead of building or managing it on your own.

What You Need to Use Azure Virtual Desktop

To get started with AVD, you’ll need a few core elements:

  • An Azure subscription
  • Access to the Azure portal (Microsoft’s web-based management interface)
  • Virtual networks for connectivity
  • Sufficient compute capacity (RAM/CPU) based on user needs
  • Licensing for Windows (often included via Microsoft 365 plans)

You then provision virtual machines in Azure, define their virtual machine size (e.g., memory, CPU, GPU), and assign them to host pools — the backend environment where users’ desktops and apps will live.

Deployment Options

You can deploy AVD in two primary ways:

  • Azure Portal: A visual interface with step-by-step wizards, ideal for smaller environments or those new to Azure.
  • PowerShell / Azure CLI: For advanced users, these command-line tools offer more control, automation, and scalability options.

This cloud-native setup enables rapid scaling, centralized management, and deep integration with other Azure services. It’s a major departure from the heavy lifting required by legacy on-prem VDI environments.

Next, let’s explore the core components that make Azure Virtual Desktop function at scale.


What Are the Main Components of Azure Virtual Desktop?
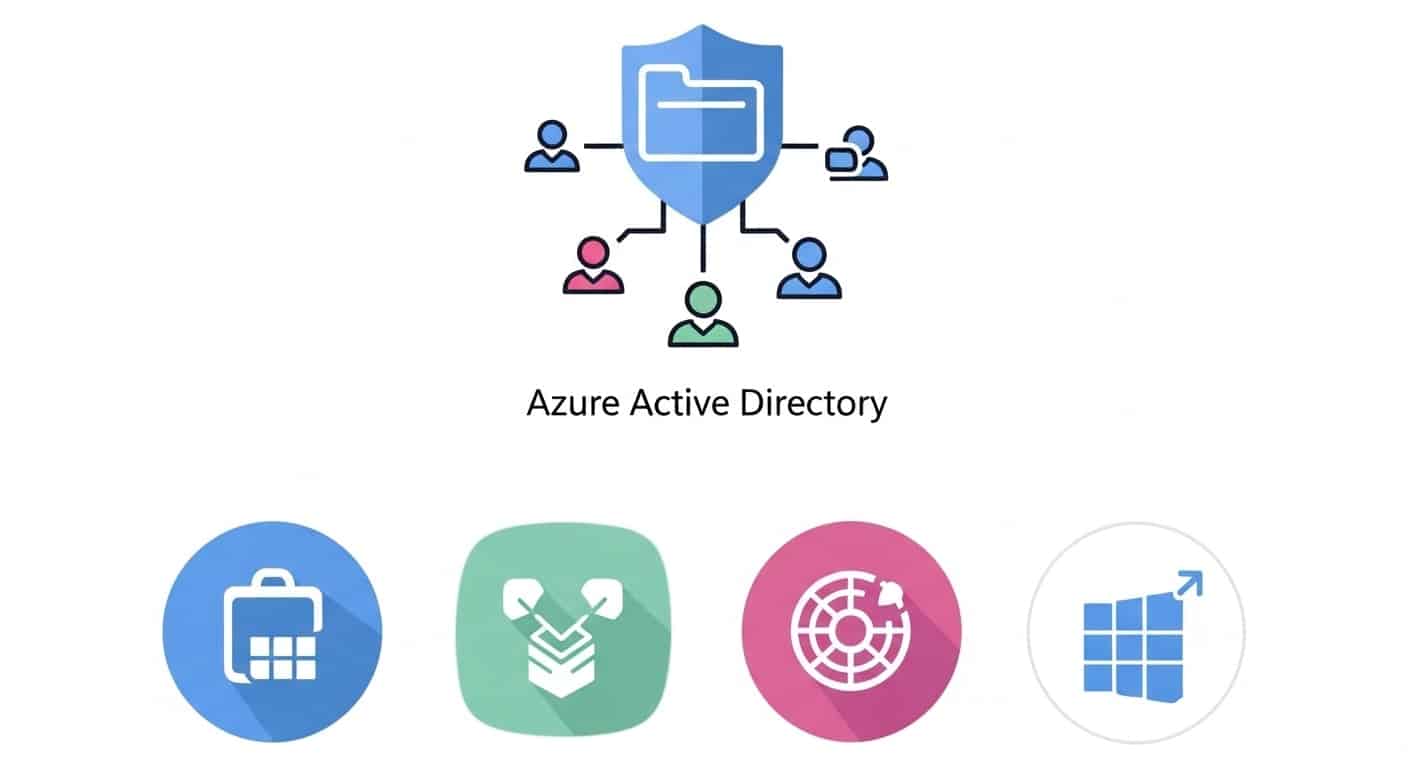
Azure Active Directory illustration showing secure identity and access management components for what is Azure Virtual Desktop.


To fully understand how Azure Virtual Desktop (AVD) works, it helps to look at its core components. Each plays a distinct role in delivering virtual desktops and apps to users efficiently and securely.

1. Host Pools

At the heart of AVD are host pools — collections of Azure virtual machines (VMs) that act as the infrastructure behind your remote desktop environment. Each VM is called a session host, and it’s where users’ sessions are actually run.

  • Host pools can be set up for pooled (multi-user) or personal (1:1 user-to-VM) access.
  • You can scale them easily to match user load and performance needs.

2. Session Hosts

These are the individual VMs inside a host pool. Each session host handles one or more user connections, depending on how you configure it.

  • For cost savings, AVD supports multi-session Windows 10/11 Enterprise, allowing multiple users to share a single VM without performance loss while utilizing remote access.

3. Application Groups (App Groups)

AVD uses app groups to organize what users can access.

  • Desktop Application Groups provide full desktop access.
  • RemoteApp Groups allow users to launch individual desktop apps without a full desktop interface.

You can assign different app groups to different user roles (e.g., finance, engineering) for fine-grained control.

4. Virtual Networks and VM Configuration

Each VM in AVD is deployed into an Azure virtual network (VNet). This controls how your virtual desktops connect to other resources and the internet.

  • You’ll define your virtual machine size, OS type, and use custom image templates to preconfigure the environments.
  • With Azure Private Link, you can keep traffic off the public internet and improve data security.

5. Azure AD and Identity Management

Identity and access are handled through Azure Active Directory (Azure AD) or a hybrid of Azure AD + on-prem Active Directory.

  • Azure AD controls user account authentication, role assignments, and conditional access policies.
  • This helps ensure only authorized users can access your AVD environment — and only from approved devices.

Together, these components form a flexible, scalable VDI foundation — with deep security, customization, and integration options.

Let’s now explore how AVD makes it possible for multiple users and devices to work together in the same environment.


How Does Azure Virtual Desktop Support Multiple Users and Devices?
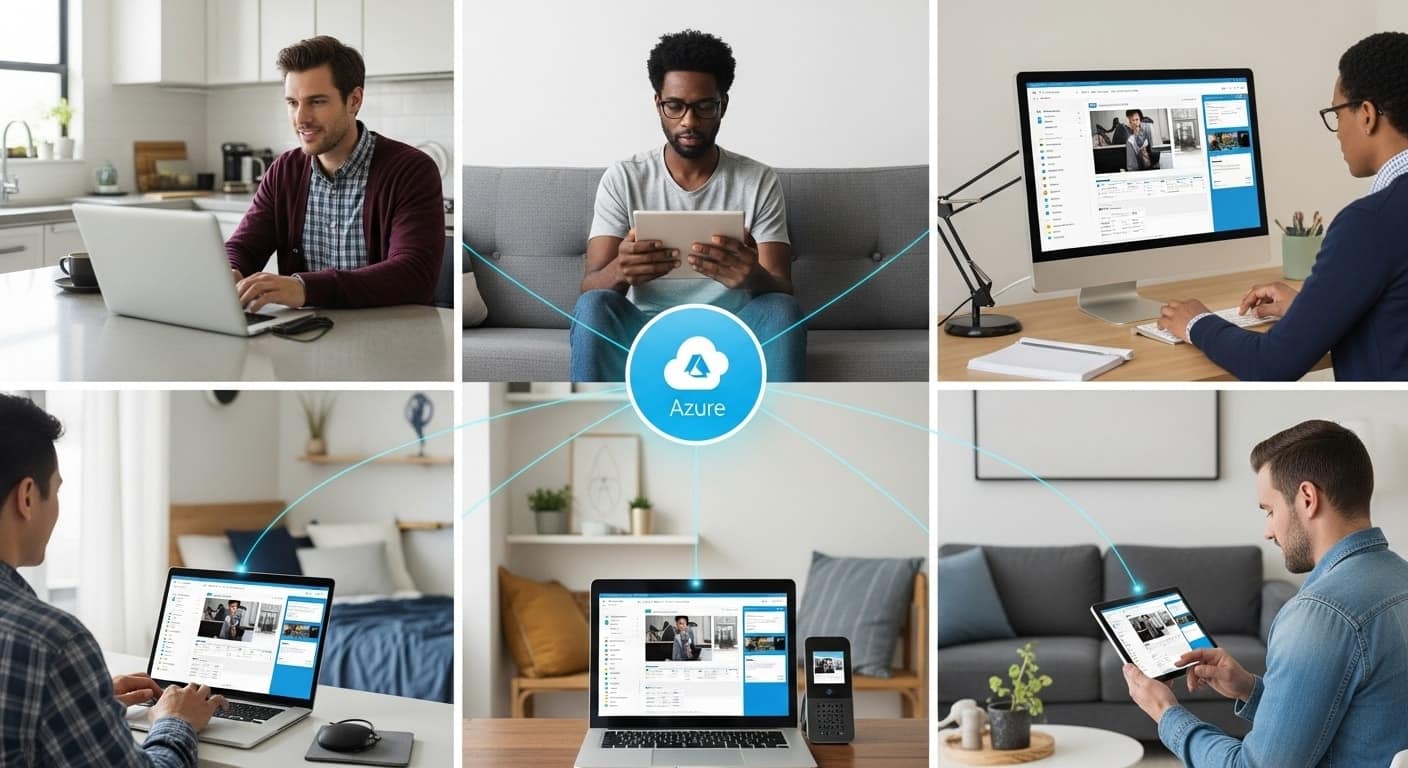
Remote employees using cloud-connected devices through Microsoft Azure to access virtual desktops, illustrating what is Azure Virtual Desktop in action.

One of the major advantages of Azure Virtual Desktop is its ability to support multiple users on a single machine — a capability known as multi-session.

With Windows 10/11 Enterprise multi-session, multiple people can connect to the same virtual machine (VM) simultaneously, each with their own separate session. This significantly reduces infrastructure costs, since you don’t need a one-to-one ratio of users to machines.

Crucial Capabilities That Enable Multi-User Support:

  • Multi-Session Resources
    A single VM can host several active sessions, managed efficiently by Azure’s backend. Users never see each other’s data or desktops.
  • User Account Assignment
    You assign users to host pools and application groups through Azure AD. These assignments control what apps or desktops they can access.
  • User Profiles and Session Management
    Each user maintains their own personalized environment, including files, settings, and app preferences. This can be managed using FSLogix (a profile container tool), which improves login times and session consistency.

Device Compatibility

Azure Virtual Desktop works across a wide range of devices and platforms:

  • Remote Desktop Client: Available for Windows, macOS, Android, and iOS.
  • Web Access: Use a supported browser to connect — no client installation required.
  • Seamless Integration: Features like copy-paste, drive redirection, and microphone passthrough make the experience feel local.

This flexibility makes AVD ideal for hybrid work environments, BYOD policies, and organizations with mixed operating systems.

Next, we’ll walk through the deployment process — from setting up your host pool to configuring app access and network security.


How to Deploy Azure Virtual Desktop: Step-by-Step Overview

Getting started with Azure Virtual Desktop (AVD) doesn’t require building your own infrastructure, but it does involve a few important steps inside the Azure portal. The deployment process is modular and allows for flexibility — whether you’re running a pilot or rolling out at scale.

Here’s a high-level guide to deploying Azure Virtual Desktop:

1. Set Up Your Azure Environment

Before anything else, make sure you have:

  • An active Azure subscription
  • An existing resource group or create a new one to hold your deployment
  • A virtual network (VNet) with DNS settings configured for Active Directory (AD)

You’ll also need to decide whether you’re using Azure Active Directory, on-prem AD, or a hybrid setup.

2. Create a Host Pool

The host pool is the foundation of your AVD deployment. It includes the virtual machines that users will connect to — known as session hosts.

When creating your host pool:

  • Choose between pooled (multi-user) or personal (dedicated) desktop assignments
  • Define virtual machine size, image type (gallery or custom image templates), and region
  • Enable scaling and load balancing if needed

3. Register Session Hosts

Each VM must be registered as a session host within the host pool. This step links your VMs to the AVD infrastructure so users can log in.

4. Create and Assign Application Groups

Application groups define what users can access:

  • Desktop Application Group = Full Windows desktop
  • RemoteApp Group = Individual apps only

You can assign user profiles to specific app groups, giving different teams access to different resources.

5. Consider Security Measures

Security begins with smart configuration:

  • Public inbound ports should be disabled unless absolutely necessary
  • Use Azure Private Link to route internal traffic securely without exposing services to the public internet
  • Apply role-based access and conditional access policies via Azure Active Directory

With deployment complete, users can connect using their remote desktop client or supported web browser — securely and with minimal delay.


What Are the Benefits of Azure Virtual Desktop for Organizations?

Business team analyzing global cloud infrastructure performance dashboards, illustrating real-time scalability and collaboration benefits of what is Azure Virtual Desktop

Azure Virtual Desktop isn’t just another IT tool — it’s a platform designed to modernize how your organization works. Whether you’re a growing business or a large enterprise, AVD offers a range of advantages that solve both technical and strategic challenges.

1. Scalability and Flexibility

Need to onboard 20 contractors next week? Or downsize for a seasonal lull? With AVD, you can scale up or down instantly without buying or provisioning new hardware.

  • Add or remove session hosts as needed
  • Use multi-session Windows to support more users with fewer resources
  • Deploy across multiple regions for geographic flexibility

This scalable solution adapts to your workload, not the other way around.

2. Centralized Management

Managing physical desktops across teams, locations, and departments is inefficient. AVD centralizes everything:

  • Manage all desktops, apps, and users from the Azure portal
  • Apply consistent policies, updates, and security settings
  • Use image management to deploy updates once and push across all VMs

This reduces administrative overhead and ensures users always work in a controlled, up-to-date environment.

3. Optimized Cost Structure

Traditional VDI often involves owning and maintaining your own infrastructure, including servers, licenses, and support contracts. AVD eliminates that, which is one of the advantages to virtual computer labs.

  • Pay only for what you use, with cost efficiency built into Azure pricing
  • Lower infrastructure costs by sharing VMs across users
  • No need for data centers, power, or cooling — everything runs in the cloud

AVD also supports cost-efficient cloud migration strategies, allowing you to shift workloads gradually without a full rip-and-replace of legacy systems. Learn more about the potential of virtual desktops in education.

4. Support for Remote Work and App Delivery

AVD provides access to virtualized Windows desktops and apps from anywhere, on any device:

  • Employees can use their own laptops or tablets
  • IT teams can deliver new apps instantly without manual installs
  • Access is secure and seamless, with full support for desktop apps and internal systems

For any organization seeking to modernize its IT environment, Azure Virtual Desktop provides both the tools and the structure to make it happen.


How Secure Is Azure Virtual Desktop?

IT specialist monitoring Azure security dashboard in a data center, highlighting advanced protection features in what is Azure Virtual Desktop.

Security is a central concern in any cloud deployment — and Azure Virtual Desktop was built with that in mind. From data security to access control, Microsoft designed AVD to meet the high standards required by today’s distributed workforces.

Here’s how the platform protects your environment:

1. Zero Trust Architecture

AVD follows the Zero Trust model, which means no user or device is automatically trusted — even if it’s inside the network. Every access request is evaluated based on:

  • Identity (who you are)
  • Device health (what you’re using)
  • Session context (where and how you’re connecting)

2. Encryption and Access Control

All communication between the user and the AVD session host is encrypted. You can also enforce:

  • Multi-factor authentication (MFA)
  • Conditional access based on risk level, location, or device type
  • Role-based access control via Azure Active Directory

3. Private Networking with Azure Private Link

With Azure Private Link, you can connect your AVD environment privately through Azure’s backbone network, avoiding public internet exposure altogether.

This significantly reduces the risk of unauthorized access or data interception, especially in highly regulated industries.

4. Built-In Security Features

AVD also integrates with Microsoft Defender for Endpoint, providing advanced threat protection for your virtual machines.

Combined, these security capabilities position AVD as a far more secure option than many traditional VDI deployments, which often depend on outdated perimeter defenses and inconsistent policies.

Next, let’s look at some potential limitations and trade-offs you should consider before committing to Azure Virtual Desktop.


What Are the Limitations or Challenges of Using Azure Virtual Desktop?

While Azure Virtual Desktop (AVD) offers significant benefits, it’s not without trade-offs. Understanding the limitations upfront helps avoid surprises down the road.

1. Licensing and Complexity

To deploy AVD, you’ll need a valid Azure subscription and the right Microsoft licensing — typically Microsoft 365 E3/E5 or equivalent. Sorting through the licensing matrix can be confusing, especially for smaller teams without Microsoft expertise.

AVD also assumes some familiarity with Azure infrastructure. If your team isn’t already managing virtual machines or resource groups, the learning curve can be steep.

2. Unpredictable Costs

While AVD removes many capital expenses, its pay-as-you-go model introduces cost unpredictability. Costs can spike based on:

  • The number and size of VMs
  • Active vs. idle usage
  • Network and storage activity

Without tight monitoring, your efforts at a cost-efficient cloud migration can turn into bloated monthly bills.

3. Setup Effort vs. Alternatives

AVD is more flexible than many VDI platforms — but that flexibility comes with added configuration work. You’ll need to manage virtual desktops, integrate identity systems, configure app groups, and define network rules.

Compared to fully managed platforms or VDI tools that abstract away infrastructure (like Apporto or other turnkey solutions), AVD demands more setup effort and ongoing tuning.

Still, for the right teams, that control can be an advantage.


How Does Azure Virtual Desktop Compare to Traditional VDI and Other Cloud Solutions?

Comparison of modern teams using Azure Virtual Desktop and legacy on-premise systems, showing the evolution of what is Azure Virtual Desktop versus traditional VDI.

Choosing the right virtual desktop solution means weighing AVD not only against older systems but also against other modern alternatives.

AVD vs. Traditional On-Prem VDI

Legacy VDI infrastructure like Citrix or VMware typically runs on in-house servers. This means:

  • High infrastructure costs (hardware, cooling, licensing)
  • Long deployment times
  • Complex patching and updates

In contrast, Azure Virtual Desktop:

  • Operates entirely in the Azure environment
  • Requires no on-prem hardware
  • Delivers virtual desktops through the cloud, with auto-scaling options

For organizations looking to reduce infrastructure burdens, AVD is a clear upgrade.

AVD vs. Standalone Solutions

Some standalone solutions (e.g., Apporto, Parallels RAS, Workspot) package the VDI experience with simplified deployment and support.

Here’s how they compare:

Feature Azure Virtual Desktop Apporto (example)
Control Full Limited (managed for you)
Ease of Setup Moderate to complex Very simple
Cost Transparency Variable Fixed/predictable
App Group Management Manual Streamlined
Integration Level Deep (Azure-native) Browser-based, simplified

When to Choose AVD

AVD is best suited for:

  • Organizations already using Microsoft Azure
  • Teams with in-house IT skills
  • Projects requiring granular control over the environment

If you prefer a simpler, fully managed experience, alternatives may be a better fit.


Who Should Use Azure Virtual Desktop? Is It Right for Your Organization?

Azure Virtual Desktop is designed for organizations that need secure, scalable remote desktop services — but not every use case requires this level of control.

Ideal Use Cases:

AVD also works well in hybrid work scenarios, where employees split time between office and home. With centralized management, IT can enforce policies regardless of location.

Who Benefits Most?

  • Enterprises with large user bases and Azure investment
  • SMBs looking for control but willing to manage infrastructure
  • Educational institutions delivering virtual labs or desktops to students

When to Consider Alternatives:

If you lack Azure experience or want to optimize costs without micromanaging VMs, consider simpler platforms. Solutions like Apporto offer browser-based VDI with no infrastructure setup, making them ideal for lean IT teams or schools prioritizing ease of use.

In the end, AVD enables organizations to run flexible, secure environments — but only if the internal resources are in place to manage them.


Considering an Easier Alternative?
Apporto company logo representing cloud-based virtual desktop solutions and partnership with what is Azure Virtual Desktop.

If you’re exploring virtual desktop solutions but feel overwhelmed by Azure’s complexity, it’s worth looking into options designed for simplicity. Apporto delivers a fully managed, browser-based VDI experience — no infrastructure, no installation, no Azure subscription required.

Built for education and mid-sized businesses, Apporto provides fast, secure access to desktops and apps with zero setup stress. It’s ideal for teams that want VDI benefits without the overhead. Try Apporto Now


Final Thoughts: Is Azure Virtual Desktop the Future of Remote Work?

Azure Virtual Desktop is a powerful platform. It brings the flexibility of cloud computing to desktop infrastructure, enabling organizations to deliver secure, scalable remote access across devices and locations.

For businesses already invested in Microsoft Azure, AVD offers deep integration, robust management tools, and high levels of control.

That said, it’s not a one-size-fits-all solution. Its licensing structure, cost variability, and technical demands mean that smaller teams or lean IT departments may face a steep learning curve. The flexibility is impressive — but comes at the cost of complexity.

Before jumping in, evaluate your current virtual desktop infrastructure (VDI). Do you need granular control over every aspect of the environment, or would a simpler, managed solution get the job done faster?

If ease of use, speed, and cost predictability are priorities, a platform like Apporto may be a better fit. It’s VDI without the maintenance — purpose-built for teams that want results, not complications.

Choose what aligns with your goals, your people, and your resources. The future of remote work isn’t just virtual — it’s also manageable.


Frequently Asked Questions (FAQs)


1. Is Azure Virtual Desktop a VDI? 

Yes, Azure Virtual Desktop (AVD) is a cloud-based virtual desktop infrastructure (VDI) service from Microsoft. It delivers Windows desktops and applications through Azure, allowing organizations to centrally manage remote desktops, applications, security, and user access across multiple devices and locations.

2. What is Azure Virtual Desktop used for?

Azure Virtual Desktop is used to deliver secure, cloud-hosted Windows desktops and apps to users anywhere in the world. It enables remote work, centralized IT management, and flexible access across devices, making it ideal for organizations shifting to hybrid or fully distributed work models.

3. How is Azure Virtual Desktop different from Windows Virtual Desktop?

They’re essentially the same service — Microsoft rebranded Windows Virtual Desktop as Azure Virtual Desktop (AVD) to better reflect its integration with the broader Azure ecosystem. AVD is now the official name and continues to evolve with more features, scalability, and cloud-native enhancements.

4. Can Azure Virtual Desktop support multiple users on a single VM?

Yes. Azure Virtual Desktop supports Windows 10/11 Enterprise multi-session, which allows multiple users to connect to the same virtual machine at once. Each session is isolated, reducing infrastructure costs and improving scalability without sacrificing performance or user experience.

5. What are host pools and session hosts?

A host pool is a group of virtual machines (VMs) that serve as the computing backbone of Azure Virtual Desktop. Each VM inside the pool is a session host, where users connect to run desktops or apps. Host pools help manage workloads and assign user access efficiently.

6. Is Azure Virtual Desktop secure for enterprise use?

Yes, AVD is designed with enterprise-grade security. It uses Zero Trust architecture, encrypted sessions, conditional access policies, and integrates tightly with Azure Active Directory. You can also isolate traffic using Azure Private Link, reducing exposure to the public internet.

7. How do you optimize Azure Virtual Desktop costs?

To control costs, right-size your virtual machines, use auto-scaling rules, and monitor usage patterns. Avoid overprovisioning, and consider shutting down idle VMs during off-hours. Microsoft also offers cost calculators and budgeting tools within the Azure portal to help manage expenses.

VDI Pros and Cons: Is Virtual Desktop Infrastructure the Right Fit for You?

Quick Answer

What Are the Pros and Cons of VDI?

VDI, or Virtual Desktop Infrastructure, delivers centralized virtual desktops from a data center or cloud environment instead of local devices. VDI improves security, remote access, and centralized management, but can require significant infrastructure and IT resources. Cloud-based alternatives like Apporto simplify virtual desktop delivery and management.

Virtual desktop infrastructure (VDI) has seen a sharp rise in adoption, especially as remote work and hybrid environments have become the norm.

For many organizations, managing physical desktops across locations has proven inefficient, costly, and difficult to secure.

VDI offers an alternative — one that centralizes desktop delivery and promises greater control.

But like any IT investment, VDI isn’t a perfect solution for everyone. There are real advantages and disadvantages to consider. Some companies see massive gains in security, scalability, and centralized management. Others face challenges related to performance, complexity, or upfront infrastructure needs.

Understanding the full picture — the VDI pros and cons — will help you evaluate whether this model aligns with your environment, your users, and your long-term goals.

In this article, you’ll explore what VDI is, how it works, and the key trade-offs involved. From user experience and cost to deployment and management, we’ll cover what you need to know to make an informed decision.


What Is VDI and How Does It Work?

Employees working on cloud-based desktops in a modern office, highlighting collaboration and flexibility as key advantages in VDI pros and cons.

Virtual desktop infrastructure (VDI) is a computing model that allows users to access their virtual desktops from anywhere, using virtually any device. Instead of relying on a traditional, physical desktop, users interact with a virtual machine hosted on a centralized server—usually located in a corporate data center or the cloud.

Each virtual desktop runs its own operating system, applications, and settings, just like a standard PC. The difference is where all that processing happens. With VDI, the heavy lifting is done remotely. Your device serves as a window into a desktop environment that lives elsewhere.

Unlike traditional desktops, which require local software installations and updates, VDI environments allow IT teams to manage everything centrally. This makes updates, scaling, and user experience more consistent. VDI is often compared to DaaS (Desktop as a Service), though DaaS is fully managed by a third-party provider, whereas VDI is typically managed in-house.

To function smoothly, VDI relies on a stable internet connection and sufficient backend infrastructure to ensure a responsive, reliable experience. Done right, it provides secure, scalable access to desktops and data without tying users to a specific location or device.


What Are the Core Advantages of VDI?

The appeal of virtual desktop infrastructure (VDI) lies in its ability to consolidate control while offering flexibility to both users and IT teams. Below are the main benefits organizations report when adopting VDI.

Centralized Management

One of the biggest advantages of VDI is how it simplifies management. Instead of maintaining dozens or hundreds of individual machines, IT teams can manage everything from a single control panel.

  • Install or update software once, and push it to all users
  • Apply patches, enforce policies, and troubleshoot issues centrally
  • Reduce downtime caused by local hardware failures or user misconfigurations

VDI allows you to manage systems more efficiently, saving both time and labor costs.

Improved Security

In a VDI environment, user data isn’t stored on local devices. Instead, it remains on secure servers in the data center.

  • Reduces the risk of data loss if a laptop is stolen or compromised
  • Centralized storage allows for stricter access controls and monitoring
  • Easier to comply with data protection regulations and internal policies

VDI enables a more secure computing environment by design.

Support for Remote Work

VDI enables employees to log in and access their virtual desktops from anywhere with an internet connection.

  • Keeps desktop environments consistent across personal and work devices
  • Enables bring your own device (BYOD) models
  • Supports hybrid teams without compromising security

Whether at home or in the office, users get the same experience.

Hardware Cost Savings

VDI reduces the need for high-powered endpoint devices.

This makes VDI a cost-effective solution over time.


What Are the Main Disadvantages or Trade-Offs?

User experiencing latency issues on a virtual desktop, representing performance challenges and limitations discussed in VDI pros and cons.

While virtual desktop infrastructure (VDI) offers many benefits, it’s not without its drawbacks. These trade-offs can affect the viability of VDI depending on your organization’s size, goals, and existing IT capabilities. Here are the key cons you should consider before moving forward.

Upfront Investment

Implementing a VDI environment requires a significant upfront investment in hardware, software, storage, and licensing.

  • You need reliable servers, centralized data center resources, and virtualization platforms
  • For smaller businesses, these costs may be difficult to absorb without long-term planning

Even if long-term costs go down, initial spending can be high.

Performance Issues

Not all networks are built to support VDI smoothly. Performance issues can quickly arise in environments with:

  • Limited network bandwidth
  • Outdated server hardware
  • Insufficient backend capacity to support peak user activity

Heavy applications or poor infrastructure will make users feel the difference.

Resource Intensive for IT

Setting up a VDI environment isn’t a plug-and-play operation.

  • It takes planning, skilled IT staff, and knowledge of virtualization
  • Troubleshooting backend issues requires more expertise than maintaining traditional desktops

For smaller IT teams, this can stretch resources thin.

User Experience Variability

A stable internet connection is non-negotiable.

  • Without one, users can experience lag, dropped sessions, or long log-in times
  • The user experience is highly dependent on how optimized the environment is

Some users may find performance inconsistent—especially in remote areas.

Compatibility Gaps

VDI doesn’t work well with everything.

  • Intensive applications like 3D rendering, video editing, or specialized CAD tools may perform poorly
  • Some software assumes access to local device resources, which a VDI environment may restrict

These operating system or software limitations can impact workflows.


When Does VDI Make the Most Sense?

Executives reviewing analytics and ROI to evaluate the benefits and drawbacks of virtual desktop infrastructure in a VDI pros and cons assessment.

While VDI isn’t ideal for every use case, there are clear scenarios where it offers unmatched value. In the right settings, desktop infrastructure VDI offers a compelling combination of control, scalability, and security.

Large Organizations

VDI works well for organizations with hundreds or thousands of users. Centralized control makes managing multiple desktops far more efficient, especially in regulated or highly distributed environments.

Healthcare and Finance

Industries handling sensitive data—like patient records or financial information—need strict access controls. With VDI, that data stays in the data center, not on local devices.

  • Easier compliance
  • Lower risk of data leakage

Education

In schools or universities, shared labs can be equipped with thin clients or low-cost machines. Students can access consistent desktop environments for testing, assignments, or virtual learning.

Remote Workforces

VDI provides a secure, unified experience regardless of where employees log in from. Remote teams can work from personal or corporate devices without compromising IT policies.

High-Compliance Industries

For industries governed by strict data handling laws, VDI simplifies enforcement:

  • Centralized patching
  • Restricted external access
  • Easier audit trails

When your businesses need centralized control over new environments, VDI can be the answer.


When Might VDI Be the Wrong Fit?

Despite its strengths, virtual desktop infrastructure (VDI) doesn’t work for every organization. Depending on your size, infrastructure, or workload demands, you may encounter limitations that outweigh the benefits.

Startups and Small Teams

VDI requires planning, infrastructure, and ongoing support. If your team doesn’t have dedicated IT staff or a well-defined deployment process, the setup can quickly become a burden. For lean teams, the upfront investment and complexity may not be worth it.

Resource-Heavy Workloads

If your users regularly work with intensive applications—like 3D design, video rendering, or CAD—VDI might not meet their performance needs. These apps often require direct hardware access or GPU acceleration that VDI environments may not deliver effectively.

Unstable Internet Connections

A poor network connection can ruin the VDI user experience. Lag, session drops, or frozen desktops can frustrate users and hurt productivity. If your users are spread across areas with unreliable connectivity, this becomes a serious issue.

Frequent Local Device Access

Some workflows still depend on local peripherals—USB drives, printers, or scanners. VDI can support some of these, but it’s often not as seamless. If direct device access is essential, a traditional desktop may still be the better option.

In these cases, the need for flexibility, performance, or simplicity may push you toward other solutions.


How Does VDI Compare to Other Virtual Desktop Options Like DaaS?

When exploring virtual desktops, VDI and DaaS (Desktop as a Service) are two leading approaches. While they serve similar functions, they differ in deployment, cost, and management models.

Here’s a side-by-side breakdown:

Feature VDI DaaS
Infrastructure Managed By In-house IT Cloud Provider
Upfront Costs High Lower
Customization Full Control Limited
Scalability Moderate High


VDI gives you complete control over hardware, software, and configurations. This is ideal for businesses with strict compliance requirements or complex systems that need close management.

DaaS, on the other hand, is a cloud-based model where the vendor manages most of the backend. It offers quicker deployment, lower upfront costs, and easier scaling, but sacrifices some control.

Choosing between the two depends on how much infrastructure you want to manage and how quickly you need to access new resources.


Looking for a Simpler Way to Deliver Virtual Desktops?

Apporto logo representing a cloud-based virtual desktop solution compatible with the azure virtual desktop client.

If you’re weighing the VDI pros and cons and feeling uncertain about infrastructure, deployment, or support, a managed solution like Apporto could be a smart alternative.

Apporto is a cloud-based virtual desktop platform designed to simplify IT operations. You don’t need to manage the backend. No servers to maintain, no software to install. Users get fast, secure access to their desktop environments directly through the browser, with zero local storage and centralized control.

Whether you’re in higher ed, supporting a remote workforce, or scaling a mid-sized business, Apporto helps you manage virtual desktops more efficiently—without the overhead. Explore Apporto.


Conclusion

Virtual desktop infrastructure (VDI) is a flexible, secure way to modernize how your teams work. VDI centralizes management, reduces hardware costs, and supports secure, scalable desktop environments—especially where compliance matters.

But it’s not a universal fit. Performance issues, infrastructure demands, and setup complexity can be barriers for smaller teams or specific use cases. That’s why it’s smart to start small—pilot VDI in one department, validate the user experience, and adjust before scaling.

If you have the resources, traditional VDI offers strong control. If not, consider a cloud-first solution like Apporto. It delivers a streamlined way to manage desktops—without the heavy lifting.

Understanding the full range of VDI pros and cons helps you choose a path that fits both your current needs and long-term strategy.


Frequently Asked Questions (FAQs)


1. Is VDI the same as cloud computing?

Not exactly. While VDI can be cloud-hosted, it’s not the same as cloud computing in general. VDI delivers virtual desktops from centralized servers, either on-premises or in the cloud, whereas cloud computing covers a broader range of services like storage, hosting, and databases.

2. What kind of hardware is needed for VDI?

You’ll need centralized server hardware with enough CPU, memory, and storage to run multiple virtual machines. Endpoint devices can be thin clients, repurposed PCs, or other low-power systems since most processing happens in the data center.

3. Does VDI work with bring-your-own-device setups?

Yes. VDI enables secure access from employee-owned devices while keeping data on centralized servers. This makes it ideal for BYOD policies, allowing users to work from their preferred device without compromising security.

4. What are the risks of VDI?

VDI risks include performance issues caused by poor network connectivity, high infrastructure costs, and increased complexity for IT teams managing virtual environments. Organizations may also face compatibility challenges with graphics-intensive applications, resource bottlenecks during peak usage, and security risks if centralized systems are not properly configured or maintained.

5. Can VDI support video editing and 3D applications?

Not easily. These intensive applications often require high-end GPUs and local processing, which many VDI environments can’t provide effectively. For such use cases, performance may suffer unless GPU-accelerated VDI setups are used.

6. How do you secure a VDI environment?

Security in VDI starts with centralized access controls, multi-factor authentication, and encryption. Since data doesn’t live on endpoint devices, the risk of data loss is lower. Regular updates and strong network monitoring also help protect the environment.

Persistent vs Non-Persistent VDI: Which Virtual Desktop Model Fits Your Needs?

Quick Answer

What is the Difference Between Persistent and Non-Persistent VDI?

Persistent and non-persistent VDI differ in how they manage user data and desktop customization. Persistent VDI assigns users a dedicated virtual desktop that retains settings and files between sessions, while non-persistent VDI resets desktops after logout for simpler management, lower storage costs, and improved scalability. Solutions like Apporto support both deployment models.

Virtual Desktop Infrastructure (VDI) allows users to access desktops and applications from anywhere through a centralized system. Instead of running everything locally, you connect to a virtual machine hosted on a server.

It’s efficient, scalable, and widely used in education, healthcare, government, and enterprise environments.

But not all virtual desktops are the same. One of the most important distinctions you’ll encounter is between persistent and non-persistent VDI. The difference affects everything—from user experience to storage needs, security, and administration overhead.

Choosing the wrong model can lead to frustrated users or bloated IT budgets. Choosing the right one? It streamlines access, simplifies management, and fits your environment.

This guide breaks down both types, compares their strengths, and shows you when to use each—so you can make a smart, informed decision.


What Is a Persistent VDI and How Does It Work?

IT administrator monitoring VDI performance dashboards in a modern office, managing persistent vs non persistent virtual desktops.

A persistent VDI assigns each user their own dedicated virtual desktop—just like having a personal computer, only hosted in a data center or cloud environment.

When a user logs in, they always return to the same virtual machine. Everything from desktop layout to user settings, downloaded applications, and stored files remains intact between sessions.

This setup allows for full customization and personalization. You can install applications, adjust preferences, and organize files without losing them after logout.

It’s ideal for users who require a consistent environment over time, like developers, designers, or staff working with complex workflows.

Because it mirrors the behavior of a traditional desktop, persistent VDI delivers a familiar experience for end users. However, it comes with tradeoffs: managing and backing up these desktops is more complex, and storage demands are significantly higher. Still, when continuity and personal settings matter, persistent VDI is often the right fit.


What Is a Non-Persistent VDI and How Does It Work?

A non-persistent VDI works more like a hotel room than a personal apartment. Each time a user logs in, they’re assigned a temporary desktop from a shared pool. After logout, everything resets—user settings, downloaded files, and application changes are wiped, returning the desktop to its original, clean state.

This type of setup is powered by a golden image (also called a master image). It’s a pre-configured template that includes the operating system and essential applications.

All virtual desktops are cloned from this image, ensuring consistency across users and reducing administrative effort.

Because non-persistent desktops don’t retain user data, they’re easier to maintain, faster to deploy, and more secure in environments where personalization isn’t needed.

Think of call centers, training labs, or kiosks—places where many people use the same tools in repeatable ways. Non-persistent VDI is all about simplicity, scale, and cost-efficiency—especially for task-focused roles.


What Are the Core Differences Between Persistent and Non-Persistent VDI?

The core distinction between persistent and non-persistent VDI lies in how user data and settings are handled. But beyond that, the differences extend to management, storage, use cases, and overall user experience. Here’s how they compare:

Feature Persistent VDI Non-Persistent VDI
User Data Saved across sessions Reset after logout
Personalization High — users can install apps, change settings Minimal — identical setup for all users
Storage Requirements Higher — unique data per user Lower — shared image, no retained user data
Use Case Developers, designers, power users Call centers, task workers, training labs
Management Complex — backup, updates, individual tracking Simplified — single image to manage
Boot Time Slower — individual environment loads each time Faster — spun up from a shared template


Choosing the right model depends on your organization’s goals—whether you prioritize personalization and continuity, or simplicity and scale. Each offers distinct benefits depending on who’s logging in and what they need to do.


When Should You Use Persistent VDI?

Persistent VDI is ideal when users need a consistent, personalized environment that doesn’t change from session to session. If your teams rely on specialized software, store data locally, or customize their desktops to support complex tasks, this setup delivers the experience they expect.

Use persistent VDI for:

  • Knowledge workers who rely on saved configurations
  • Developers and designers working with custom tools or environments
  • Financial professionals needing access to sensitive files
  • Medical data entry where session continuity improves productivity

In these cases, the extra storage requirements and management effort are worthwhile because they enable a seamless user experience. You’re not just offering access—you’re providing a full workstation that adapts to each individual user, session after session.


When Should You Use Non-Persistent VDI?

Non-persistent VDI is best suited for environments where users don’t need to save personal data or customize settings. It’s a clean, efficient solution for high-turnover teams or shared workstations—where everyone uses the same apps in a repeatable way.

Use non-persistent VDI for:

  • Task workers in roles with routine, repetitive processes
  • Call centers, airline check-in terminals, or library workstations
  • Computer labs and training sessions where desktops reset after use
  • Self-service kiosks or contractor devices where minimal access is needed

The appeal here is simplicity. You reduce the need for backups, minimize security risks, and lower storage costs. When the session ends, the system resets—clean, fast, and ready for the next user. It’s a model that works best when efficiency and manageability are more important than customization.


What Are the Benefits and Tradeoffs of Each Approach?

Professional comparing persistent and non persistent VDI interfaces through holographic data panels inside a data center.

Choosing between persistent and non-persistent VDI isn’t just a technical decision—it’s about balancing user needs with system efficiency. Each option brings distinct advantages and tradeoffs.

Persistent VDI Benefits:

  • Supports full personalization for users
  • Ideal for power users with advanced workflows
  • Retains user data, settings, and installed applications across sessions

Tradeoffs:

  • Requires more storage per user, which increases costs
  • Involves more complex management, including backups and patching for individual desktops

Non-Persistent VDI Benefits:

  • Easier to manage and scale, especially for large teams
  • Significantly lower storage costs due to shared base image
  • Enhances security by wiping changes after each session

Tradeoffs:

  • Offers limited personalization—users can’t save changes
  • Doesn’t automatically retain user data or custom applications

Understanding these differences helps align your VDI strategy with actual use cases, rather than theoretical preferences. It’s not just about features—it’s about how people work and what the infrastructure can support.


How Can Organizations Decide Between Persistent and Non-Persistent VDI?

Making the right choice starts with understanding who your users are and what they need. If most users are task-oriented, with limited customization needs, non-persistent VDI offers simplicity and cost savings. If your environment includes developers, analysts, or executives needing tailored setups, persistent VDI may be essential.

Also consider your IT team’s capacity. Persistent desktops require more oversight, updates, and storage management. Non-persistent setups are easier to deploy and maintain but less flexible.

Think through your security policies, application requirements, and existing infrastructure. Some organizations even use a mix of both models, assigning desktop types based on role.

There’s no one-size-fits-all solution—only the one that fits your operational reality.


Why Apporto Makes the Choice Easier

Apporto logo representing a cloud-based virtual desktop solution compatible with the azure virtual desktop client.

If you’re weighing persistent vs. non-persistent VDI, Apporto offers a flexible platform that supports both—without the complexity that usually comes with managing virtual desktops. With browser-based access, built-in security, and support for hybrid deployments, Apporto simplifies the decision-making process.

Whether you’re supporting task workers in non-persistent environments or power users who need full personalization, Apporto gives you the control to assign desktops based on role—not limitations.

IT teams benefit from streamlined management, while end users get a consistent, responsive experience.

Instead of building workarounds, Apporto lets you deliver the right desktop to the right user—efficiently, securely, and at scale. Explore Apporto now


Final Thoughts

There’s no one-size-fits-all answer when it comes to persistent vs. non-persistent VDI. The right choice depends on who your users are, how they work, and what your systems can support. It’s not just a technical preference—it’s an operational strategy.

Some environments thrive on flexibility and personalization, while others need simplicity, speed, and scale. The secret is to match the VDI model to the workflow, not the other way around.

If you haven’t revisited your virtual desktop strategy in a while, now’s the time. Evaluate your current setup, assess future needs, and make the choice that will keep your users productive—and your IT team sane.


Frequently Asked Questions (FAQs)


1. Is persistent VDI better than non-persistent?

Not necessarily. Persistent VDI is better for users who need personalization and data retention. Non-persistent VDI is better for scalability, lower storage use, and easier management. It depends entirely on your use case.

2. Can users install apps on non-persistent desktops?

No. Any changes made in a non-persistent desktop—like app installs or file downloads—are lost after logout. The system reverts to its original state every time a user signs out.

3. What is a golden image in VDI?

A golden image is a pre-configured virtual desktop template used in non-persistent environments. It includes the operating system, apps, and settings shared across all user sessions for consistency and control.

4. Which VDI model is more secure?

Non-persistent VDI is generally considered more secure because it resets after every session, eliminating lingering data and reducing the risk of persistent malware or unauthorized changes.

Thin Client VDI: A Smarter, Simpler Approach to Virtual Desktop Infrastructure

The way people access work environments has shifted — fast. With the rise of virtual desktop infrastructure (VDI), cloud platforms, and widespread remote work, the focus has moved toward solutions that are secure, cost-effective, and easy to manage. That’s where the thin client comes in.

Unlike traditional PCs or “thick clients,” which process and store data locally, thin clients offload most of the heavy lifting to a centralized server.

This approach uses fewer resources, simplifies device management, and improves security — all while maintaining a solid user experience.

You’ll also hear about zero clients, an even more lightweight option, often used in high-security or single-purpose environments.

In this article, you’ll learn how thin clients work in a VDI setting, what benefits they offer, how they compare to other endpoint devices, and where they make the most impact.


What Is a Thin Client in the Context of VDI?

Team of employees working on thin clients in a collaborative office environment, representing productivity and management in thin client VDI.

A thin client is a lightweight endpoint device used to access a centrally managed virtual desktop infrastructure (VDI). Unlike traditional desktop computers (also called thick clients), a thin client has limited local processing power and storage. Its main job is to connect users to applications and data hosted on a server, not to run them locally.

In a typical setup, a thin client boots up, connects to the VDI platform, and presents the user with a virtual desktop. All the computing—opening applications, storing files, and running processes—happens on a centralized server in a data center or cloud environment.

The user interacts with the desktop interface as if it were local, but it’s actually being streamed from a remote system.

Thin clients are especially useful in centralized environments like schools, hospitals, and call centers, where uniform setups and strong security are essential. They offer a cost-effective, secure, and easy-to-manage alternative to managing fleets of individual PCs.

You may also encounter zero clients, which are even more stripped down than thin clients. Zero clients have no operating system or local software — they exist solely to connect users to their remote desktop.

On the other end of the spectrum, thick clients are full computers with local resources, capable of running applications independently.

In short, thin clients strike a balance. They reduce local complexity while still offering enough flexibility for most day-to-day use. For many organizations looking to modernize, they’re the practical bridge between the heavy footprint of traditional PCs and the minimalism of zero clients.


How Does a Thin Client Work in a Virtual Desktop Infrastructure?

Understanding how a thin client fits into a virtual desktop infrastructure (VDI) starts with the architecture. It’s a clean chain: endpoint → network → host server → virtual desktop.

When a user powers on a thin client, it connects to a centralized server—often hosted in a data center or the cloud. From there, the user is given access to a virtual desktop, which includes their applications, files, and settings.

The processing, storage, and computing all happen remotely. What’s displayed on the thin client’s screen is essentially a video feed of the desktop environment.

Thin clients rely heavily on a stable network. Because the device itself doesn’t run complex software or store files, a secure and fast connection is critical. Everything — from opening an email to running a full application — is executed in the data center, not on the local device.

Modern VDI platforms use display protocols like PCoIP or HDX to compress and stream the desktop efficiently. These protocols make it possible to deliver a responsive user experience even with limited bandwidth, as long as the network is reliable.

Thin clients typically have a minimal operating system, just enough to handle connections, authentication, and basic settings. Some are cloud-based, using web clients to access virtual desktops, while others boot directly into the VDI environment.

This centralized model not only simplifies management — it also enhances security. Because no data is stored locally, there’s less risk if a device is lost or compromised. IT teams can also deploy updates or reassign desktops without physically touching each endpoint.

In essence, thin clients act as portals to powerful computing environments. They don’t do the heavy lifting, but they open the door to systems that can — all while keeping local complexity to a minimum.


Thin vs Thick vs Zero Clients: What’s the Difference?

When choosing endpoint devices for virtual desktop infrastructure, understanding the difference between thin, thick, and zero clients is essential. Each has a unique approach to local computing, maintenance, and power consumption.

Here’s a quick comparison:

Client Type Local Resources Used OS Installed Use Case Fit Power Usage Management Needs
Thin Client Minimal Yes (light) Education, call centers Low Easy to manage
Thick Client High Yes (full) Engineering, power users High Complex
Zero Client Almost none No High security, kiosk systems Very Low Minimal


Thin Clients

These strike a balance. They offer enough flexibility for most tasks while minimizing local complexity. You get a basic operating system, light local resources, and strong compatibility with VDI platforms.

Thick Clients

These are traditional PCs. They use significant power, require frequent updates, and demand more IT maintenance. While powerful, they can be overkill for users who don’t need heavy local processing.

Zero Clients

These are built for simplicity and security. With no local OS or storage, they’re perfect for highly controlled environments like kiosks or high-compliance industries. They offer minimal setup and require almost no ongoing support.

In short, thin clients provide a sweet spot — more flexible than zero clients and more efficient than thick ones. For many VDI environments, especially where centralized management is key, they’re the most practical option.


What Are the Benefits of Using Thin Clients for VDI?

Split-screen comparison of centralized IT management using thin client VDI versus manual desktop maintenance, highlighting reduced complexity.

Thin clients bring multiple advantages to any organization adopting virtual desktop infrastructure (VDI). They’re designed to simplify management, enhance security, and reduce overall costs — without sacrificing the user experience.

1. Cost-Effective

Thin clients require less hardware and have a longer lifespan than traditional PCs. They also consume less power, which contributes to ongoing energy savings. This makes them ideal for large-scale deployments in education, healthcare, and enterprise environments.

2. Centralized Management

With a thin client, all updates, patches, and configurations are handled at the server level. There’s no need to touch every device individually. This saves your IT team valuable time and reduces human error across systems.

3. Better Security

Since data lives on the server and not on the local device, thin clients reduce the risk of loss, theft, or breach. This is especially important in remote work setups or shared device scenarios.

4. Easy to Support and Scale

Need to roll out 100 new devices? With thin clients, you can do it faster, cheaper, and with fewer compatibility concerns. They’re easier to deploy and even easier to replace if something goes wrong.

5. Efficiency for End Users

Users get fast, consistent access to their desktops, applications, and cloud-based tools. The experience feels local, even though everything is happening remotely.

In the long term, thin clients reduce both capital expenditures and day-to-day IT maintenance. They’re the kind of efficient endpoint solution that allows your infrastructure to scale without getting bogged down.


Common Use Cases for Thin Client VDI Deployments

Thin client VDI isn’t just a theoretical solution — it’s actively transforming how different industries use and manage their computing environments. By moving desktops and applications to a centralized server, organizations can simplify support, reduce hardware costs, and maintain tighter control over data and access.

1. Education

Schools and universities are classic candidates for thin client VDI. In labs or remote learning setups, students can log into the same virtual desktops, ensuring consistency across devices. Whether students are in a classroom or at home, they access the same software, systems, and experience — with less demand on school-owned hardware.

2. Healthcare

In hospitals and clinics, users need quick, secure access to patient data and records. Thin clients allow access without storing anything locally, reducing compliance risks. IT teams can also roll out updates and new applications from a central location, streamlining workflows for staff.

3. Call Centers

Thin clients make sense where you have high numbers of users needing identical desktops. They simplify management, reduce setup time for new hires, and lower energy consumption — a big plus in large-scale environments.

4. Enterprise IT

Organizations managing remote teams or high-security environments benefit from centralized control. Thin client use cases in enterprise range from internal departments to customer-facing systems, offering virtual desktops with predictable configurations and strong support options.

In all these environments, thin client VDI helps balance user needs with IT control, reducing costs while maintaining reliability and scalability.


What Are the Limitations or Trade-Offs of Thin Clients?

Business professional waiting at a computer with a loading screen, depicting network dependency challenges in thin client VDI environments.

While thin clients bring many benefits, they aren’t without limitations. It’s important to understand where they excel — and where they might fall short — before deploying them across your organization.

1. Less Local Processing Power

Thin clients are designed to offload most processing to the server. That means they won’t perform well for heavy-duty tasks like video editing, 3D rendering, or running high-end applications locally. If your users need significant local computing resources, a thick client or hybrid solution may be more appropriate.

2. Network Dependency

Thin clients rely on a strong, stable network connection. If the network is slow, spotty, or overloaded, the performance of the virtual desktop suffers. In remote areas with limited connectivity, this can be a real issue.

3. Compatibility with Specialized Platforms

Some platforms and applications aren’t optimized for VDI environments. While many tools work well with modern protocols, some legacy or graphics-intensive apps may run into compatibility issues — particularly when local GPU acceleration is needed.

4. Backend Infrastructure is Critical

Thin clients are only as good as the infrastructure behind them. If the server, storage, or management systems aren’t properly maintained, the user experience can degrade quickly. Load balancing and capacity planning are essential for larger deployments.

In short, thin clients work best in task-based workflows, where computing needs are predictable, access is controlled, and users don’t require powerful devices. They’re efficient — but not universal.


How Do Thin Clients Improve Management and Security in VDI?

One of the biggest advantages of thin clients in a virtual desktop infrastructure (VDI) environment is how much they simplify management while strengthening security.

Centralized Control

With thin clients, all software, updates, and access permissions are handled from a central server. You no longer have to manage each endpoint individually. Whether you’re deploying new systems, rolling out patches, or adjusting user access, everything happens in one place — efficiently and with fewer errors.

Better Security by Design

Thin clients don’t store any data locally. If a device is lost, stolen, or compromised, there’s nothing on it that can be extracted. This drastically reduces the attack surface and lowers risk. In many cases, thin clients operate in read-only mode, further reducing vulnerabilities.

Compliance Made Easier

For users in healthcare, finance, or education — industries where compliance is a priority — thin clients help enforce secure environments by centralizing control and eliminating exposure points. Policy changes can be applied across the environment instantly, without needing to update individual devices.

Simple to Deploy and Reuse

Need to reassign a device? Thin clients are easy to wipe and reprovision. New users can be set up in minutes, not hours. This flexibility helps during onboarding, hardware rotations, or departmental changes.

In short, thin clients help you manage more with less. They remove complexity, reduce support time, and enhance the security of your entire cloud-based infrastructure — all without sacrificing the user experience.


Are Thin Clients a Cost-Effective VDI Solution?

IT administrator monitoring server performance dashboards in a data center, managing virtual desktops through thin client VDI.

When evaluating any IT strategy, cost is always part of the equation. Thin clients, when paired with VDI, offer a cost-effective solution that can reduce expenses both short- and long-term.

Lower Upfront and Ongoing Costs

Thin clients generally require less hardware — no powerful CPUs, large hard drives, or expensive graphics cards. That alone reduces the upfront cost. Over time, they also require less maintenance and fewer repairs. With no moving parts and simpler builds, their lifespan often exceeds that of standard desktops.

Lower Support Burden

Because thin clients are easy to manage from a centralized platform, your IT team spends less time troubleshooting individual devices. This frees up time and reduces the need for large support staff — a direct cost saving.

Energy Efficiency

Thin clients consume less power, making them more efficient to run at scale. If you’re outfitting a large call center, lab, or office, those energy savings add up over time.

Licensing and Deployment Flexibility

VDI allows you to deploy virtual desktops on demand. When paired with thin clients, you only need to purchase the licenses and hardware you actually use. This deployment model helps avoid overbuying and supports scalable growth.

Ideal for Growing Organizations

If you’re expanding quickly, thin clients give you flexibility. New users can be added without overhauling your infrastructure. Just plug in a device, assign credentials, and go.

In the end, thin clients offer a well-balanced, budget-conscious approach to modern desktop delivery — especially for organizations looking to scale efficiently without increasing complexity.


Looking for a Smarter Way to Deliver Virtual Desktops?

Apporto logo representing the company’s cloud desktop and thin client VDI solutions.

If you’re drawn to the simplicity and efficiency of thin client VDI but want to skip the complexities of setting up infrastructure, Apporto might be the solution you’re looking for.

Apporto is a fully managed, cloud-based virtual desktop platform that eliminates the need for costly hardware, complex backend systems, or heavy IT maintenance.

You don’t need to worry about servers, storage, or network architecture. Just log in from a thin client, laptop, or browser—and get to work.

Whether you’re in education, a mid-sized business, or supporting remote teams, Apporto delivers high-performance virtual desktops through the browser with no local data, no VPNs, and no hassle. Try Apporto now.


Conclusion

Thin client VDI offers a practical and efficient solution for modernizing your virtual desktop infrastructure. It simplifies management, strengthens security, lowers power consumption, and delivers a consistent user experience across devices.

With centralized updates and minimal hardware dependencies, it’s a scalable approach for organizations supporting remote work or distributed teams.

That said, it’s not the best fit for every scenario. Thin clients may struggle with graphics-heavy applications or poor network conditions. But in predictable, task-focused environments—like education labs, call centers, and healthcare systems—they shine.

When evaluating your strategy, weigh your use cases, IT capacity, and budget. If reducing complexity and cost are priorities, thin client VDI is likely a strong match.

With the right platform, you can provide secure access, streamline onboarding, and improve how your teams work and manage their daily computing tasks—without unnecessary overhead.


Frequently Asked Questions (FAQs)


1. What is a thin client in VDI?

A thin client in a virtual desktop infrastructure (VDI) environment is a lightweight endpoint device that connects to a centralized server. It doesn’t run applications locally but accesses them from the cloud or a data center, helping simplify management and reduce hardware complexity.

2. Is a zero client better than a thin client?

Zero clients are more stripped down than thin clients—they have no local operating system or software. They’re better suited for highly secure, single-purpose environments like kiosks. However, thin clients are more flexible and offer a wider range of use cases for general business or educational platforms.

3. Can thin clients run Windows?

Most thin clients don’t run a full version of Windows, but some do support lightweight or embedded versions. Typically, the Windows desktop experience is delivered remotely from a server via the VDI session, not installed locally.

4. Do thin clients need an operating system?

Yes, but it’s often a minimal OS—just enough to launch the VDI client and connect to a virtual desktop. Unlike thick clients, they don’t need a full OS because all major processing happens on the remote server.

5. Are thin clients good for remote work?

Absolutely. Thin clients are an efficient, cost-effective option for remote work, especially when paired with a cloud-hosted VDI solution. They allow users to access their desktop, apps, and data securely—without exposing sensitive information on the local device.

How to Run Linux on Windows: A Complete Guide

Developer working in a Linux terminal inside Windows, showing how to run Linux on Windows for cross-platform coding and scripting.
Quick Answer

How Can You Run Linux on Windows?

You can run Linux on Windows using WSL, virtual machines, or dual boot, depending on your needs. For a no-install alternative, browser-based Linux platforms such as Apporto and other remote desktop solutions provide full Linux access for development, testing, and learning.

Interest in how to run Linux on Windows has surged—and for good reason. As more users move into roles involving development, scripting, penetration testing, or system-level troubleshooting, the need for Linux tools is growing. But abandoning a familiar Windows computer just to access a Linux environment isn’t always necessary.

Today, it’s possible to run both systems side by side. Whether you’re a developer looking to test across platforms or a student experimenting with Linux commands, there are reliable ways to get started without installing a second computer.

This guide explores three core methods: the Windows Subsystem for Linux (WSL), virtual machines, and full dual boot setups. Each comes with tradeoffs—some are light and fast, others more powerful but technical.

And if even that sounds like too much setup, there’s another option: platforms like Apporto offer remote Linux desktops accessible entirely through your browser. No installation, no risk to your existing OS—just a clean way to begin.

Let’s explore what’s possible.


1. Why Run Linux on Windows?

User writing Linux-compatible code on a Windows laptop, demonstrating how to run Linux on Windows for development tasks.

If you’ve ever needed to use sudo apt update, write a shell script, or compile a tool that only runs on Linux, you’ve already encountered the gap. The Linux shell opens a world of possibilities that Windows doesn’t always match.

That’s why many developers, system administrators, data scientists, and ethical hackers turn to Linux—even while keeping their Windows environment intact. Running Linux inside Windows provides a balance: access to powerful Linux applications, without losing the tools or comfort of your primary OS.

It also solves a practical problem. For many users, running multiple operating systems on the same machine is more efficient than maintaining two separate devices. You can script in Bash, compile with GCC, or run containerized apps—all from a Windows laptop.

And beyond coding, Linux is widely used for penetration testing, custom networking tools, and software that simply doesn’t run on Windows without modification. Instead of picking sides, you can choose to run both—cleanly, effectively, and without compromise.


2. How to Run Linux on Windows?

There’s more than one way to run Linux on a Windows machine, and each method serves a different type of user. Whether you’re just starting out or need full control over your environment, you’ll find a fit among these three main approaches:


1. WSL (Windows Subsystem for Linux)

WSL is Microsoft’s built-in compatibility layer. It’s lightweight, fast, and doesn’t require a reboot. Perfect for running terminal commands and using most Linux tools right inside your Windows desktop.


2. Virtual Machine (VM)

A virtual machine allows you to install a full Linux OS within Windows using tools like VirtualBox or VMware. It runs in a window, giving you both systems at once—but with some performance overhead.


3. Dual Boot

The most powerful option, but also the most technical. Dual booting installs Linux alongside Windows on a separate partition, letting you choose which OS to run at startup.

Each method fits a different need. In the sections ahead, we’ll walk through setup steps, strengths, and limitations. And for those who prefer a zero-setup option, we’ll also touch on remote platforms like Apporto, which let you run full Linux desktops from any browser.


3. Using WSL: The Fastest Way to Get Started

What is WSL?

Windows Subsystem for Linux (WSL) is Microsoft’s solution for users who want to run Linux commands and applications inside their Windows environment—without installing a second operating system or using virtualization software. It functions as a compatibility layer, translating Linux system calls so native Linux binaries can run directly in Windows.

WSL is especially useful for developers who need access to tools like sudo apt update, Bash scripting, or Python environments—all within a single Windows computer.


How to Install WSL

  1. Open PowerShell as Administrator
  2. Enter the following command:
    wsl --install
  3. Choose a default Linux distribution (Ubuntu is a popular choice)
  4. Download it via the Microsoft Store

That’s it. WSL automatically sets up a Linux shell, allowing you to run Linux in parallel with your Windows apps.


WSL: Pros and Cons

Pros Cons
No reboot required No GUI by default (GUI apps require WSLg or extra setup)
Easy installation via Microsoft Store Not ideal for resource-heavy Linux applications
Integrated with the Windows file system Lacks full kernel access — some tools may not work
Can install additional distributions easily Limited compatibility for system-level operations


WSL is perfect for scripting, learning Linux commands, and lightweight development tasks. If you need a full GUI or a heavier Linux environment, consider a VM—or skip setup entirely with a browser-based solution like Apporto.


4. Virtual Machines: Full Linux, Contained in Windows

Conceptual image of Linux running in an isolated environment on Windows, symbolizing how to run Linux on Windows using containers or VMs.

Why Use a VM?

A virtual machine gives you a full Linux OS experience inside Windows. It’s isolated, configurable, and ideal for running multiple Linux distributions, testing environments like Kali Linux, or experimenting with different setups—all without modifying your main system.

Unlike WSL, a VM supports full GUIs and system services, making it ideal for users who need a real Linux installation within a self-contained environment.


Setup Process

  1. Download and install Oracle VirtualBox or VMware Workstation
  2. Download your preferred Linux ISO file (e.g., Ubuntu, Fedora, Debian)
  3. Create a new VM in your virtualization software
  4. Allocate resources like CPU, RAM, and disk space
  5. Mount the ISO and begin the installation process

Once installed, you’ll have a complete Linux desktop running in a window.


VMs: Pros and Cons

Pros Cons
Full GUI and terminal support Uses more system resources (RAM, CPU, storage)
Easy to reset, snapshot, or clone Requires manual setup (e.g., allocating RAM, configuring VM)
Run multiple distros side by side Needs moderate technical expertise to configure properly
Safe for testing without altering host system Lower performance compared to native installation


A VM is a great solution for testing, development, or learning—especially when system isolation is important. But for casual or short-term use, the overhead might not be worth it. In those cases, Apporto offers cloud-based Linux desktops with no setup required.


5. Dual Booting: For Power and Flexibility

What It Means

Dual booting allows you to install Linux alongside Windows on the same machine, giving each operating system its own separate partition. You select which OS to load during startup using a boot menu.

This is the most performance-focused option, giving both systems full control of the hardware—just not at the same time.


Installation Process

  1. Create a bootable USB drive with your Linux ISO (Ubuntu or Linux Mint are beginner-friendly)
  2. Use Windows Disk Management to shrink your main volume and free up disk space
  3. Boot from the USB and begin the Linux installation
  4. Choose “Install alongside Windows” or manually configure a separate partition
  5. Reboot, and select your OS from the boot menu


Dual Boot: Pros and Cons

Pros Cons
Full native performance for both operating systems Reboot required to switch between Linux and Windows
Keeps systems completely separate and clean Risk of misconfiguration during partitioning or setup
Best choice for intensive tasks (e.g., dev, GPU rendering) Slower access to Linux if you only need quick tools or scripts
Great long-term solution for committed dual users Setup requires care and moderate technical skill


Dual booting gives you the best performance, but it comes at the cost of convenience. If you just need a Linux environment for occasional tasks—or want to avoid system risks—Apporto lets you run Linux in the cloud with zero local setup and no dual boot fuss.


6. Comparing the Methods: Which One Is Right for You?

Choosing how to run Linux on Windows comes down to your priorities—speed, functionality, setup time, or flexibility. Here’s how the three main options stack up side by side:

Feature WSL Virtual Machine (VM) Dual Boot
Setup Time Fastest Moderate Longest
Performance Medium Medium-Low Full performance
Technical Skill Needed Low Medium High
GUI Support Limited (WSL1), Improved (WSL2) Full GUI Full GUI
Reboot Required No No Yes
Best Use Case Dev work, scripting Testing, isolated tasks High-performance workflows


Each approach has its best use case depending on what you’re trying to achieve. WSL is ideal for those needing quick access to the terminal or lightweight dev tools. A VM is better for experimenting with Linux distros, full applications, or Linux installations you don’t want interfering with your primary OS. Dual boot is for those ready to commit to both operating systems with the highest performance possible.

Whatever you choose, make sure it aligns with your comfort level and workflow. And if none of these quite fit—or if setup feels like a barrier—there’s one more option worth considering.


7. Remote Option: Access Linux Desktops Through the Cloud

Cloud-hosted Linux environment accessed from a Windows PC, visualizing how to run Linux on Windows using remote desktop services.

If you want to run Linux without installing anything, a cloud-based Linux desktop might be the best shortcut. It’s especially appealing for users who:

  • Don’t want to configure a VM or partition their drive
  • Need access for short-term testing or classroom use
  • Are part of distributed teams or shared computing environments


Why Consider a Remote Solution?

  • No local installation or system changes
  • Avoid disk space, versioning, and installation process issues
  • Great for schools, businesses, or Windows environments where admin rights are restricted


How Apporto Helps

  • Launch a full Linux desktop in your browser
  • Works on any Windows machine, including shared or managed computers
  • Offers persistent storage, access to a Linux shell, and common Linux tools
  • Supports additional distributions, scripting, development environments, and more


This isn’t a full replacement for a dedicated development machine—but for many, it’s an ideal balance. Whether you’re learning, testing, or just need a clean Linux instance without local setup, Apporto gets you there instantly.

Sometimes the simplest Linux installation is the one that doesn’t happen on your machine at all.


Conclusion: Linux on Windows—Your Way, Your Workflow

You now have more ways than ever to run Linux on Windows. From the lightweight convenience of WSL, to the isolation of a VM, to the raw power of dual boot, the right setup is about choosing the right tool—not forcing a fit.

Flexibility is the core strength of modern computing. You can keep your familiar Windows environment and still gain access to the full potential of Linux tools—on your terms.

But not everyone has the time or technical headroom for local setup. That’s where Apporto stands out. With no installation required, it lets you run a full Linux distro directly in your browser, giving you everything you need to work, test, or learn.

Want to explore Linux without installing anything?
Try Apporto and launch a full Linux desktop from your browser—zero setup, all function.


Frequently Asked Questions (FAQs)


1. Can we run Linux on Windows?

Yes, you can run Linux on Windows using several methods. The most popular options include the Windows Subsystem for Linux (WSL), setting up a virtual machine with software like VirtualBox or VMware, or using a dual boot setup. Each approach has its own benefits depending on your needs—whether it’s quick command-line access, full GUI support, or high-performance computing.

2. How do I run Linux on my PC? 

You can run Linux on a PC using the Windows Subsystem for Linux (WSL), a virtual machine, or a dual boot setup. If you prefer no installation, browser-based platforms like Apporto provide remote access to full Linux desktops.

3. Which Linux is best for beginners? 

Ubuntu is often considered the best Linux distribution for beginners because it offers an easy interface, strong community support, and broad software compatibility. Linux Mint is another popular option for users transitioning from Windows.

4. Can Linux replace Windows 11? 

Linux can replace Windows 11 for many users, especially for development, education, and general productivity. However, software compatibility and gaming needs may influence the choice, so some users prefer dual booting or running both systems.

5. Can I run Linux on 4GB RAM? 

Yes, you can run Linux on 4GB RAM, especially lightweight distributions like Ubuntu, Linux Mint XFCE, or Lubuntu. For better performance, avoid resource-heavy applications or consider browser-based Linux environments that reduce local hardware demands.

6. How do I enable Linux on Windows?

To enable Linux using WSL, open PowerShell as Administrator and run the following command:

wsl --install

This installs the WSL system and prompts you to choose a default Linux distribution, like Ubuntu. You can then download additional distros through the Microsoft Store. It’s one of the easiest ways to get started with Linux in a Windows environment.

7. How do I run Linux terminal on Windows?

Once WSL is installed, you can launch the Linux terminal directly from the Start Menu or by typing the name of your Linux distro (e.g., “Ubuntu”) into the search bar. This opens a native Linux shell inside Windows, where you can run commands like ls, sudo apt update, or any other standard Linux command-line tools.

8. How do I run a Linux command in Windows?

After enabling WSL, you can run Linux commands inside a terminal window without leaving Windows. Simply open your installed Linux distribution and start using commands as you would on a traditional Linux machine. You can even access Windows files from within the Linux shell via /mnt/c/, /mnt/d/, etc., bridging the Windows file system and Linux environment.

9. What’s the best way to run Linux on Windows without installing anything?

If you don’t want to install or configure anything locally, the best option is to use a remote Linux desktop like Apporto. It lets you run a full Linux OS directly in your browser—no disk partitions, ISO files, or virtual machines required. It’s ideal for quick testing, learning, or development work without touching your system setup.

What is an RDP File And How to Create It?

What is an RDP file visualized as a secure digital bridge enabling remote desktop access between two computers.
Quick Answer

What is an RDP File?

An RDP file is a configuration file used by Microsoft Remote Desktop to store connection settings like IP address, display options, and login details. It allows users to quickly access remote systems. For simpler access, platforms like Apporto provide browser-based remote desktops without manual setup.

If you’ve ever needed to log into a computer that isn’t in the same room—or even the same country—you’ve likely used remote desktop access. It’s the kind of technology that quietly keeps modern work running, especially when people and machines aren’t always in the same place.

At the heart of this is the Remote Desktop Protocol (RDP). It’s a Microsoft tool that lets you remotely access another computer, see the desktop, move the mouse, type commands—just like you’re there in person.

An RDP file saves all the connection settings you’d otherwise enter manually, turning multiple steps into a single click. It helps streamline access, especially when connecting to the same machine frequently.

But if this setup sounds overly technical, you’re not alone. Today, browser-based platforms like Apporto offer secure, high-performance alternatives—no RDP file required.

Still, understanding RDP files can help you better manage traditional systems. Here’s how it works.


1. What Is an RDP File?

Illustration explaining what is an RDP file, represented as a digital folder storing remote desktop configuration data.

An RDP file is a small text-based file used to configure and launch connections via the Remote Desktop Connection tool built into Windows. Think of it as a shortcut—but one with all the technical details baked in.

Instead of entering settings manually every time you want to connect, the RDP file holds them for you. It stores values like:

  • The IP address or hostname of the remote computer
  • Display resolution and monitor preferences
  • Authentication settings like usernames or credentials (if saved)
  • Options for reconnecting if the connection is dropped

This pre-configured setup speeds up workflows and ensures consistency, especially for IT teams or users managing multiple remote sessions daily.

Once created, a saved RDP file can be launched directly—just double-click it. The tool loads your preferences and establishes a connection using the saved configuration.

It’s efficient, but like any manual system, it can get complex to manage at scale. That’s why understanding what’s inside the file—and how to create it properly—is so important.


2. What Settings Are Stored in an RDP File?

Once you’ve created an RDP file, it becomes a kind of blueprint for how your remote desktop session behaves. You can launch it without reentering preferences every time, and that saves a lot of friction—especially when you’re managing remote access daily.

Here’s what you’ll find inside.


Display Configuration Settings

The RDP file lets you define how your remote desktop connection should appear on screen:

These settings fall under what’s often referred to as step 3: configuring display settings.


Local Resource Access

This is where you define what from your local device gets shared during a session. You can:

  • Redirect your printers, clipboard, and audio playback and recording
  • Access local devices and resources like USB drives or folders
  • Fine-tune under step 4: customizing local resource access

It’s especially useful when you need certain tools or files from your physical machine while working remotely.


Performance and Optimization

Here’s where you choose your connection speed to match your network—Wi-Fi, LAN, or slow broadband.

  • Toggle persistent bitmap caching to save images locally and load faster
  • Enable the connection bar to easily minimize or switch sessions
  • Tweak compression and quality to optimize performance

You’ll often find these under step 5: optimizing performance—and yes, they really do make a difference when you’re trying to keep things responsive.


3. How Do You Create, Open, and Configure an RDP File?

Laptop showing contents of an RDP file, highlighting what is inside an RDP file used for remote access setup.

So how do you create, open, and configure an RDP file? You’re only a few clicks away from a shortcut that holds all your preferences for future sessions.


Creating the File

Start by launching the Remote Desktop Connection tool:

  • Press Win + R, type mstsc, and press Enter
  • In the remote desktop connection window, type the name or IP of the remote computer
  • Click Show Options to access configuration tabs

Now you’re ready to configure RDP files the way you want them—display, audio, local resources, and more.


Saving the RDP Configuration

Once your settings are in place:

  • Go to the General tab
  • Click Save As to create a saved RDP file for future sessions
  • Choose a location you’ll remember—desktop, documents folder, or a shared drive

You can also edit your RDP file later:

  • Right-click and choose Edit
  • Or open it in Notepad if you’re comfortable tweaking values manually (for example, to configure server authentication settings or add optional credentials if preferred)

And if you need to open and configure an existing one again, just double-click it or load it back into the connection tool.

A saved RDP file keeps your access consistent, even if your memory isn’t.


4. What Are the Advanced RDP File Settings Worth Adjusting?

3D rendering of an RDP file icon with gears, symbolizing what is an RDP file and how it stores connection configurations.

Once you’ve configured the basics, there’s still more you can do. Step 6 is all about adjusting advanced settings—the ones that improve security, enhance reliability, or streamline how input behaves during your session.


Security and Authentication

  • Use server authentication to verify you’re connecting to a trusted source
  • This protects you from accidentally launching a session on a spoofed or unsecure machine
  • You can also add optional credentials if preferred, so you’re not prompted each time

These fields help secure the session, especially when accessing sensitive systems or servers offsite.


Input Behavior

  • You can apply Windows key combinations directly to the remote machine or keep them local
  • For example, the Ctrl + Alt + Break shortcut toggles full-screen mode
  • There are also options to reconnect if the connection is dropped automatically

Input control may seem minor, but for frequent users, it’s a big usability upgrade.\


Remote Gateway Settings

  • If you’re in an enterprise or secure environment, consider setting up a remote desktop gateway
  • This routes RDP traffic through a secure channel, helping manage remote access without exposing your network

These settings aren’t necessary for everyone—but if you’re configuring RDP for a larger team, they’re worth exploring.


5. How Do RDP Files Simplify Remote Access Management?

At first glance, an RDP file seems like just another config file. But when used well, it’s a reliable tool to connect from anywhere without reentering your setup each time.


Why It Works

  • It’s consistent—your display, audio, and performance settings are already locked in
  • For IT teams managing multiple remote machines, that consistency matters
  • You can store files on a shared drive or deploy them with scripts, depending on how complex your environment is

That said, traditional RDP management with Apporto or similar platforms can make handling large-scale deployments easier—especially when file editing becomes repetitive.


Modern Alternatives Like Apporto

If editing text files and saving configs isn’t your idea of good UX, you’re not alone. Tools like Apporto eliminate the entire concept of an RDP file:

  • No local software
  • No settings to tweak
  • No configs to accidentally delete

With secure, optimized remote desktop access through a browser, you just log in and go. That’s the kind of experience that doesn’t just simplify RDP management—it replaces it altogether.


6. Example: RDP File Settings for Optimal Performance

If you’re unsure where to start, these example settings for optimal performance should help. They’re balanced for reliability, speed, and simplicity—ideal if you’re creating a file for future sessions or setting up multiple devices.


Display Settings

  • Full screen mode enabled
  • Match native resolution of your local monitor
  • Disable unnecessary visuals like font smoothing or animations


Resources

  • Redirect clipboard for copy/paste
  • Allow audio playback (disable recording if not needed)
  • Disable printers and drives unless you specifically need them


Performance Tweaks

  • Enable persistent bitmap caching to reduce load times
  • Turn off the desktop background image
  • Choose a connection speed that matches your network type (e.g., LAN, broadband)


Authentication and Reliability

These are common settings IT teams use to improve remote desktop functionality. Still, your setup may require tweaks. Always test changes in a controlled environment before rolling them out more widely.


Conclusion: Do You Need an RDP File—or Something Better?

There’s no question—an RDP file gives you a level of control and consistency that’s valuable, especially when you’re managing remote access across different systems.

But setting it up, editing, and maintaining those files takes effort. And if you’re someone who just wants to connect to the remote machine and work without diving into configs, that effort adds up.

That’s where platforms like Apporto change the game. You can use remote desktop access without a single configuration file. Just log in through your browser and enjoy a seamless, secure desktop protocol RDP connection.

No manual setup. No tuning. Just a better remote desktop experience by design.

Tired of editing RDP files every time you need to connect?
Try Apporto—remote access, simplified. 


Frequently Asked Questions (FAQs)


1. What is an RDP file? 

An RDP file is a text-based configuration file used by Microsoft Remote Desktop to store connection settings like IP address, display preferences, and login details. It lets users quickly connect to remote systems without re-entering setup information each time.

2. What is RDP and how does it work? 

Remote Desktop Protocol (RDP) is a Microsoft technology that allows users to access and control another computer over a network. It transmits screen data, keyboard input, and mouse actions between devices, enabling a full desktop experience as if working directly on the remote machine.

3. How to create a new RDP file? 

To create a new RDP file, open Remote Desktop Connection on Windows, enter the remote computer’s address, and click “Show Options” to configure settings. Then select “Save As” to store the configuration as an RDP file for quick future access.

4. How do I setup RDP to my PC? 

To set up RDP on your PC, enable Remote Desktop in system settings, allow access through the firewall, and note your computer’s IP address or hostname. Then use Remote Desktop Connection from another device to connect using your credentials and configured permissions.

5. How to use RDP for Windows? 

To use RDP on Windows, open Remote Desktop Connection, enter the target computer’s IP address or name, and click connect. After entering login credentials, you gain full access to the remote desktop, allowing you to run applications, manage files, and control the system remotely.

What Is VMware Horizon Client? Everything You Need to Know

User interacting with VMware Client interface on a tablet, visually representing remote access and the core concept behind what is VMware Horizon.
Quick Answer

What Is VMware Horizon Client?

VMware Horizon Client is software that connects users to secure virtual desktops and applications hosted in the cloud or a data center. It enables remote access across devices, while browser-based alternatives like Apporto offer similar virtual desktop access without requiring local client installation.

When most people talk about remote work or hybrid learning, they think about video calls, cloud apps, or file sharing. But the real engine behind a smooth remote experience often runs much deeper—powered by something called virtual desktops. And one of the most common ways to access those desktops is through a tool known as the VMware Horizon Client.

If you’ve ever logged into a digital workspace from your laptop or tablet, there’s a good chance this software was doing the heavy lifting. It helps users access secure desktops and apps hosted in remote environments—without needing to be physically at the office or school.

But what exactly is VMware Horizon Client? How does it work, and what are its limitations? And more importantly, is it still the best way to deliver remote desktops in 2025?

We’ll break it all down—starting with what the client actually is and how it fits into the bigger picture.


What is VMware Horizon Client?

Cloud-based virtual desktop infrastructure streaming data to a laptop, illustrating what is VMware Horizon and how it enables remote access.

The VMware Horizon Client is a piece of software that allows you to connect to a virtual desktop environment hosted in a data center or the cloud. When you launch it, you’re essentially opening a window into a desktop that doesn’t live on your device—it’s hosted remotely and streamed to you over the internet.

This client is part of the larger VMware Horizon platform, which delivers virtual desktops and applications to all kinds of endpoint devices. Whether you’re on Windows, macOS, Linux, Chrome OS, or even Android, the Horizon Client helps maintain a consistent user experience across the board.

Here’s what it’s built to do:

  • Connect you to a centralized desktop or specific app without storing data locally
  • Provide a consistent digital workspace, regardless of the device you’re using
  • Support secure access to internal systems, with data kept safely on the server

Supported platforms include:

  • Windows
  • macOS
  • Linux
  • Chrome OS
  • Android and iOS

To use it, the client must be installed on the device, and that’s where some friction can appear. Updates, compatibility, and configuration can introduce overhead that not every organization is equipped to manage easily.


Key Components of the VMware Horizon Environment

To understand how VMware Horizon Client functions in context, it helps to know the broader environment it connects to. This isn’t a standalone app—it’s part of a layered system designed to deliver a full desktop experience from a remote location. Two elements are especially central: the Horizon Client and the Connection Server.


Horizon Client and View Desktops

The Horizon Client is the interface installed on your device. Once opened, it connects you to a view desktop, which is essentially a virtual machine running in a secure location—usually a cloud environment or data center.

These view desktops behave just like a typical operating system. You might be running Windows, Linux, or something else entirely, but the environment isn’t hosted on your physical device. Instead, it’s streamed to your screen from a central server.

This approach allows users to work from different endpoint devices—a laptop at home, a tablet while traveling, or a campus desktop—all while maintaining a consistent experience. Everything from apps to files stays in one place, reducing reliance on local storage and making IT management a bit more centralized.


Connection Server and Authentication

Behind the scenes, the View Connection Server acts as the gatekeeper. It manages authentication, checks user credentials, and determines what virtual resources a person can access.

When you log in through the Horizon Client, the connection server handles the handshake. It confirms your identity, enforces security rules, and ensures that only permitted users reach the environment. This is where session control happens—who’s connected, how long they stay logged in, and what kind of data they’re allowed to work with.

Sensitive information isn’t stored locally. Instead, it stays within the network, which is one reason enterprises and educational institutions use Horizon in the first place. The setup supports compliance, keeps things clean from a data privacy perspective, and gives administrators tight control over the access experience.


How VMware Horizon Works in Practice

Professional using VMware Horizon on a laptop in a home office, showing what is VMware Horizon in a hybrid work environment.

Understanding the structure is one thing. Seeing how it operates day to day brings it into clearer focus. VMware Horizon isn’t plug-and-play in the way many modern tools are. It’s built for control, scale, and tight integration with enterprise systems—which makes it powerful, but not without trade-offs.


Deployment and Infrastructure

VMware Horizon’s architecture depends on a layered backend, typically hosted in a data center or private cloud. At the core of this setup are virtual machines, managed through VMware’s vSphere client, which act as the desktops users log into.

Each of these virtual desktops is configured within a larger infrastructure that includes network routing, storage, and system resource allocation. The IT team defines templates for these machines—what software is included, how much memory they get, which users they serve—and then scales that environment as needed.

It’s not a small lift. Setting up Horizon means configuring authentication policies, assigning resources, and integrating with systems like Active Directory. In high-volume environments, performance tuning and load balancing also come into play.

When done right, it gives organizations deep control over how digital workspaces behave. But it also assumes you have the expertise—and time—to manage that complexity.


User Access and Experience

From the user’s side, it looks simpler. You launch a browser or local Horizon client, enter your credentials, and the system connects you to your virtual desktop. If everything’s running properly, the switch is fairly seamless.

The performance varies depending on your network, device specs, and configuration. On modern systems, the experience can feel native. But on older devices, or in bandwidth-constrained environments, things like lag, resolution drops, or freezing apps can get in the way.

Compatibility is wide but not always even. Horizon supports Linux, Chrome OS, Android, and more, but how well it performs can differ from one platform to another. Users may find it smoother on Windows machines than on Chromebooks or tablets, particularly when dealing with graphics-heavy applications.


Pros and Cons of the VMware Horizon Client

Below is a breakdown of the strengths and trade-offs of using VMware Horizon Client in a typical organization.

Pros Cons
Strong integration with VMware ecosystem Can be complex to deploy and manage
Secure access to centralized desktops and applications Requires ongoing infrastructure maintenance
Compatible with a wide range of endpoint devices Performance can vary across platforms and network speeds
Supports centralized IT control and user policy enforcement Local client installation and frequent updates can add friction
Helps with data protection and compliance in enterprise environments Less agile for organizations needing quick or browser-based deployment


Who Uses VMware Horizon and Why?

The VMware Horizon platform is widely used in sectors that demand centralized control, strict compliance, and broad access to desktop resources. Its strongest footholds are in large enterprises, higher education institutions, and government agencies.

In higher ed, Horizon is often used to deliver virtual computer labs, giving students access to software from anywhere—even when the physical campus is closed. For corporate environments, it’s a go-to solution for enabling remote teams to access internal systems without storing sensitive data on personal devices. Government organizations lean on its centralized structure to meet regulatory requirements and safeguard high-risk virtual environments.

Common use cases include:

  • Remote onboarding and employee training
  • Bring Your Own Device (BYOD) support across varied hardware
  • Regulated industries needing strict access control and compliance adherence

Its popularity comes from its ability to scale, enforce policy, and manage user sessions with precision. Many users appreciate the control it offers IT teams, especially in environments where the stakes are high and flexibility is less of a priority. But control comes with cost—and complexity. That becomes clearer when you look at the system’s inherent limitations.


Limitations in the Current Horizon Model

VMware Horizon offers a lot of control, but that control comes with complexity. For many organizations, especially those without deep IT resources, the trade-offs are hard to ignore.

Here are some of the most common limitations:

  • Device compatibility issues
    Horizon doesn’t always work smoothly across all endpoint devices. Chromebooks, older laptops, or tablets can struggle with performance, especially when handling high-resolution visuals or specialized software.
  • Heavy infrastructure dependency
    The system relies on a well-built backend—including data centers, network stability, and proper configuration. Without that, things slow down quickly or break altogether.
  • Token-related fragility
    Horizon uses session tokens for authentication. If something goes wrong—like an expired token or a missed handshake—the session might fail with no clear reason, frustrating users.
  • Client installation and updates
    The Horizon client must be installed on each device. Keeping that client up to date across distributed teams becomes the responsibility of the user or IT staff, increasing overhead and risk.
  • Security maintenance gaps
    With a locally installed client, there’s always a risk of missed patches or delayed updates, which can create security vulnerabilities over time.
  • Performance bottlenecks with demanding apps
    Horizon can struggle to deliver a smooth experience for resource-intensive apps like video editing tools or 3D modeling software—especially when running in hybrid or cloud environments.

While Horizon remains a powerful solution, these limitations can weigh heavily on organizations that value speed, simplicity, and ease of access. If you’re managing a smaller team or supporting a mixed-device environment, these drawbacks may be more than just inconveniences—they could slow down your entire operation.


A Modern Alternative: Apporto’s Browser-Native Architecture

Apporto logo, a top contender among the best VDI solutions for AutoCAD users seeking cloud-based design platforms.

Legacy systems like VMware Horizon served their purpose—but the world has shifted. What teams need now is flexibility without complexity. That’s where Apporto comes in.

Apporto rethinks virtual desktops for a cloud-first world. It removes the traditional hurdles—lengthy setups, heavy infrastructure, and constant patching—and replaces them with something lighter, smarter, and built for the way you work now.


Zero-Install, Browser-Based Access

One of Apporto’s biggest advantages? No installations. No headaches.

Everything runs directly in your browser. Just log in, and you’re instantly connected to your full desktop or app environment. There’s no need to worry about device compatibility or operating system quirks. Whether you’re using a Mac, Windows PC, Chromebook, or even a tablet, Apporto just works.

This setup removes technical barriers for users, streamlines IT workflows, and reduces risk. Because nothing’s installed locally, security is easier to manage. Data stays in the cloud—never on the device—which makes compliance and audit trails far more straightforward.

With built-in support for most devices and seamless access to cloud-based apps, Apporto provides a responsive, modern experience without the usual overhead. It’s the kind of technology shift that feels obvious—once you see it in action.


Efficiency and Cost Benefits

Apporto simplifies deployment by removing most of the moving parts. You don’t need to build out expensive infrastructure or maintain complex management tools. It’s fast to roll out and scales easily across teams, departments, or entire institutions.

There’s also the financial side. Apporto offers predictable pricing whether you run in the cloud, on-premises, or in a hybrid setup. No surprise fees, no complicated licensing. That alone makes it appealing to organizations trying to stay within budget.

Because it’s built to reduce overhead, you’ll also cut down on routine IT tasks. No more patching clients, troubleshooting installs, or explaining why someone’s remote access isn’t working. You get fewer support tickets, faster resolutions, and more time back to focus on things that actually move your business forward.

When you eliminate unnecessary maintenance, the benefits ripple outward—from IT admins to end users and the organization as a whole.


Summary: Choosing the Right Virtual Desktop Solution for the Future

VMware Horizon is a well-known solution, and it continues to serve many organizations well—particularly those with large IT teams and tightly controlled environments. Its system architecture offers power, but that power comes at a cost: complexity, overhead, and performance gaps on less powerful devices.

Apporto takes a different path. It’s lean, flexible, and designed to meet today’s access demands without overburdening your IT team. You don’t have to install anything, manage clients, or fine-tune network resources just to deliver a good user experience.

When you step back and evaluate what really matters—secure access, strong performance, predictable costs—it becomes easier to create a VDI strategy that works not just today, but in the future.

Apporto is a modern desktop platform for modern needs. It’s not just another alternative—it’s a smarter way to deliver technology that works.


Ready to Rethink Your VDI Strategy?

If you’re ready to move away from the weight of legacy systems, it might be time to take a closer look at Apporto.

Whether you’re managing a university, a growing business, or a distributed workforce, Apporto gives you a virtual desktop platform that’s simple to manage, secure by design, and easy for end users to adopt.

Visit our site to launch a demo, check the documentation, or contact our team directly. We’re here to help—whether you need technical support, want to explore integration options, or just want to see how it all works.

Better virtual access starts here.


Frequently Asked Questions (FAQs)


1. What is the VMware Horizon Client and do I need it?

VMware Horizon Client is software used to access virtual desktops and applications hosted remotely. You may need it if your organization uses VMware Horizon for secure remote access. Some newer browser-based platforms, however, provide similar access without requiring a locally installed client.

2. What are the benefits of using Horizon Client? 

Horizon Client provides secure access to centralized desktops and applications, supports multiple devices, and helps organizations manage users and data more efficiently. It can improve remote access consistency, support compliance needs, and simplify access to enterprise software across distributed teams.

3. Is Horizon Client a VDI? 

Horizon Client itself is not the VDI platform but the software used to connect to VMware Horizon’s virtual desktop infrastructure. It serves as the access layer, allowing users to reach centrally hosted virtual desktops and applications from endpoint devices.

4. Is VMware Horizon like Citrix?

Yes, VMware Horizon and Citrix are both virtual desktop infrastructure platforms that deliver remote desktops and applications. Both support centralized management and secure access, though they differ in architecture, administration, and deployment models, with organizations choosing based on performance and complexity needs.

5. Can VMware Horizon Client be used through Web browser? 

Yes, VMware Horizon can support browser-based access through its HTML Access feature, though capabilities may vary compared with the installed client. Some modern alternatives, including Apporto, are designed as fully browser-native platforms, eliminating the need for separate client software.