DaaS vs SaaS: What’s the Real Difference and Why It Matters

Comparison of teams using SaaS apps for productivity and DaaS environments for creative workflows, illustrating real-world DaaS vs SaaS use cases.

Cloud services have become the foundation of how modern businesses operate. Whether it’s accessing data, running applications, or managing teams remotely, the change to cloud computing has changed how organizations approach technology. Within this shift, two models stand out: Software as a Service (SaaS) and Desktop as a Service (DaaS).

Both offer unique advantages, but they serve very different needs. SaaS delivers specific software tools through the internet, while DaaS provides full desktop environments hosted in the cloud.

This article provides a complete DaaS vs SaaS comparison and explores both models—what they are, how they work, and what sets them apart.


What Is SaaS and How Does It Work?

Businesswoman selecting software icons from a cloud-based SaaS interface, visualizing the user experience in DaaS vs SaaS models.

Software as a Service (SaaS) is one of the most common forms of cloud computing used today. In simple terms, it allows you to access software applications through an internet connection, without installing or maintaining them locally. These apps are hosted and managed by a SaaS provider, who takes care of everything—from updates and backups to performance and security.

SaaS follows a subscription service model. You typically pay monthly or annually to use the software, often on a per-user or per-seat basis. This makes it predictable and easy to scale.

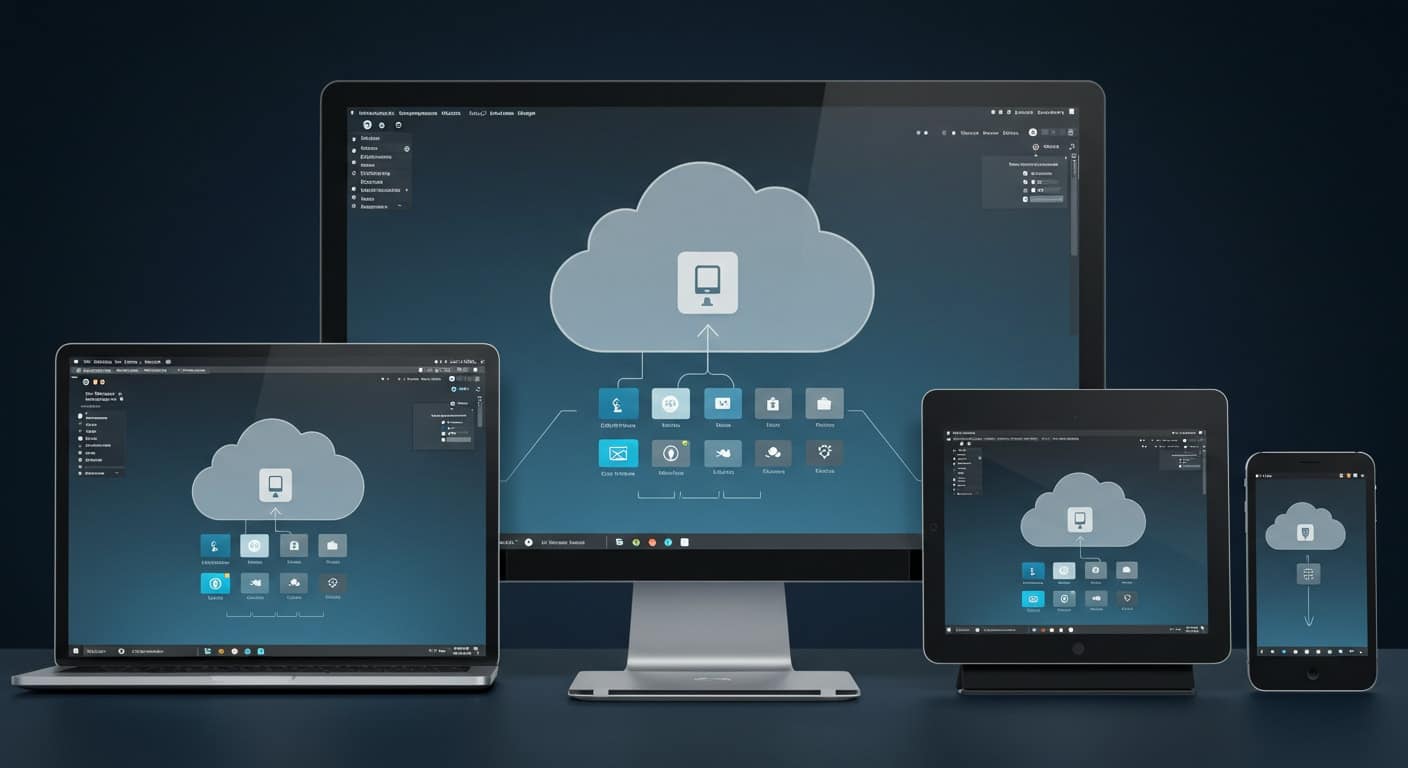
Common SaaS apps include tools like Google Workspace, Microsoft 365, Salesforce, and Dropbox. You can use them from virtually any device—laptops, tablets, even phones—because the application and data are stored in the cloud, not on your machine.

For businesses, SaaS offers quick deployment and low overhead. You get access to modern tools without worrying about underlying servers, storage, or updates. But with that convenience comes limited control over the environment and customization options.


What Is DaaS and How Does It Work?

Cloud desktop interface streamed to laptop, desktop, tablet, and smartphone, showcasing cross-device compatibility in DaaS vs SaaS.

Desktop as a Service (DaaS) takes a different approach to cloud computing. Instead of offering just individual applications, it provides full virtual desktops—complete with an operating system, applications, files, and settings—all streamed from the cloud.

A DaaS provider handles the desktop infrastructure, including servers, storage, and security. You simply connect to a DaaS desktop session using any internet-connected device. Once connected, you’re in a familiar desktop environment, just like you would be on a local machine. Whether it’s Windows, macOS, or Linux, DaaS supports multiple operating systems to fit diverse user needs.

This model is especially useful for remote teams, educational institutions, or companies with flexible workforces. It reduces the need for physical hardware while still delivering the computing power and applications users rely on.

Since the provider manages the heavy lifting, your internal IT team can focus on strategic initiatives instead of maintenance. DaaS gives you centralized control, better security, and the ability to scale desktop access up or down based on demand—all without the complexity of traditional desktop setups.


DaaS vs SaaS: How Are SaaS and DaaS Different?

Though both are cloud-based service models, SaaS and DaaS serve different functions. SaaS delivers access to individual software applications, while DaaS provides an entire virtual desktop environment over the internet.

Here’s how they compare:

Feature SaaS DaaS
Delivers Software Full Desktop
Device Dependency Low Moderate
Data Storage Hosted by provider Hosted by provider or user
Customization Limited More control
Use Cases Business apps Full work environments


SaaS is ideal when you need a specific tool—like email, file storage, or customer management software. It’s fast to deploy and requires very little configuration. DaaS, on the other hand, replicates a full computer in the cloud, making it suitable for teams that need operating systems, access to multiple tools, or centralized desktop management.

The key differences lie in control, flexibility, and the depth of the user experience. Where SaaS simplifies access to one task, DaaS enables a broader, more customizable workspace.


Which One Gives You More Control?

If you need flexibility in how desktops are managed, updated, or secured, DaaS offers more options. IT teams can configure desktop infrastructure, install specific apps, and control how data is stored or backed up.

SaaS, while convenient, often limits customization. You’re confined to what the software provider allows—functionality is dictated by the vendor, not your internal policies.

With DaaS, you gain more control over data security, access rights, and the overall system environment. This makes it a better fit for organizations that want to maintain oversight of how tools and files are used—especially in regulated or compliance-heavy industries.


How Do Cost and Scalability Compare Between DaaS and SaaS?

3D illustration of cloud computing infrastructure with SaaS application icons and data servers, representing DaaS vs SaaS architecture.

Both SaaS and DaaS follow a subscription service model, but how you’re charged can differ significantly.

SaaS pricing is usually per app or per user. It’s simple and cost-effective if you only need one or two tools. But if your team uses multiple apps, those subscriptions can add up quickly.

DaaS pricing often bundles computing resources, licensing, and infrastructure into a single monthly cost. It can be more expensive up front—but also more efficient when supporting teams or remote staff who need full desktop functionality.

In terms of scalability, cloud-based services like DaaS are designed to flex. You can quickly provision or remove desktops as your workforce grows or shifts—making it particularly cost-effective for hybrid or seasonal teams.


What Are the Security Considerations for Each?

Security is a key concern for any cloud-based service, and both SaaS and DaaS approach it differently.

With SaaS, your data lives entirely in the hands of the third-party vendor. While major SaaS providers have strong security protocols, you have limited visibility into how data is managed or stored.

DaaS enables desktop virtualization with multiple layers of control. You can set granular user permissions, enforce access rules, and even implement Zero Trust architecture—a framework where access is constantly verified, not assumed.

Providers like Apporto offer these advanced security measures out of the box, helping organizations reduce risk without increasing complexity. DaaS lets you manage both the data load and user interaction more securely.


How Do DaaS and SaaS Fit into the Broader Cloud Computing Model?

Both SaaS and DaaS are part of the larger cloud computing model, which also includes Infrastructure as a Service (IaaS) and Platform as a Service (PaaS).

SaaS sits at the top of the stack—it’s the easiest to use and requires the least maintenance. Just sign in and go.

DaaS, by contrast, builds on IaaS services. It runs on virtual machines and cloud storage, offering full desktops streamed over the web. You don’t manage the hardware, but you still have control over software and configurations.

Think of SaaS as providing access to one tool, while DaaS gives you the entire workspace. Together, they offer flexible options for different types of users and business needs.


When Should You Use DaaS Instead of SaaS?

Students using cloud-based virtual desktops in a classroom setting, highlighting secure DaaS use in education.

SaaS works well when you only need access to a specific software application. But if your team needs a more complete and customizable environment, DaaS is the better fit.

Here are a few situations where DaaS makes more sense:

  • You need to deliver a consistent desktop experience across different platforms

  • Teams require access to development tools, enterprise apps, or software that doesn’t run in a browser

  • You want to consolidate management and reduce local IT support needs

  • Your business serves multiple developers, analysts, or power users

  • You’re in education, healthcare, or government, and need strict control over desktop infrastructure

In these scenarios, DaaS offers the depth, flexibility, and security that SaaS alone can’t provide.


Why Apporto Is the Right DaaS Provider for Modern Teams

Apporto offers a modern take on Desktop as a Service, designed to eliminate the hassle of managing infrastructure or maintaining software locally. Everything runs through a browser-based interface, making setup fast and access effortless.

What sets Apporto apart:

  • No installations, no VPNs, no updates to manage

  • Seamless performance across any internet-connected device

  • Support for Windows, Mac, and Linux, with full 4K @ 60fps capability

  • Built-in Zero Trust security architecture to protect user data and access

  • Tailored for education and SMBs that need flexibility without complexity

It’s a powerful, scalable desktop solution—without the heavy lifting of traditional virtual desktop infrastructure.


Conclusion: DaaS vs SaaS — Which Cloud Service Is Right for You?

While SaaS delivers quick access to specific tools, DaaS offers a complete, flexible workspace in the cloud. The right choice depends on what your teams need—whether it’s a single app or a full computing environment.

The shift toward cloud-first operations means rethinking not just the tools you use, but how you access and manage them. Matching the right service model to your business application is key.

Want to test drive secure, cloud-delivered desktops? Try Apporto now and experience the DaaS difference.

How to Change the RDP Port in Windows (Step-by-Step Guide)

Digital padlock next to port numbers 338 and 8080, symbolizing the need to change the default RDP port in Windows for improved security.

Remote Desktop Protocol (RDP) is the backbone of remote access on Windows systems. It lets you connect to another computer and work as if you were sitting in front of it. But here’s the problem: the default RDP port—3389—is widely known and heavily targeted by attackers.

Leaving this port unchanged is like leaving your front door unlocked because the key is too common. In this guide, you’ll learn how to change the RDP port safely, reduce exposure, and add a layer of obscurity that can help secure your remote desktop access.


What Is the Default RDP Port Number and Why Should You Care?

Illustration of RDP port 3389 being closed and redirected to port 443, representing secure configuration to change the RDP port in Windows Firewall.

When you use Remote Desktop to connect to another system, your connection request travels through a specific channel known as a port. For RDP, that channel is port 3389. It’s the default across all Windows devices.

That predictability is exactly what makes it vulnerable. Automated bots and malicious actors often scan networks for open port 3389. Once they find one, they launch brute-force attacks—repeated login attempts to gain unauthorized access.

Changing the port won’t stop a targeted attack, but it does lower your chances of being randomly hit. Think of it as moving the lock from the front door to a side entrance with fewer visitors. It’s not bulletproof security, but it’s practical defense.


When Should You Change the Remote Desktop Port?

You don’t need to change the RDP port every time you set up a Windows machine. But certain conditions make it a smart move.

If you’re managing a terminal server, especially one exposed to the internet, sticking with the default port leaves you wide open. Small to mid-sized businesses (SMBs) and academic IT teams often operate with limited cybersecurity resources, making basic preventive steps like this especially valuable.

Changing the port is also useful when dealing with Windows Server environments that support multiple users or allow external access. It’s not just about hiding—it’s about narrowing your attack surface in a world where every open port is a potential invitation.


How Do You Back Up the Windows Registry Before Making Changes?

Windows system icon locked in a secure vault, symbolizing protection of remote desktop access after changing the RDP port in Windows.

Editing the Windows Registry can feel routine—but a small mistake can lead to serious issues. That’s why backing up the registry before making changes isn’t just a precaution. It’s essential.

To do this safely:

  • Open the Start Menu, type regedit, and press Enter.
  • In the Registry Editor, click File > Export.
  • Choose a location and file name, then select “All” under Export range.
  • Click Save.

This gives you a full backup of your registry, so if anything goes wrong, you can restore your system to its previous state quickly and without stress.


Where in the Registry Can You Find the RDP Port Setting?

The RDP port setting lives in a very specific place inside the Windows Registry. You’ll find it by navigating to:

HKEY_LOCAL_MACHINESYSTEMCurrentControlSetControlTerminal ServerWinStationsRDP-Tcp

Each part of this path matters. The Control branch governs system behavior. Terminal Server manages remote access settings, and WinStations handles session-specific details. Finally, RDP-Tcp is the actual configuration point for RDP connections.

Inside this key, look for a value named PortNumber. That’s the setting controlling which port Windows uses for incoming remote desktop connections. Once you locate it, you’re ready to change it—but only after you’ve completed the backup.


How to Change the RDP Port Using Registry Editor

Once you’ve backed up your registry and found the correct path, you can safely update the RDP port:

  1. In Registry Editor, double-click the PortNumber entry in the RDP-Tcp key.
  2. A small dialog box appears—make sure to select the Decimal option.
  3. Enter your new port number. Choose something higher than 1024 and not already in use. For example, 4455 or 3390 are common alternatives.
  4. Click OK to save the value.

Avoid using ports assigned to other services or applications. Conflicting port numbers can block services or cause connection errors. After saving, close the Registry Editor. The port is now technically changed, but the system won’t recognize it until after a restart.


What Firewall Rules Should You Update for the New Port?

Futuristic diagram showing RDP port configuration on a digital chip, representing advanced methods to change the RDP port in Windows for secure access.

Changing the RDP port in the registry isn’t enough on its own. If Windows Firewall doesn’t know to allow traffic on the new port, your remote desktop connection will fail.

Here’s what to do:

  1. Open Windows Defender Firewall with Advanced Security.
  2. Go to Inbound Rules > New Rule.
  3. Select Port, then click Next.
  4. Choose TCP and enter your new RDP port number under Specific local ports.
  5. Select Allow the connection.
  6. Apply the rule to the appropriate profiles: Domain, Private, and/or Public, depending on your environment.

This ensures your connection request reaches the right destination. Without this step, Windows will continue blocking traffic—even if your registry setting is correct.


How Do You Connect with a Remote Desktop Client After the Change?

Once the new port is set and firewall rules are in place, update your connection format. Use the syntax:

IPaddress:NewPort

For example: 192.168.0.25:4455

This tells the Remote Desktop Connection tool which port to use when initiating the session. You can also save this configuration in the connection settings to avoid entering it manually each time.


What Should You Check Before Restarting the System?

Before rebooting, make sure all changes are complete:

  • Verify that your inbound rule is active.
  • Double-check the PortNumber entry in the registry.
  • Run netstat -a or open Control Panel > Windows Defender Firewall > Advanced Settings to confirm port status.

Then restart the system. This allows the RDP service to pick up the new configuration and route traffic accordingly.


Can You Change the RDP Port Using PowerShell?

Yes, PowerShell is a fast alternative to manually editing the registry—especially useful when managing multiple Windows Server machines.

Here’s a simplified command:

Set-ItemProperty -Path "HKLM:SystemCurrentControlSetControlTerminal ServerWinStationsRDP-Tcp" -Name "PortNumber" -Value 4455

This sets the new port directly. Just be sure to update your firewall rules and restart the server afterward.


What to Do If Your Remote Desktop Connection Fails After the Change

Connection issues are usually easy to resolve. Start with the basics:

  • Confirm you’re entering the correct IP and new port number.
  • Ensure your firewall rule wasn’t skipped or misconfigured.
  • Verify that you made changes with administrator access.
  • Open services.msc and check that the Remote Desktop Services are running.

One small oversight—like forgetting to switch from hexadecimal to decimal in the registry—can block access. Review each step carefully before troubleshooting deeper.


Why Apporto Is a Smarter Alternative to Traditional RDP

Apporto logo representing a cloud-based Windows emulator for Chromebook ideal for education and virtual desktops.

Manual RDP port changes, firewall configurations, and registry edits are manageable—but they’re also a burden. Apporto eliminates all of that.

With Apporto, there’s:

  • No registry editing.
  • No open ports to monitor.
  • No firewall headaches.

It’s a browser-based virtual desktop platform built with Zero Trust security and seamless remote desktop access across any device. Whether you use Windows, Mac, or Linux, Apporto supports full performance—up to 4K @ 60fps, with support for multi-monitor setups and real-time collaboration.

It’s ideal for SMBs and educational institutions that want security, scalability, and simplicity—without the overhead of legacy setups.


Conclusion: Ready to Take Control of Your Remote Access?

Changing the RDP TCP port is a smart first step toward better remote access security. Just remember to back up your registry, update firewall rules, and test everything before going live.

If you’re looking for an easier, more secure alternative, explore Apporto—a cloud-first solution that removes the complexity of traditional remote desktop management.

Skip the registry edits and firewall tweaks. Try Apporto now for secure, hassle-free remote access.

IGEL and Apporto: Simplifying Endpoint Device Management in Education

Apporto, a leading provider of virtual desktop infrastructure (VDI) technologies, recently joined a growing number of forward-thinking businesses integrating and validating their products through the IGEL Ready program.

Offering customers in the education sector a comprehensive, cost-effective virtual desktop infrastructure (VDI) solution, Apporto enables students, faculty, and staff to access their desktop from anywhere, anytime, and on any device.

When combined with IGEL OS, Apporto delivers a secure and simplified IT infrastructure that gives educators the freedom and flexibility of a virtual desktop environment without the typical challenges associated with hardware or software management.

By integrating Apporto’s VDI technologies with IGEL OS, educational institutions can benefit from an effective endpoint management system that ensures security, performance, and compliance across all endpoint devices. Apporto has helped improve the end-user experience for more than 200 universities, colleges, and schools, benefiting over 2.5 million students with its VDI solutions, including Virtual Computer Labs.


Expanding Student Access Beyond Traditional Boundaries

One of Apporto’s primary focus areas is to increase accessibility to educational resources for everyone. To ensure secure access, Apporto implements robust endpoint management policies that govern the configuration and security of all devices, including BYOD, by managing device configurations effectively.

They achieve this by offering secure, 24/7 access to desktops and apps on any device, including students’ own devices (BYOD). This means that learning is not restricted to physical classrooms or computer labs.

This flexibility allows students to study at any time and from any location, removing the barriers that previously hindered access to continuous learning.


Creating a Collaborative and Secure Learning Environment with Endpoint Security

It’s important to note that Apporto isn’t just about accessing resources – it’s about transforming education delivery. With features like virtual classrooms and collaboration tools that integrate chat and voice communications, traditional computer labs are reimagined into dynamic, flexible spaces.

Apporto’s endpoint management systems play a crucial role in providing secure access to resources, ensuring that all devices are compliant with security standards. Apporto’s endpoint security solutions are integral to this process, ensuring that sensitive data and systems are protected.

With Apporto’s innovations, such as enhanced screen sharing and desktop control, we can facilitate an interactive and engaging learning and teaching experience. This can be achieved regardless of physical location, encouraging students and faculty to work together in real-time. This fosters a sense of teamwork and promotes an active, engaged learning process that is both more enjoyable and effective.

In response to the growing importance of cybersecurity, Apporto offers Modular Cyber Labs that allow students and tutors to quickly build, load, save, adapt, and attack fully operational network environments. This hands-on learning environment is completely isolated from the campus network, providing a safe space for experimentation and skill development.

Protecting Against Cyber Threats

Apporto’s endpoint management efforts are pivotal in safeguarding against cyber threats by ensuring that all devices connected to the network are secure, authorized to access resources, and user-friendly.

Their robust endpoint management strategy plays a vital role in preventing cyber attacks by swiftly identifying and addressing vulnerabilities, detecting and responding to threats, and maintaining compliance with security policies and regulations.

By implementing a unified endpoint management (UEM) solution, Apporto empowers organizations with complete visibility and control over all endpoints, significantly reducing the risk of cyber attacks and data breaches.


Unburdening IT Teams with Unified Endpoint Management to Focus on What Matters

The administrative burden on IT teams in educational institutions can often be overwhelming. With advanced remote management capabilities, Apporto allows IT teams to monitor and manage endpoint devices and network access from any location, ensuring compliance and security.

Apporto significantly lightens this load by managing all virtual infrastructure, software deployment, backup, recovery, and even antivirus. This level of support simplifies managing and configuring endpoint devices, freeing up IT teams to concentrate on higher-priority tasks that improve the educational experience.


Benefits of Unified Endpoint Management (UEM)

Apporto’s unified endpoint management (UEM) offers numerous benefits to educational institutions, including enhanced security, increased productivity, reduced costs, and improved compliance. By providing a centralized console for managing all endpoints, Apporto allows IT teams to monitor and manage devices, applications, and data in real-time.

This capability enables organizations to respond swiftly to security threats, reduce downtime, and boost overall efficiency. Furthermore, Apporto simplifies endpoint management by automating routine tasks such as patch management and software updates, ensuring that educational environments remain secure and operationally efficient.


Reducing Costs While Enhancing Flexibility with Mobile Devices

Financial efficiency is another important aspect of Apporto’s offering for educational institutions that can experience up to 50-70% lower Total Cost of Ownership (TCO) with Apporto’s straightforward, all-inclusive subscription model. This approach reduces hidden costs and makes expenses predictable, allowing for improved financial planning and resource allocation.

This approach not only reduces hidden costs but also ensures that corporate data is protected from vulnerabilities. Apporto’s endpoint management solution provides a cost-effective and flexible approach to managing endpoint devices, ensuring security and operational efficiency.

Apporto also offers versatile deployment options, including cloud, on-prem, or a hybrid approach. Compatible with AWS, Azure, and on-premises solutions, Apporto provides educational institutions with comprehensive coverage for flexible and scalable computing needs based on user preferences.


Delivering a Superior User Experience with Endpoint Devices

The virtual desktop solution offered by Apporto is genuinely next-generation. It utilizes advanced compression, geo-optimization, and autoscaling to provide a superior experience directly in the browser.

With features such as running at up to 60fps and supporting up to three screens, students can enjoy a seamless, high-performance interface. Launching a desktop with a single click from the Virtual Learning Environment (VLE) via LTI integration has never been easier. Apporto’s mobile device management (MDM) tools ensure that mobile devices are securely managed and monitored, providing a seamless user experience.

Apporto’s VLE also enhances online learning by enabling teachers to view all student screens simultaneously, ensuring active engagement. With features like hand-raising for communication and screen sharing, teachers can easily interact with and assist students in real time, creating a more interactive and supportive digital learning environment.

The mobile device management (MDM) capabilities of Apporto distinguish it from other solutions, focusing exclusively on the management of mobile devices within the broader context of enterprise mobility.

Moreover, Apporto’s Cloud Mounter integrates with major cloud providers such as OneDrive, Dropbox, Box, and Google Drive, as well as supporting on-premises storage. This allows for easy access to files, streamlining management and collaboration. Users can efficiently access, manage, and share files across platforms, enhancing productivity and simplifying workflows.


Advancing Digital Equality for All Students

By leveling the educational playing field, Apporto enables any device to become a fully capable workstation, removing financial barriers to education. By effectively managing mobile devices, Apporto ensures that all students have secure and equal access to educational resources, regardless of their device.

This ensures that all students can have the opportunity to learn and succeed, regardless of their economic background. Additionally, built-in learner analytics empower tutors to track and support student learning, making education more inclusive and effective.


Learn More About Apporto and IGEL for Education

Visit Apporto’s IGEL Ready Showcase page [here] to learn more. To explore the IGEL Ready ecosystem of solutions, visit igel.com/ready.

How to Run Windows on Linux: A Step-by-Step Guide

User running a virtual desktop interface on Linux, demonstrating how to run Windows on Linux for remote access to Windows environments.

The rise of the Linux desktop isn’t just a trend—it’s a shift. Developers, IT professionals, and even entire organizations are moving toward Linux-based workflows. It’s fast, lightweight, secure, and in many cases, entirely free. But there’s one recurring challenge: needing to run Windows on Linux.

Whether it’s legacy software, proprietary tools, or that one stubborn app your team relies on, many Windows programs aren’t natively supported on Linux. And replacing them isn’t always practical.

You have options. Some are elegant. Others… not so much. The truth is, there’s no single “best” way to run Windows apps on Linux systems—only the one that fits your specific use case.

This guide breaks down the most common approaches: using Wine, spinning up a virtual machine, setting up a dual-boot system, or skipping the hassle entirely with cloud platforms like Apporto. Each comes with tradeoffs, and understanding those will save you time—and probably a few headaches.

If you’re looking for the most effective way to run Windows software without ditching Linux, this is where to start.


1. Why Run Windows on Linux at All?

Conceptual image of the Windows OS integrating into a Linux system, representing how to run Windows on Linux through compatibility tools.

Let’s be clear: Linux has grown into a mature, capable operating system. But despite that, many users still find themselves reaching for Windows applications—and for good reason.

Some industries rely on proprietary tools that simply don’t have Linux equivalents. Others need access to Microsoft Office, finance apps, or design software that only runs smoothly in a Windows environment. Even developers sometimes need to test software in both systems, or run tools built with the Windows API in mind.

And then there’s gaming. Despite progress with native ports and platforms like Proton, many Windows programs—especially games—still offer the best experience on Windows.

So, the question isn’t whether Linux is powerful enough. It’s whether you can run Windows apps when the job demands it.

What matters most is clarity: are you trying to run one specific program, or do you need full access to a Windows system? That distinction will guide your decision—and how much complexity you’ll have to tolerate.

If you just need to “get into” a Windows app quickly, manually configuring Wine or juggling VMs might not be worth it. That’s where modern solutions like Apporto step in, offering instant access without setup.


2. Understanding the Options: 3 Core Ways to Run Windows on Linux

Before diving into specifics, it helps to zoom out. There are three primary ways to run Windows on Linux, and each has a different balance of complexity, compatibility, and control.


1. Wine

Wine acts as a compatibility layer. It translates Windows API calls into something Linux can understand, allowing many Windows apps to run natively—without installing a full Windows OS.


2. Virtual Machines (VMs)

Using a virtual machine, you create a sandboxed environment where a complete Windows OS runs inside your Linux system. This offers high compatibility but requires more resources and setup.


3. Dual Booting

With dual booting, you install both Linux and Windows on the same machine. At startup, you choose which OS to run. It’s not simultaneous—just full native performance, one system at a time.

Each approach has its place. But understanding their tradeoffs can help you avoid unnecessary setup—or point you toward a more efficient tool, like Apporto, if your goal is fast, frictionless access.


3. Using Wine: Run Many Windows Programs Without a VM

What Is Wine?

Wine, short for “Wine Is Not an Emulator,” is a clever tool that serves as a compatibility layer. It doesn’t emulate Windows—it re-implements enough of the Windows API to let many Windows programs run directly on Linux systems.

This means you can launch software like Notepad++, older games, or even lightweight business tools without running a full Windows install.


How to Install Wine

Let’s use Ubuntu or Linux Mint as an example. To install Wine, open a terminal window and run the following command:

sudo apt install wine64

After installation, it’s smart to create a Wine prefix. Think of it as a container for app settings and dependencies. You can do this by setting a directory and running winecfg to initialize your environment.


Limitations and Tips

Wine is powerful, but it’s not perfect.

  • Some apps run flawlessly
  • Others need manual tweaks like installing DLLs
  • And some won’t work at all without further configuration

It often struggles with newer apps, apps with heavy graphical demands, or anything requiring complex installers. In some cases, you may find you’re fighting with outdated versions of software just to get things working.

For many Windows applications, Wine offers a lightweight path. But if you’re dealing with mission-critical software or something that doesn’t behave well, Wine can become more of a project than a solution.

That’s where a cloud-based environment like Apporto can save hours. Instead of patching compatibility issues, you get ready-to-go access to Windows apps from any browser—no installs, no troubleshooting.


4. Running Windows in a Virtual Machine on Linux

Stylized visual of Windows running in a virtualized window within Linux, symbolizing how to run Windows on Linux using virtual machines.

Why Choose a VM?

When Wine doesn’t cut it—or you need a full Windows desktop experience—your next option is a virtual machine. This is essentially a complete Windows OS running inside your Linux system, isolated but fully functional.

A VM is especially useful for:

  • Apps that don’t work well with Wine
  • Enterprise tools
  • Windows Server environments
  • Testing purposes, especially when you need rollback

You will need a valid Windows license to set one up legally.


Setting Up a VM

You can use tools like VirtualBox, VMware Workstation, or GNOME Boxes. Each has its own interface, but the process is generally the same:

  1. Create a new VM
  2. Assign system resources (CPU cores, RAM, storage)
  3. Mount a Windows ISO
  4. Go through the installing Windows process just as you would on physical hardware

Be mindful of virtualization technology support (like VT-x or AMD-V) in your BIOS or UEFI. Without it, performance will suffer.


Pros and Cons

Pros

  • Works with nearly all Windows software
  • Great isolation from your main Linux environment
  • You can snapshot and revert easily

Cons

  • Heavier on RAM and CPU
  • Slower than native apps
  • Can feel clunky for short, quick tasks

For many users, especially those dealing with resource-heavy tools, this is the best long-term approach. But it does come with overhead—both in performance and setup time.

And again, if you’re only accessing a few apps or need a temporary environment, Apporto offers an alternative: a Windows VM, already configured and accessible via browser—no ISO downloads, no VM tuning, no local strain.


5. Dual Booting: Full Power, Separate Systems

Conceptual depiction of Linux and Windows environments coexisting on a single machine, illustrating the dual-boot method for how to run Windows on Linux.

What It Is

Dual booting means installing both Linux and Windows on the same machine. At startup, you choose which operating system to run. Each OS operates independently, giving you the full power of your hardware, but only one at a time.

This method is common for users who want to keep their Linux Mint or Ubuntu setups intact but still need Windows for specific tools, creative work, or software development.


When It Makes Sense

  • You want native performance for both environments
  • You’re using high-performance apps (e.g., video editing, games, or engineering software)
  • You’re not switching back and forth constantly


Important Point

  • You’ll need to partition your drive during installation
  • Switching OS requires a full reboot, so it’s not ideal for quick app access
  • Missteps during setup can overwrite partitions or data, so take care


Dual booting delivers unmatched speed for each system, but it comes at the cost of flexibility. If you only need to run a few Windows applications—and you’d rather avoid downtime—cloud-based tools like Apporto offer a faster path. No reboots, no risk, and no partitioning.


6. Is Wine or a VM Better for You?

When you’re deciding between Wine and a virtual machine, it really comes down to what you need and what you’re willing to manage. Here’s a simple side-by-side comparison to help:

Factor Wine Virtual Machine
Speed Fast (runs apps natively) Slower due to system overhead
Compatibility Limited to supported apps Works with nearly all Windows apps
Setup Difficulty Moderate – requires tweaks and testing Easier with guided tools
Windows License Not needed Required for legal installation
Use Case Lightweight tools, legacy programs Full Windows desktop experience


The best bet depends on your workflow. If you just want to launch a simple app here and there, Wine may be the lightweight solution you’re after. But if you’re working with complex tools or need a stable, isolated system, a VM is more reliable.

Still, both require a level of maintenance. You’re installing, configuring, testing—and sometimes troubleshooting.

This is where Apporto steps in: no setup, no tweaking, no virtual machine headaches. Just open a browser and use your apps. It’s not a replacement for every scenario, but for many users, it’s the smoothest option available.


7. What About Microsoft Office, Games, and Complex Software?

Let’s be honest—some software doesn’t play nicely outside of Windows. High-end tools like Microsoft Office, Adobe Creative Suite, or professional CAD programs can present serious issues when you try to run them on Linux.


Where Wine Falls Short

  • You may run into issues with licensing and activation
  • Complex installers may require installing DLLs or scripts
  • Some features might break, or the UI might render poorly
  • Newer apps often rely on background services that Wine doesn’t support well


When a VM Is Better

  • You get full support for additional software like device drivers, plugins, and extensions
  • Better compatibility for games, though performance is limited by virtualization
  • Ideal for software that needs an environment similar to a Windows server

Still, all this requires time, effort, and usually some trial and error.


For many, a better route is using browser-accessible versions—Office 365, cloud IDEs, or remote desktops. That’s where Apporto shines. It sidesteps the mess altogether, offering a cloud-based compatibility layer that just works—no missing features, no setup scripts.

If your software is critical and your time is limited, it’s worth considering a simpler route.


8. Apporto: A Simplified, Smarter Solution

Apporto logo representing a cloud-based Windows emulator for Chromebook ideal for education and virtual desktops.

By now, it’s clear—running Windows applications on a Linux desktop is completely doable. But between configuring Wine, setting up a virtual machine, and managing dual-boot environments, it often takes more time than it should.

Apporto offers a different approach—one that skips all of that.

Instead of tweaking configs or juggling software layers, Apporto delivers Windows apps through your browser. No installations. No partitions. No compatibility fixes.


Why Apporto is the Simpler, Smarter Option

  • No setup required – Skip Wine installations, VM configs, and disk partitioning
  • Browser-based access – Run Windows apps from any Linux system, instantly
  • Works on all major Linux distributions – Ubuntu, Fedora, Debian, Linux Mint, and more
  • No Windows license management – Apporto handles it for you
  • No system slowdown – Unlike local VMs, nothing runs directly on your hardware
  • No compatibility headaches – Avoid missing DLLs, failed installs, or outdated Wine support
  • Fast, optimized experience – Designed for performance and simplicity
  • Ideal for schools, SMBs, and professionals – Anyone who just wants to “open and go”

For many users, it’s not about running Windows just because they can. It’s about getting work done without barriers. That’s what Apporto is built for.


Conclusion: Run Windows on Linux—Your Way

You have real choices when it comes to running Windows on Linux. Whether it’s Wine for lightweight tools, a virtual machine for full desktop access, or dual booting for raw performance, each method serves a purpose.

And that’s the beauty of Linux—it’s flexible. You can adapt the system to your needs, not the other way around.

But for many users, flexibility doesn’t need to mean complexity. If you’re tired of managing versions, tuning settings, or losing time to setup, Apporto offers a clean alternative. It lets you run Windows apps inside any Linux version, instantly—no installs, no restarts, no compromise.

You choose the workflow. Apporto removes the friction. Try it now!

How to Run Linux on Windows: A Complete Guide

Developer working in a Linux terminal inside Windows, showing how to run Linux on Windows for cross-platform coding and scripting.

Interest in how to run Linux on Windows has surged—and for good reason. As more users move into roles involving development, scripting, penetration testing, or system-level troubleshooting, the need for Linux tools is growing. But abandoning a familiar Windows computer just to access a Linux environment isn’t always necessary.

Today, it’s possible to run both systems side by side. Whether you’re a developer looking to test across platforms or a student experimenting with Linux commands, there are reliable ways to get started without installing a second computer.

This guide explores three core methods: the Windows Subsystem for Linux (WSL), virtual machines, and full dual boot setups. Each comes with tradeoffs—some are light and fast, others more powerful but technical.

And if even that sounds like too much setup, there’s another option: platforms like Apporto offer remote Linux desktops accessible entirely through your browser. No installation, no risk to your existing OS—just a clean way to begin.

Let’s explore what’s possible.


1. Why Run Linux on Windows?

User writing Linux-compatible code on a Windows laptop, demonstrating how to run Linux on Windows for development tasks.

If you’ve ever needed to use sudo apt update, write a shell script, or compile a tool that only runs on Linux, you’ve already encountered the gap. The Linux shell opens a world of possibilities that Windows doesn’t always match.

That’s why many developers, system administrators, data scientists, and ethical hackers turn to Linux—even while keeping their Windows environment intact. Running Linux inside Windows provides a balance: access to powerful Linux applications, without losing the tools or comfort of your primary OS.

It also solves a practical problem. For many users, running multiple operating systems on the same machine is more efficient than maintaining two separate devices. You can script in Bash, compile with GCC, or run containerized apps—all from a Windows laptop.

And beyond coding, Linux is widely used for penetration testing, custom networking tools, and software that simply doesn’t run on Windows without modification. Instead of picking sides, you can choose to run both—cleanly, effectively, and without compromise.


2. How to Run Linux on Windows?

There’s more than one way to run Linux on a Windows machine, and each method serves a different type of user. Whether you’re just starting out or need full control over your environment, you’ll find a fit among these three main approaches:


1. WSL (Windows Subsystem for Linux)

WSL is Microsoft’s built-in compatibility layer. It’s lightweight, fast, and doesn’t require a reboot. Perfect for running terminal commands and using most Linux tools right inside your Windows desktop.


2. Virtual Machine (VM)

A virtual machine allows you to install a full Linux OS within Windows using tools like VirtualBox or VMware. It runs in a window, giving you both systems at once—but with some performance overhead.


3. Dual Boot

The most powerful option, but also the most technical. Dual booting installs Linux alongside Windows on a separate partition, letting you choose which OS to run at startup.

Each method fits a different need. In the sections ahead, we’ll walk through setup steps, strengths, and limitations. And for those who prefer a zero-setup option, we’ll also touch on remote platforms like Apporto, which let you run full Linux desktops from any browser.


3. Using WSL: The Fastest Way to Get Started

What is WSL?

Windows Subsystem for Linux (WSL) is Microsoft’s solution for users who want to run Linux commands and applications inside their Windows environment—without installing a second operating system or using virtualization software. It functions as a compatibility layer, translating Linux system calls so native Linux binaries can run directly in Windows.

WSL is especially useful for developers who need access to tools like sudo apt update, Bash scripting, or Python environments—all within a single Windows computer.


How to Install WSL

  1. Open PowerShell as Administrator
  2. Enter the following command:
    wsl --install
  3. Choose a default Linux distribution (Ubuntu is a popular choice)
  4. Download it via the Microsoft Store

That’s it. WSL automatically sets up a Linux shell, allowing you to run Linux in parallel with your Windows apps.


WSL: Pros and Cons

Pros Cons
No reboot required No GUI by default (GUI apps require WSLg or extra setup)
Easy installation via Microsoft Store Not ideal for resource-heavy Linux applications
Integrated with the Windows file system Lacks full kernel access — some tools may not work
Can install additional distributions easily Limited compatibility for system-level operations


WSL is perfect for scripting, learning Linux commands, and lightweight development tasks. If you need a full GUI or a heavier Linux environment, consider a VM—or skip setup entirely with a browser-based solution like Apporto.


4. Virtual Machines: Full Linux, Contained in Windows

Conceptual image of Linux running in an isolated environment on Windows, symbolizing how to run Linux on Windows using containers or VMs.

Why Use a VM?

A virtual machine gives you a full Linux OS experience inside Windows. It’s isolated, configurable, and ideal for running multiple Linux distributions, testing environments like Kali Linux, or experimenting with different setups—all without modifying your main system.

Unlike WSL, a VM supports full GUIs and system services, making it ideal for users who need a real Linux installation within a self-contained environment.


Setup Process

  1. Download and install Oracle VirtualBox or VMware Workstation
  2. Download your preferred Linux ISO file (e.g., Ubuntu, Fedora, Debian)
  3. Create a new VM in your virtualization software
  4. Allocate resources like CPU, RAM, and disk space
  5. Mount the ISO and begin the installation process

Once installed, you’ll have a complete Linux desktop running in a window.


VMs: Pros and Cons

Pros Cons
Full GUI and terminal support Uses more system resources (RAM, CPU, storage)
Easy to reset, snapshot, or clone Requires manual setup (e.g., allocating RAM, configuring VM)
Run multiple distros side by side Needs moderate technical expertise to configure properly
Safe for testing without altering host system Lower performance compared to native installation


A VM is a great solution for testing, development, or learning—especially when system isolation is important. But for casual or short-term use, the overhead might not be worth it. In those cases, Apporto offers cloud-based Linux desktops with no setup required.


5. Dual Booting: For Power and Flexibility

What It Means

Dual booting allows you to install Linux alongside Windows on the same machine, giving each operating system its own separate partition. You select which OS to load during startup using a boot menu.

This is the most performance-focused option, giving both systems full control of the hardware—just not at the same time.


Installation Process

  1. Create a bootable USB drive with your Linux ISO (Ubuntu or Linux Mint are beginner-friendly)
  2. Use Windows Disk Management to shrink your main volume and free up disk space
  3. Boot from the USB and begin the Linux installation
  4. Choose “Install alongside Windows” or manually configure a separate partition
  5. Reboot, and select your OS from the boot menu


Dual Boot: Pros and Cons

Pros Cons
Full native performance for both operating systems Reboot required to switch between Linux and Windows
Keeps systems completely separate and clean Risk of misconfiguration during partitioning or setup
Best choice for intensive tasks (e.g., dev, GPU rendering) Slower access to Linux if you only need quick tools or scripts
Great long-term solution for committed dual users Setup requires care and moderate technical skill


Dual booting gives you the best performance, but it comes at the cost of convenience. If you just need a Linux environment for occasional tasks—or want to avoid system risks—Apporto lets you run Linux in the cloud with zero local setup and no dual boot fuss.


6. Comparing the Methods: Which One Is Right for You?

Choosing how to run Linux on Windows comes down to your priorities—speed, functionality, setup time, or flexibility. Here’s how the three main options stack up side by side:

Feature WSL Virtual Machine (VM) Dual Boot
Setup Time Fastest Moderate Longest
Performance Medium Medium-Low Full performance
Technical Skill Needed Low Medium High
GUI Support Limited (WSL1), Improved (WSL2) Full GUI Full GUI
Reboot Required No No Yes
Best Use Case Dev work, scripting Testing, isolated tasks High-performance workflows


Each approach has its best use case depending on what you’re trying to achieve. WSL is ideal for those needing quick access to the terminal or lightweight dev tools. A VM is better for experimenting with Linux distros, full applications, or Linux installations you don’t want interfering with your primary OS. Dual boot is for those ready to commit to both operating systems with the highest performance possible.

Whatever you choose, make sure it aligns with your comfort level and workflow. And if none of these quite fit—or if setup feels like a barrier—there’s one more option worth considering.


7. Remote Option: Access Linux Desktops Through the Cloud

Cloud-hosted Linux environment accessed from a Windows PC, visualizing how to run Linux on Windows using remote desktop services.

If you want to run Linux without installing anything, a cloud-based Linux desktop might be the best shortcut. It’s especially appealing for users who:

  • Don’t want to configure a VM or partition their drive
  • Need access for short-term testing or classroom use
  • Are part of distributed teams or shared computing environments


Why Consider a Remote Solution?

  • No local installation or system changes
  • Avoid disk space, versioning, and installation process issues
  • Great for schools, businesses, or Windows environments where admin rights are restricted


How Apporto Helps

  • Launch a full Linux desktop in your browser
  • Works on any Windows machine, including shared or managed computers
  • Offers persistent storage, access to a Linux shell, and common Linux tools
  • Supports additional distributions, scripting, development environments, and more


This isn’t a full replacement for a dedicated development machine—but for many, it’s an ideal balance. Whether you’re learning, testing, or just need a clean Linux instance without local setup, Apporto gets you there instantly.

Sometimes the simplest Linux installation is the one that doesn’t happen on your machine at all.


Conclusion: Linux on Windows—Your Way, Your Workflow

You now have more ways than ever to run Linux on Windows. From the lightweight convenience of WSL, to the isolation of a VM, to the raw power of dual boot, the right setup is about choosing the right tool—not forcing a fit.

Flexibility is the core strength of modern computing. You can keep your familiar Windows environment and still gain access to the full potential of Linux tools—on your terms.

But not everyone has the time or technical headroom for local setup. That’s where Apporto stands out. With no installation required, it lets you run a full Linux distro directly in your browser, giving you everything you need to work, test, or learn.

Want to explore Linux without installing anything?
Try Apporto and launch a full Linux desktop from your browser—zero setup, all function.


Frequently Asked Questions (FAQs)

1. Can we run Linux on Windows?

Yes, you can run Linux on Windows using several methods. The most popular options include the Windows Subsystem for Linux (WSL), setting up a virtual machine with software like VirtualBox or VMware, or using a dual boot setup. Each approach has its own benefits depending on your needs—whether it’s quick command-line access, full GUI support, or high-performance computing.


2. How do I enable Linux on Windows?

To enable Linux using WSL, open PowerShell as Administrator and run the following command:

wsl --install

This installs the WSL system and prompts you to choose a default Linux distribution, like Ubuntu. You can then download additional distros through the Microsoft Store. It’s one of the easiest ways to get started with Linux in a Windows environment.


3. How do I run Linux terminal on Windows?

Once WSL is installed, you can launch the Linux terminal directly from the Start Menu or by typing the name of your Linux distro (e.g., “Ubuntu”) into the search bar. This opens a native Linux shell inside Windows, where you can run commands like ls, sudo apt update, or any other standard Linux command-line tools.


4. How do I run a Linux command in Windows?

After enabling WSL, you can run Linux commands inside a terminal window without leaving Windows. Simply open your installed Linux distribution and start using commands as you would on a traditional Linux machine. You can even access Windows files from within the Linux shell via /mnt/c/, /mnt/d/, etc., bridging the Windows file system and Linux environment.


5. What’s the best way to run Linux on Windows without installing anything?

If you don’t want to install or configure anything locally, the best option is to use a remote Linux desktop like Apporto. It lets you run a full Linux OS directly in your browser—no disk partitions, ISO files, or virtual machines required. It’s ideal for quick testing, learning, or development work without touching your system setup.